Stepping into smart home climate automation feels like gaining superpowers over your living environment. You can pre-warm the house before your morning coffee, cool specific rooms only when occupied, and potentially slash your energy bills by 20-30%. But beneath this promise lies a complex ecosystem of sensors, algorithms, and integration points where most beginners stumble. The difference between a system that saves you hundreds annually and one that becomes a frustrating source of thermostat wars often comes down to foundational rules that few installation guides bother to explain.
These ten climate automation rules aren’t just technical suggestions—they’re strategic principles that professional integrators use to create resilient, efficient systems. Whether you’re retrofitting a century-old home or optimizing new construction, understanding these concepts before you buy your first device will save you from costly rework, incompatible ecosystems, and the dreaded “smart home that isn’t actually smart” syndrome.
Top 10 Smart Home Automation Systems
Detailed Product Reviews
1. Amazon Echo Hub, 8” smart home control panel with Alexa+ Early Access, Compatible with thousands of devices

Overview: The Amazon Echo Hub redefines centralized smart home management with its 8-inch touchscreen display and robust Alexa integration. Designed as a dedicated control panel, this device eliminates the need to juggle multiple apps by providing instant access to lights, cameras, thermostats, and security systems through intuitive taps or voice commands.
What Makes It Stand Out: Unlike standard smart speakers, the Echo Hub supports an impressive array of protocols including WiFi, Zigbee, Matter, Thread, and Sidewalk, ensuring seamless connectivity with virtually any smart device. Its wall-mountable design transforms any room into a command center, while the customizable dashboard lets you prioritize frequently used controls and camera feeds. The ability to arm/disarm security systems directly from the panel adds professional-grade functionality.
Value for Money: At $179.99, the Echo Hub sits comfortably between basic displays and expensive proprietary systems. Considering its multi-protocol hub capabilities (which would cost $100+ separately) and the convenience of a centralized interface, it delivers substantial value for homes with diverse smart ecosystems.
Strengths and Weaknesses: Strengths:
- Universal protocol support eliminates compatibility concerns
- Clean wall-mount design with flexible installation options
- Direct security system integration enhances home safety
- Customizable dashboard streamlines daily routines
Weaknesses:
- Requires separate purchases for cable concealment or tabletop use
- Alexa-only ecosystem locks out Google Home and Siri users
- Limited value for homes with minimal smart devices
Bottom Line: The Echo Hub is an excellent investment for Alexa households seeking a polished, centralized smart home control solution that grows with your ecosystem.
2. Kasa Smart Plug HS103P4, Smart Home Wi-Fi Outlet Works with Alexa, Echo, Google Home & IFTTT, No Hub Required, Remote Control, 15 Amp, UL Certified, 4-Pack, White

Overview: The Kasa HS103P4 four-pack delivers reliable smart plug functionality without complexity. These UL-certified outlets connect directly to your 2.4GHz WiFi network, enabling voice control through Alexa or Google Assistant and remote operation via the Kasa app from anywhere in the world.
What Makes It Stand Out: Kasa’s Silicon Valley pedigree shows in its polished app experience and rock-solid reliability, earning trust from over 5 million users and PCMag’s 2020 Reader’s Choice award. The 15-amp rating handles most appliances safely, while IFTTT compatibility enables creative automation scenarios. Setup takes minutes with no hub required.
Value for Money: At $24.23 for four plugs ($6.06 each), this pack offers exceptional affordability without sacrificing quality. Competing brands charge $10-15 per plug for similar features, making Kasa the clear budget champion for whole-home deployments.
Strengths and Weaknesses: Strengths:
- Unbeatable price-per-plug value
- Trusted brand with proven reliability
- Simple setup and intuitive app interface
- Robust scheduling and timer functions
- UL certification ensures electrical safety
Weaknesses:
- 2.4GHz WiFi limitation may cause issues in congested networks
- No energy monitoring capabilities
- Requires separate Kasa app (no native HomeKit support)
- Bulkier design may block adjacent outlets
Bottom Line: For cost-conscious consumers wanting dependable smart plugs, the Kasa HS103P4 four-pack delivers premium features at an entry-level price point.
3. Kasa Smart Light Switch HS200P3, Single Pole, Needs Neutral Wire, 2.4GHz Wi-Fi Light Switch Compatible with Alexa and Google Home, UL Certified, No Hub Required, 3 Count -Pack of 1 , White

Overview: The Kasa HS200P3 three-pack transforms traditional lighting into intelligent, voice-controlled illumination. These single-pole smart switches require a neutral wire and 2.4GHz WiFi, offering professional-grade scheduling and remote access through the trusted Kasa ecosystem.
What Makes It Stand Out: Kasa’s app-guided installation walks DIYers through wiring step-by-step, significantly reducing electrician costs. The innovative “Away Mode” randomly toggles lights to simulate occupancy, enhancing security. Trusted by 4 million users and UL certified, these switches balance safety with sophistication.
Value for Money: At $32.22 for three switches ($10.74 each), this pack undercuts most competitors by 30-50% while maintaining premium features. For homes with compatible wiring, it’s one of the most cost-effective ways to smarten multiple rooms.
Strengths and Weaknesses: Strengths:
- Excellent app-guided installation for confident DIYers
- Comprehensive scheduling with unique Away Mode security feature
- Reliable voice control via Alexa and Google Assistant
- Proven brand reliability and UL safety certification
- Competitive three-pack pricing
Weaknesses:
- Neutral wire requirement excludes older homes (pre-1980s)
- Single-pole only; incompatible with three-way circuits
- 2.4GHz WiFi limitation
- May require electrician for complex wiring scenarios
Bottom Line: The Kasa HS200P3 is a fantastic value for modern homes with neutral wiring, offering professional smart lighting features at a DIY-friendly price point.
4. Linkind Matter Smart Plug, Work with Apple Home, Siri, Alexa, Google, SmartThings, Smart Home Smart Outlet Timer 15A/1800W, APP Remote Control & Schedule, ETL & FCC Certified, 2.4G Wi-Fi Only, 4 Pack

Overview: The Linkind Matter Smart Plug four-pack represents the next generation of smart home connectivity. These ETL and FCC-certified outlets leverage the Matter protocol to deliver seamless interoperability across Apple HomeKit, Alexa, Google Home, and SmartThings ecosystems from a single device.
What Makes It Stand Out: Matter certification enables offline LAN control during internet outages—a game-changer for reliability. The plugs communicate directly with each other without cloud dependency. Unlike platform-specific devices, Linkind works natively across all major ecosystems, eliminating compatibility anxiety.
Value for Money: At $23.73 for four plugs, Linkind matches budget brands while offering premium Matter support. Future-proofing your smart home typically commands $15-20 per device, making this an exceptional value for multi-platform households.
Strengths and Weaknesses: Strengths:
- Matter protocol ensures cross-platform compatibility
- Offline LAN control maintains functionality during outages
- No hub required when using AiDot app
- Competitive four-pack pricing
- ETL and FCC safety certifications
Weaknesses:
- Requires Matter hub for Apple Home/Alexa/Google platforms
- 2.4GHz WiFi only
- Newer brand with shorter track record than Kasa
- Larger form factor may block adjacent outlets
Bottom Line: Linkind’s Matter plugs are the ideal choice for forward-thinking smart home enthusiasts wanting maximum flexibility and offline reliability at an unbeatable price.
5. Emporia Vue 3 Home Energy Monitor - Smart Home Automation Module and Real Time Electricity Usage Monitor, Power Consumption Meter, Solar and Net Metering for UL Certified Safe Energy Monitoring

Overview: The Emporia Vue 3 provides professional-grade energy monitoring by installing directly in your circuit panel. This UL-certified system delivers real-time electricity usage data, solar/net metering capabilities, and automated energy management to help reduce utility bills through intelligent consumption tracking.
What Makes It Stand Out: Unlike plug-in monitors, the Vue 3 tracks whole-home energy use at the source with ±2% accuracy. The system supports single-phase, split-phase, and three-phase configurations with expandable sensors. Automated alerts and time-of-use optimization help prevent costly demand charges, while solar integration monitors production and consumption simultaneously.
Value for Money: At $199.99, the Vue 3 costs less than a single electrician visit while providing continuous energy intelligence. Professional monitoring services charge $300-500 annually, making this a wise investment for energy-conscious homeowners.
Strengths and Weaknesses: Strengths:
- UL certification ensures electrical safety
- Comprehensive whole-home monitoring with solar support
- Automated energy management reduces utility costs
- Detailed data retention (1-second to indefinite hourly)
- Configurable alerts prevent appliance failures
Weaknesses:
- Complex installation may require licensed electrician
- 2.4GHz WiFi limitation
- Higher upfront cost than basic smart plugs
- Data export requires active app usage
Bottom Line: The Emporia Vue 3 is essential for homeowners serious about energy savings, solar monitoring, and preventing costly electrical issues through proactive consumption management.
6. Smart Home Energy Monitor Supports Home Assistant, Real-Time Accurate Energy Consumption Tracking, Electricity Usage Monitor with 16x60A Circuit Sensor, 36-Month History, Solar Metering, ETL Certified

Overview:
The Refoss Smart Home Energy Monitor is a sophisticated power tracking system designed for tech-savvy homeowners seeking granular control over their electricity consumption. Supporting Home Assistant integration and featuring 16 branch circuit sensors plus two main inputs, this ETL-certified device provides professional-grade monitoring at a fraction of industrial costs. It tracks real-time power, voltage, current, and power factor across individual appliances.
What Makes It Stand Out:
The solar metering capability with zero feed-in automation sets this monitor apart from standard energy trackers. It intelligently detects excess solar production and automatically triggers high-consumption appliances like EV chargers or water heaters, maximizing your renewable investment. Recent firmware updates add channel merging, hourly data export, and direct CT reading inversion—features typically reserved for enterprise systems. The 36-month historical data storage with minute-level granularity provides exceptional long-term analysis capabilities.
Value for Money:
At $169.99, this monitor delivers outstanding value considering its 16 dedicated branch sensors and solar optimization features. Competing systems with similar capabilities often exceed $250-300, especially those offering Home Assistant compatibility. The potential 10-20% energy savings can recoup the investment within a year for average households.
Strengths and Weaknesses:
Strengths include ETL certification, comprehensive Home Assistant integration, sophisticated solar automation, exceptional data retention, and 98% accuracy. Weaknesses involve complex electrical panel installation requiring caution, reliance on the Refoss app for initial setup, and incompatibility with Delta three-phase systems. The current transformers also require careful handling.
Bottom Line:
This energy monitor is an excellent investment for solar-equipped homes and Home Assistant enthusiasts wanting detailed consumption analytics. While installation demands technical confidence, the long-term savings and automation capabilities justify the effort.
7. Tapo Smart Home Central Hub for Smart Devices – Connect up to 16 Our Cameras & 64 Sub-G Sensors, Built-in 16GB Storage + 2.5’’ SATA Expandable Storage Option, Improves Camera AI Accuracy – Tapo H500

Overview:
The Tapo H500 Smart Home Central Hub serves as the command center for Tapo-centric smart homes, consolidating up to 16 cameras and 64 Sub-G sensors onto a single platform. With built-in 16GB storage and SATA expandability, it eliminates the need for individual microSD cards while providing local recording access without recurring subscription fees. The HDMI output enables convenient multi-camera viewing on larger displays.
What Makes It Stand Out:
Unlike basic hubs, the H500 adds facial recognition intelligence to existing Tapo cameras, filtering alerts to only unfamiliar faces—a premium feature typically requiring cloud subscriptions. The expandable SATA storage offers unlimited capacity, while the HDMI port provides professional-grade monitoring capabilities. WPA3 encryption ensures enterprise-level security for your footage, and the system processes AI locally, improving accuracy while maintaining privacy.
Value for Money:
Priced at $129.98, the hub pays for itself quickly when compared to cloud storage subscriptions costing $5-10 monthly per camera. For a four-camera setup, you’ll break even within 3-4 months while gaining superior local control. The SATA expandability future-proofs your investment as camera resolution and recording needs grow.
Strengths and Weaknesses:
Strengths include centralized local storage, facial recognition AI, HDMI monitoring, robust WPA3 encryption, and elimination of subscription fees. Weaknesses involve Tapo ecosystem lock-in, limitation of four cameras for continuous recording despite supporting 16 total, and the additional cost of a SATA drive. The 16GB base storage fills rapidly with multiple cameras.
Bottom Line:
This hub is essential for Tapo camera owners prioritizing privacy and local control. The facial recognition and expandable storage justify the cost, though ecosystem exclusivity limits broader smart home integration.
8. HERNAS Smart Phone APP Unlocking Access Control System Kit, with Remote Controllers / 280KG(600lbs) Magnetic Lock/Power Adapter, Lock Delay Time Adjustable

Overview:
The HERNAS Smart Phone APP Unlocking Access Control System Kit delivers affordable keyless entry for residential and small business applications. This complete package includes a 280KG magnetic lock, four remote transmitters, an indoor exit button, and a WiFi-enabled controller—all powered by a 12V adapter. The Tuya Smart APP integration allows remote unlocking from anywhere with internet connectivity.
What Makes It Stand Out:
At this price point, smartphone integration with included physical remotes is remarkable. The 600lbs holding force magnetic lock provides commercial-grade security typically found in systems costing twice as much. The intuitive wiring design with clearly marked ports simplifies DIY installation, while the adjustable lock delay time offers customization for different door types and traffic patterns.
Value for Money:
At $66.78, this kit represents exceptional value, undercutting professional access control installations that often exceed $300. Including four remotes, a robust magnetic lock, and app connectivity eliminates additional purchases. For small offices or rental properties, the remote management capability saves countless trips to grant access.
Strengths and Weaknesses:
Strengths include unbeatable pricing, comprehensive kit contents, strong magnetic lock, straightforward installation, and dual unlocking methods (app and remote). Weaknesses involve reliance on the Tuya Smart ecosystem, limited 30-meter remote range potentially insufficient for larger properties, basic feature set lacking advanced scheduling or audit trails, and no battery backup for power outages.
Bottom Line:
This access control kit is ideal for budget-conscious users needing convenient remote entry. While it lacks enterprise features, the combination of app control, physical remotes, and robust locking makes it a practical solution for basic security needs.
9. Building Smart Home Automation Solutions with Home Assistant: Configure, integrate, and manage hardware and software systems to automate your home

Overview:
“Building Smart Home Automation Solutions with Home Assistant” is a comprehensive technical guidebook for DIY enthusiasts seeking to master the popular open-source home automation platform. The book covers hardware selection, software configuration, and system integration strategies for creating sophisticated automated environments. It serves as a structured learning path through Home Assistant’s complex ecosystem.
What Makes It Stand Out:
Unlike fragmented online tutorials, this book provides cohesive, end-to-end guidance spanning both theoretical concepts and practical implementation. It addresses hardware-software integration challenges that often stump beginners, offering proven solutions for device compatibility, automation logic, and system management. The content helps readers avoid common pitfalls that waste hours of troubleshooting.
Value for Money:
At $31.96, the book delivers exceptional value compared to subscription-based courses or the hidden cost of trial-and-error learning. For the price of a single smart plug, you gain structured knowledge that can save dozens of hours and prevent expensive purchasing mistakes. The permanent reference format allows revisiting complex topics as your system evolves.
Strengths and Weaknesses:
Strengths include comprehensive coverage, structured learning progression, hardware integration focus, and permanent reference value. Weaknesses involve rapidly evolving software potentially outdating content, requiring self-motivation and technical aptitude, lacking interactive community support, and no video demonstrations for visual learners. The static nature means recent Home Assistant updates may not be covered.
Bottom Line:
This book is an essential resource for serious DIY smart home builders. While online resources are plentiful, the organized, in-depth approach justifies the cost for anyone wanting to efficiently master Home Assistant’s full potential.
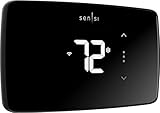
10. Sensi Lite Smart Thermostat, Data Privacy, Programmable, Wi-Fi, Easy DIY, Works With Alexa, Energy Star Certified, ST25, Most Systems C-Wire Not Required, Except On Heat/Cool Only and Heat Pump System
Overview:
The Sensi Lite Smart Thermostat offers a privacy-first approach to climate control at an accessible price point. This ENERGY STAR-certified device provides programmable scheduling, geofencing, and remote access through a highly-rated mobile app. Its DIY-friendly design features a built-in level and straightforward instructions, while the flexible C-wire requirement accommodates most HVAC systems without additional wiring.
What Makes It Stand Out:
Sensi’s explicit privacy commitment—promising not to sell personal data or leverage usage for advertising—distinguishes it in a market where data monetization is common. The C-wire flexibility is genuinely useful, working on most systems without one while supporting heat pumps and heat/cool-only setups when present. The claimed 23% HVAC energy savings, combined with no subscription fees, creates a compelling value proposition.
Value for Money:
At $65.98, the Sensi Lite significantly undercuts premium competitors like Nest and Ecobee while delivering core smart thermostat benefits. The energy savings can repay the investment within the first year for typical households. Avoiding monthly fees and protecting personal data from commercial exploitation adds intangible value that privacy-conscious consumers will appreciate.
Strengths and Weaknesses:
Strengths include robust privacy protections, affordable pricing, simple DIY installation, flexible wiring requirements, and legitimate energy savings. Weaknesses involve limited smart home integration (primarily Alexa), fewer advanced features than premium models, and C-wire necessity for heat pump systems. The basic display and design may feel dated compared to sleeker competitors.
Bottom Line:
The Sensi Lite is perfect for homeowners prioritizing privacy and value over cutting-edge features. It delivers reliable energy savings and remote control without compromising personal data or requiring expensive subscriptions.
Rule 1: Start with Zoning Strategy
Understanding Your Home’s Microclimates
Every home contains multiple microclimates, and treating your house as a single thermal zone is the most expensive mistake beginners make. That west-facing bedroom that bakes in the afternoon sun needs a different automation strategy than your north-facing basement office. Before purchasing any smart thermostat, map your home’s thermal personality. Identify rooms with large windows, poor insulation, heat-generating electronics, or unique occupancy patterns. The goal is segmentation that mirrors how your family actually lives, not how your HVAC contractor originally divided the ductwork.
The Multi-Thermostat Approach
For homes over 1,800 square feet or with multiple stories, a single smart thermostat creates compromises that automation cannot fix. The multi-thermostat approach uses independent temperature controllers for distinct zones, each running its own automation logic. When evaluating systems, prioritize platforms that support seamless multi-device coordination. Look for features like zone priority settings (which room gets cooled first during peak demand) and temperature averaging options that prevent conflicting commands when zones overlap.
Rule 2: Master the Scheduling Basics
Creating Your First Temperature Schedule
Effective scheduling transcends simple time-of-day adjustments. The foundation lies in understanding your utility company’s peak rate hours, your family’s departure and return variance, and thermal lag—the time it takes your home to actually change temperature. Build your first schedule around three anchor points: morning warm-up beginning 45 minutes before wake time, daytime setback starting 30 minutes after typical departure, and evening recovery initiating 60 minutes before typical return. This buffer accounts for thermal mass and prevents your system from working hardest during expensive peak hours.
The 15-Minute Buffer Principle
Never schedule temperature changes to coincide exactly with occupancy transitions. Your automation needs a 15-minute buffer on either side of expected arrivals and departures. This prevents your HVAC from cycling unnecessarily when you’re running five minutes late and allows the system to use gentler, more efficient ramp-up periods instead of emergency heating or cooling bursts. Advanced systems learn this buffer automatically, but beginners should manually program this cushion from day one.
Rule 3: Embrace Occupancy-Based Automation
Geo-Fencing vs. Indoor Sensors
The geo-fencing versus indoor sensor debate defines your automation philosophy. Geo-fencing uses your smartphone’s location to anticipate arrivals and departures, working brilliantly for predictable schedules but failing when you leave your phone at home or have guests. Indoor occupancy sensors provide real-time room-level data but can’t predict your arrival. The expert approach combines both: use geo-fencing for broad home/away states and indoor sensors for micro-zone adjustments. When shopping, verify that your chosen platform supports simultaneous location and sensor-based triggers without creating logical conflicts.
Multi-User Household Considerations
Single-user automation is simple; multi-user households require hierarchical decision-making. Your system needs rules for what happens when one person leaves while another remains, or when family members have vastly different temperature preferences. Look for automation platforms that support “majority rules” logic, “first to arrive/last to leave” tracking, and individual comfort profiles that can be weighted by room priority. The best systems allow you to assign “primary occupants” to specific zones, so your home office temperature doesn’t plummet when your teenager leaves for school.
Rule 4: Integrate Weather Intelligence
Hyper-Local Weather Data Sources
Your thermostat’s built-in weather display is useless for automation. True climate automation requires hyper-local data feeds that account for solar radiation, wind chill, and humidity—factors that affect your home’s thermal load but don’t show up in basic forecasts. Seek systems that integrate with weather APIs offering minute-by-minute updates and predictive modeling. The key feature is automatic adjustment based on forecasted conditions, not just current weather. If a cold front will hit at 3 PM, your system should begin pre-heating at 2 PM using cheaper off-peak energy.
Predictive Heating and Cooling
Predictive climate control uses weather forecasts to shift energy consumption away from peak periods. This means starting cooling cycles before a heat wave arrives or leveraging upcoming sunny days to assist with heating. When evaluating systems, look for “weather adapt” or “forecast-based pre-conditioning” features. The sophistication varies widely—basic systems adjust setpoints by a few degrees, while advanced platforms run full thermal modeling simulations. For beginners, even modest predictive capabilities deliver measurable savings.
Rule 5: Prioritize Energy Efficiency Over Convenience
Understanding SEER and HSPF Ratings
Automation cannot compensate for inefficient equipment. Before investing in smart controls, understand your HVAC’s Seasonal Energy Efficiency Ratio (SEER) for cooling and Heating Seasonal Performance Factor (HSPF) for heating. Smart thermostats on a 10-SEER air conditioner will never match the savings of basic controls on a 16-SEER unit. When planning automation, consider that your system will reveal equipment shortcomings. Use automation data to identify when replacement makes financial sense—if your system runs continuously during moderate weather, no amount of scheduling will fix that underlying inefficiency.
The 3-Degree Challenge Rule
The 3-Degree Challenge is a self-imposed constraint that builds efficiency discipline: never program temperature swings greater than 3°F from your baseline comfort setting. Extreme setbacks force your system into inefficient recovery cycles that consume more energy than they save. This rule forces you to find efficiency through occupancy detection, zoning, and gradual adjustments rather than brute-force temperature swings. Advanced users can expand this to 5°F, but beginners should treat 3°F as their automation guardrail until they understand their home’s thermal response curve.
Rule 6: Establish Temperature Guardrails
Minimum and Maximum Safety Settings
Automation failures happen, and temperature extremes can damage your home or create dangerous conditions. Every climate automation system needs hardwired minimum and maximum temperature limits that override all schedules and occupancy logic. Set your minimum at 55°F to prevent pipe freezing and your maximum at 85°F to protect electronics and finishes. These aren’t efficiency settings—they’re insurance policies. Verify that your chosen platform stores these limits locally on the device, not just in the cloud, so they persist during internet outages.
Vacation Mode Protocols
Vacation mode requires different logic than daily “away” settings. It should maintain safe temperatures while minimizing energy use and provide alerts for unusual conditions. The expert approach creates a “vacation hold” that disables occupancy-based recovery, extends temperature ranges to 50°F-90°F, and increases monitoring frequency. Look for systems that can automatically activate vacation mode based on calendar integration or extended geo-fence absence, and that send daily status reports to your phone.
Rule 7: Layer Your Climate Control
HVAC Plus Smart Vents and Dampers
Smart thermostats controlling dumb ductwork deliver only half the automation potential. Layering smart vents or zone dampers creates true room-level control. This approach lets you close off unused guest rooms or over-conditioned spaces, redirecting airflow where needed. When planning this layer, verify compatibility between your thermostat platform and vent/damper protocol. The critical feature is pressure monitoring—closing too many vents can damage your HVAC system. Quality systems monitor static pressure and automatically adjust to prevent equipment strain.
Complementary Device Ecosystem
Climate automation extends beyond thermostats and vents. Smart ceiling fans, window shades, and even door sensors contribute to thermal management. A truly integrated system coordinates these devices: shades lower during summer afternoons, fans spin counterclockwise to distribute cooled air, and doors trigger micro-adjustments. When selecting your primary climate controller, examine its integration ecosystem. Does it natively communicate with fan controllers and smart shades, or will you need complex workarounds? Native integration always proves more reliable than cloud-based bridges.
Rule 8: Automate Air Quality Management
Humidity Control Boundaries
Temperature automation without humidity control delivers incomplete comfort. High humidity makes 72°F feel stifling; low humidity makes 68°F feel frigid. Your system needs humidity guardrails—typically 40-60% relative humidity. Advanced automation links dehumidifiers and humidifiers to your climate platform, creating coordinated responses. When evaluating thermostats, check for integrated humidity sensors and dedicated humidity control modes. The best systems treat humidity as a primary variable, not just a secondary reading.
Ventilation Scheduling
Modern airtight homes require mechanical ventilation, but running exhaust fans continuously wastes energy. Smart ventilation automation coordinates bathroom fans, range hoods, and whole-house ventilators with occupancy and outdoor conditions. Program bathroom fans to run for 10 minutes post-shower, then stop. Use outdoor air temperature sensors to trigger economizer modes—bringing in cool night air instead of running AC. Look for platforms with dedicated ventilation control outputs or integration with smart switches that can handle inductive fan loads.
Rule 9: Create Failure-Safe Backup Plans
Internet Outage Contingencies
Cloud-dependent climate automation fails catastrophically during internet outages. Your system must have local processing capability that maintains basic schedules and safety limits without connectivity. Test this before you need it—disconnect your router and verify that temperatures remain stable. The gold standard is a system that continues full automation locally and syncs changes when connectivity returns. Avoid platforms that require cloud polling for every decision; these become expensive paperweights when your ISP has issues.
Device Malfunction Alerts
A stuck relay or failed sensor can cost hundreds in wasted energy or equipment damage. Your automation platform must monitor device health and alert you to anomalies. Look for systems that track runtime hours, cycle frequency, and temperature deviation patterns. The best platforms send proactive alerts: “Master bedroom sensor offline” or “Furnace cycling every 3 minutes—possible short-cycling.” This transforms your climate system from a black box into a transparent, maintainable infrastructure.
Rule 10: Test and Refine Continuously
The 30-Day Optimization Cycle
Set a calendar reminder for the same day each month to review your automation performance. Check runtime reports against weather data, identify rooms that consistently deviate from setpoints, and adjust schedules based on seasonal daylight changes. This disciplined review catches problems before they become expensive. Most smart platforms provide basic energy reports—use them. Correlate high usage days with your automation logs to identify inefficient patterns. Beginners often discover that a single poorly-timed setback costs more than it saves.
Seasonal Recalibration
Your home’s thermal characteristics shift dramatically between seasons. Summer solar gain through south-facing windows becomes winter heat loss. Automations that work perfectly in October will fail in January. Create four seasonal automation profiles—spring, summer, fall, winter—that adjust not just temperatures but also sensor sensitivity, schedule timing, and ventilation strategies. The transition dates aren’t calendar-based; trigger them when your HVAC shifts from cooling to heating mode for three consecutive days. This adaptive approach prevents the common beginner mistake of running summer logic deep into fall.
Additional Considerations
Privacy and Data Security
Climate automation systems know when you’re home, awake, and away. This data is valuable to utilities, insurers, and potentially malicious actors. Before purchasing, investigate the platform’s data retention policy and encryption standards. Does it sell anonymized usage data? Can you opt out? Local-first systems that process data on-device and minimize cloud transmission offer superior privacy. If you choose a cloud platform, enable two-factor authentication and regularly audit third-party integrations that might access your climate data.
Professional vs. DIY Installation
The DIY route works for simple thermostat replacements, but complex zoning and damper installations require professional expertise. A faulty installation can void HVAC warranties and create safety hazards. If your project involves more than replacing a single thermostat, get quotes from HVAC contractors certified in automation systems. The cost difference often includes proper load calculations, duct pressure balancing, and warranty coverage that DIY cannot match. Consider professional installation as insurance against the most common beginner failure: automating an improperly configured mechanical system.
Frequently Asked Questions
How much money can I realistically save with climate automation?
Most households save 10-30% on heating and cooling costs, translating to $180-$600 annually for average US homes. The range depends on your baseline efficiency, local utility rates, and automation sophistication. Homes with programmable thermostats that were never programmed see the highest returns. Your savings compound over time as the system learns your patterns and utility rates increase.
Will smart climate automation work with my 20-year-old HVAC system?
Yes, but with limitations. Modern smart thermostats control any system with standard wiring, but they cannot improve underlying efficiency. Older systems lack variable-speed capabilities, so automation is limited to on/off cycling. Consider upgrading to a high-efficiency unit first if your system is near end-of-life. Automation reveals equipment shortcomings—you might discover your old furnace runs constantly, making replacement financially urgent.
What happens to my automation when the power goes out?
Smart thermostats lose all functionality during power outages, just like traditional ones. However, quality systems retain programming in non-volatile memory and resume normal operation when power returns. Battery backup is rare and unnecessary for most users. For critical applications, consider a whole-house generator or UPS specifically for your HVAC control circuit. The real concern is internet outages—prioritize systems with local automation capability.
Do I need a hub, or can I use Wi-Fi devices?
Hub-based systems offer superior reliability and local processing, while Wi-Fi devices provide easier setup but depend on cloud connectivity. For climate automation, a hub is strongly recommended. Temperature control demands instant response and failsafe operation that Wi-Fi cloud polling cannot guarantee. Hubs also enable complex multi-device automation that spans brands and protocols, future-proofing your investment.
How many zones does my house actually need?
Most homes benefit from 3-4 zones: sleeping areas, living spaces, and basement/utility areas. Each additional zone increases complexity and cost. Start with the zone that has the most distinct usage pattern or comfort issues. You can always expand later. A professional Manual J load calculation reveals your true zoning needs based on thermal characteristics, not just floor plan.
Can climate automation integrate with solar panels?
Advanced platforms can coordinate with home energy management systems to shift heating/cooling to times of peak solar production. This requires an automation hub that monitors real-time solar generation and utility net metering rates. The system pre-cools your home during sunny afternoons when electricity is essentially free, then minimizes usage during evening peak rates. Look for platforms with Modbus or API integration for solar inverters.
What’s the biggest mistake beginners make?
The number one mistake is automating too aggressively too soon. Setting extreme setbacks and complex schedules before understanding your home’s thermal response creates discomfort and higher bills. Start with simple scheduling, add occupancy detection after two weeks, then layer in weather integration. Each addition should be tested for 10 days before adding the next. Climate automation rewards patience and iterative refinement.
How do I handle pets when using occupancy-based automation?
Pets require temperature guardrails that override occupancy logic. Create a “pets at home” mode that maintains safe temperatures in areas where animals stay, using indoor cameras or pet sensors to verify presence. Set wider temperature bands—65°F to 78°F—rather than full setbacks. Smart vents can close off unused rooms while keeping pet areas conditioned. Never rely solely on geo-fencing when animals are present.
Will smart vents damage my HVAC system?
Improperly configured smart vents can increase static pressure and damage equipment. Quality systems monitor pressure and automatically open vents if pressure exceeds safe thresholds. When installing smart vents, never close more than 30% of your total vents simultaneously. Have a professional verify your ductwork can handle zoning. The safest approach pairs smart vents with a variable-speed blower motor that automatically adjusts to changing airflow resistance.
How long does it take for automation to “pay for itself”?
Typical payback periods range from 18 months to 4 years. A $250 smart thermostat saves $180-$250 annually, paying for itself in roughly one year. Multi-zone systems costing $2,000-$4,000 take longer but deliver superior comfort and control. Factor in non-monetary benefits: improved sleep quality, elimination of hot/cold spots, and remote monitoring peace of mind. The value extends beyond pure energy savings to include home protection and lifestyle enhancement.