Transform your living room into a pulsating concert hall or a immersive cinema sanctuary without breaking the bank. DIY lighting automation strips that dance to your favorite beats and pulse with on-screen action represent one of the most satisfying smart home projects you can tackle. Unlike off-the-shelf solutions that often force you into proprietary ecosystems, building your own reactive lighting system gives you unparalleled control over color accuracy, responsiveness, and customization.
Whether you’re a home theater enthusiast seeking true bias lighting that mirrors every explosion, or a music lover wanting your walls to visualize your playlist’s frequencies, this guide walks you through everything that matters. We’ll explore the underlying technology, critical component choices, installation strategies, and the software ecosystems that turn simple LED strips into intelligent, responsive design elements. No product pitches—just pure, actionable expertise to help you engineer the perfect system for your space.
Top 10 Lighting Automation Strips for Music Movies
Detailed Product Reviews
1. dalattin Bluetooth Led Lights for Bedroom 100ft,Smart Led Strip Lights with App Control Remote Control, RGB LED Light Strips,Music Sync Color Changing Room Decoration Party, (2 Rolls of 50ft)

Overview: The dalattin Bluetooth LED Lights deliver an impressive 100 feet of smart lighting across two 50-foot rolls, providing enough length to wrap entire rooms. Controlled via both a Bluetooth app and 24-key IR remote, these strips offer 16 million colors with dynamic modes like Flashing, Quick, Jump, and Fade. The music synchronization feature responds to smartphone audio, while a built-in timer automates on/off schedules. Installation is straightforward with adhesive backing, making them suitable for bedrooms, kitchens, living rooms, and party spaces.
What Makes It Stand Out: The sub-$10 price point for 100 feet of addressable RGB lighting is remarkable, democratizing smart home ambiance for budget-conscious buyers. Dual control options eliminate single-point-of-failure frustration, and the music sync capability punches well above its class for entry-level strips. The generous length allows creative installations that shorter, pricier kits cannot match.
Value for Money: At $0.10 per foot, these are among the most affordable smart LED strips available. Comparable basic RGB strips without app control often cost more, while adding Bluetooth and music sync typically commands a 3-5x premium. For renters and beginners, this represents minimal financial risk with maximum decorative potential.
Strengths and Weaknesses: Strengths include unbeatable pricing, generous 100-foot length, dual control flexibility, and simple setup. Weaknesses involve Bluetooth’s limited range versus WiFi, IR remote’s line-of-sight requirements, occasional app connectivity drops, and adhesive that struggles on textured surfaces. The lack of voice assistant integration limits smart home ecosystem compatibility.
Bottom Line: Perfect for dorm rooms, renters, or smart home newcomers wanting maximum coverage with minimal investment. While not as reliable as premium options, the dalattin strips deliver surprising functionality at a price that’s hard to beat for decorative accent lighting.
2. TJOY 200ft Smart Led Strip Lights for Bedroom, Alexa Light Strip,2835 RGB Color Changing Music Sync Rope Lighting with App Remote,Multi-Color Wireless Led Lighting for Bedroom (APP+Remote+Voice)

Overview: The TJOY 200ft Smart LED Strip Lights offer double the standard length with full smart home integration, making them ideal for large-scale installations. This massive strip supports Alexa and Google Assistant voice control alongside app and remote operation. The music sync feature responds to ambient sound, while DIY cutting allows customization along marked intervals. With 16 million colors and adjustable brightness, it transforms expansive bedrooms, living rooms, or commercial spaces with seamless, intelligent lighting.
What Makes It Stand Out: The triple-control approach (voice, app, remote) provides unmatched accessibility, while the 200-foot length handles entire home installations in one kit. The ability to cut and customize lengths offers architectural lighting flexibility that pre-sized strips cannot match. Voice control eliminates the need to physically interact with controllers, a genuine convenience upgrade.
Value for Money: At $0.20 per foot, TJOY commands a premium over budget options but delivers genuine WiFi connectivity and voice control that typically costs $30-50 for shorter strips. For large-scale projects, purchasing one 200ft kit is far more economical than multiple smaller sets, reducing connection points and power supply clutter.
Strengths and Weaknesses: Strengths include impressive length, robust smart home integration, DIY flexibility, and reliable adhesive. Weaknesses include lack of 5GHz WiFi support, the fact that cut sections become unusable (creating waste), occasional connectivity drops on longer runs, and a more complex initial setup process for smart home pairing.
Bottom Line: An excellent choice for serious smart home enthusiasts needing extensive coverage. The voice control and customization options justify the moderate price increase, making it ideal for larger spaces or whole-room installations where seamless, intelligent lighting is prioritized.
3. ZIWJGPCCV Smart LED Corner Floor Lamp for Living Room with App Remote Control, 16 Million Colors, Music Sync, Black

Overview: The ZIWJGPCCV Smart LED Corner Floor Lamp reimagines smart lighting as furniture, delivering a sleek 5-foot tower designed to nestle perfectly into room corners. Featuring advanced RGBIC technology, each LED can display different colors simultaneously, creating dynamic rainbow effects impossible with standard RGB strips. Controlled via Bluetooth app or included remote, it offers 16 million colors, music sync, and scheduling. The minimalist black design complements modern decor while the lightweight build allows easy repositioning between living rooms, bedrooms, or gaming spaces.
What Makes It Stand Out: The floor lamp form factor eliminates installation anxiety—no adhesives, no ladders, just plug-and-play convenience. RGBIC technology enables stunning segmented color displays and flowing gradients that make standard strips look primitive. Its corner-hugging design maximizes floor space while providing 360-degree ambient illumination that washes walls with immersive color.
Value for Money: At $39.99, it competes directly with premium strip kits while offering superior aesthetics and easier setup. Similar smart floor lamps from established brands cost $80-150, making this an aggressive value proposition for design-conscious buyers who prioritize form as much as function.
Strengths and Weaknesses: Strengths include gorgeous modern design, true RGBIC color mixing, portability, tool-free assembly, and zero installation damage. Weaknesses involve Bluetooth’s limited range, single-point lighting versus distributed strips, potential tip-over risk in high-traffic areas, and brightness that may not suffice as primary room lighting for larger spaces.
Bottom Line: Ideal for renters, design enthusiasts, or anyone wanting statement lighting without permanent modifications. The ZIWJGPCCV lamp delivers premium RGBIC effects in a stylish package that traditional strips simply cannot match, making it a worthy centerpiece for modern interiors.
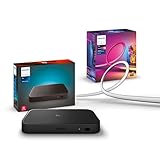
4. Philips Hue RGB Play Gradient LED Smart Light Tube - Large - Pack of 1 - Multicolor Effect - Indoor - Sync with TV, Music and Gaming - Bridge and Sync Box Required - Control with Voice or App - Black

Overview: The Philips Hue Play Gradient Light Tube represents the premium tier of immersive lighting, designed specifically for entertainment synchronization when paired with the Hue Bridge and HDMI Sync Box. This large multicolor tube delivers Philips’ renowned 16-million-color spectrum with professional-grade gradient blending. Control options include Bluetooth, the Hue app, and voice assistants like Alexa and Google Home. Engineered for behind-TV placement, it creates a seamless halo of light that extends on-screen action into your physical space with millisecond-level accuracy.
What Makes It Stand Out: As a Hue ecosystem component, it offers unmatched synchronization reliability and color accuracy. The gradient technology produces smooth color transitions that budget strips cannot replicate, while Philips’ build quality ensures years of dependable operation. Bluetooth capability allows basic control without additional hardware, providing a migration path for new users.
Value for Money: At $199.99 for a single tube, this is a luxury purchase requiring an additional $300+ investment in Bridge and Sync Box for full functionality. While expensive, it delivers a cohesive, frustration-free experience that DIY alternatives struggle to match. For existing Hue users, it’s a logical expansion; for newcomers, the total cost is prohibitively high.
Strengths and Weaknesses: Strengths include exceptional build quality, flawless sync performance, robust app ecosystem, and reliable voice control. Weaknesses are the mandatory additional hardware, high price for a single light source, limited versatility as a standalone product, and ecosystem lock-in that prevents integration with non-Hue devices or protocols.
Bottom Line: Only worthwhile for committed Philips Hue ecosystem users seeking the ultimate entertainment lighting. For casual buyers, the total investment exceeds $500, making it overkill for simple ambiance needs. Consider only if you’re already invested in or planning a full Hue setup.
5. Philips Hue Play HDMI Sync Box 8K + Gradient 65" Smart TV Light Strip - Sync Your Video Games, Movies, and Music - Requires Hue Bridge - Supports Dolby Vision HDR10+ - Control with Hue App
Overview: The Philips Hue Play HDMI Sync Box 8K with Gradient 65" TV Light Strip is the definitive premium immersive lighting solution, combining next-generation HDMI processing with a precision-engineered LED gradient strip. This bundle includes the Sync Box 8K—supporting 8K at 60Hz and 4K at 120Hz—and a 65-inch TV light strip with mounting brackets. The system requires a Hue Bridge and syncs lighting to any HDMI-connected device with millisecond-level accuracy, supporting Dolby Vision and HDR10+ for uncompromised video quality.
What Makes It Stand Out: HDMI 2.1 certification ensures compatibility with the latest gaming consoles and future-proofs your investment. The Sync Box handles up to four HDMI inputs, automatically switching between sources while maintaining flawless light synchronization. This is professional-grade entertainment lighting that reacts to content at the signal level, not via camera-based workarounds.
Value for Money: At $511.49, this bundle represents a significant investment. However, it replaces complex DIY solutions costing $300-400 while delivering superior performance, reliability, and ease of use. For home theater enthusiasts and serious gamers, the immersive experience justifies the premium over basic bias lighting or camera-based sync systems.
Strengths and Weaknesses: Strengths include unmatched synchronization quality, HDMI 2.1 support, multi-device management, and Philips’ ecosystem reliability. Weaknesses are the prohibitive cost, requirement for Hue Bridge (sold separately), complexity for average users, and limitation to HDMI sources only—native TV apps and internal streaming won’t synchronize.
Bottom Line: The ultimate choice for home theater aficionados and competitive gamers wanting seamless, high-fidelity reactive lighting. For most consumers, it’s extravagantly priced overkill; for enthusiasts seeking the best possible immersive experience, it’s the best-in-class solution that justifies its premium positioning.
What Makes Lighting “Reactive”?
Reactive lighting isn’t just about random color changes—it’s about intelligent, real-time translation of audio or visual data into coordinated light output. At its core, a DIY reactive system consists of three fundamental elements: an input source (microphone, HDMI signal, or software audio capture), a processing unit (microcontroller or single-board computer), and addressable LED strips capable of executing complex commands.
The magic happens in the microcontroller’s firmware, which analyzes incoming signals and maps them to specific LEDs using mathematical algorithms. For music, this means breaking down audio into frequency bands and assigning colors, brightness, and animation patterns to each segment. For movies, it involves sampling screen regions and calculating dominant colors or brightness levels, then projecting them onto your wall-mounted strips with minimal latency.
Core Components of a DIY System
Before diving into specifications, understand that every reactive lighting setup shares common architecture. You’ll need LED strips with individual chip control (typically WS2812B, SK6812, or APA102), a microcontroller with sufficient processing power and memory, a stable power supply rated for your total LED count, and software that bridges your media source to the hardware. The quality of each component directly impacts responsiveness, color accuracy, and system stability.
The Role of Microcontrollers
The microcontroller acts as your system’s brain, executing thousands of calculations per second. Its clock speed determines how smoothly animations render, while RAM capacity limits the number of LEDs you can control. For basic music reaction with under 300 LEDs, an 80MHz processor suffices. However, movie synchronization with HDMI capture demands multicore architectures running at 160MHz or higher to prevent frame drops and latency issues.
LED Strip Technologies Explained
Not all LED strips are created equal, and selecting the wrong type can cripple your reactive ambitions. The market offers dozens of variants, but only a handful deliver the performance characteristics necessary for smooth, accurate music and movie synchronization.
Addressable vs. Non-Addressable: Which to Choose?
Addressable strips allow individual control of each LED, enabling wave effects, chases, and precise color mapping across frequency bands or screen zones. Non-addressable strips change color as a single unit, limiting you to basic brightness pulsing. For reactive applications, addressable strips aren’t just recommended—they’re mandatory. Look for strips with built-in ICs (integrated circuits) at each LED or in small clusters, typically labeled as “digital,” “pixel,” or “dream” strips.
Understanding RGB, RGBW, and RGBIC Variants
Standard RGB strips mix red, green, and blue to create colors, but struggle with pure whites and pastels. RGBW adds a dedicated white diode, dramatically improving color accuracy and allowing true warm or cool white effects during movie watching. RGBIC strips integrate control chips directly into the LED package, enabling tighter pixel density and smoother gradients. For movie bias lighting, RGBW is worth the premium. For music visualization where saturated colors dominate, standard RGB addressable strips offer better value.
Voltage Options: 5V, 12V, and 24V Trade-offs
5V strips are most common and work seamlessly with microcontrollers, but suffer from voltage drop over distances exceeding 10 feet, causing dimming and color shifts. 12V strips maintain brightness over longer runs but require level-shifting circuits to interface with 3.3V microcontrollers. 24V systems excel in large installations (over 300 LEDs) with minimal power injection points, though they demand more careful planning and higher-rated power supplies. For most DIY projects under 200 LEDs, 5V offers the simplest implementation.
Key Performance Metrics
Understanding technical specifications prevents disappointment and ensures your build meets expectations. Manufacturers often highlight misleading numbers, so focus on these measurable performance indicators.
LED Density and Luminosity
LED density, measured in LEDs per meter, directly impacts animation smoothness. Thirty LEDs per meter creates noticeable gaps in effects, while 60 LEDs per meter delivers acceptable performance for most applications. Enthusiasts seeking fluid, seamless waves should target 144 LEDs per meter, though this quadruples power consumption and cost. Brightness, measured in lumens per meter, determines how well your effects compete with ambient room lighting. Aim for at least 1000 lumens per meter for daytime visibility.
Color Rendering and Bit Depth
Color depth, expressed in bits, defines how many distinct colors your system can produce. Eight-bit control yields 16.7 million colors—sufficient for most users. However, 12-bit or 16-bit strips eliminate banding in smooth gradients and provide subtler color transitions during slow movie scenes. Color Rendering Index (CRI) matters less for reactive effects but becomes crucial when using strips for general room illumination; target CRI above 80 for natural-looking whites.
Response Time and Refresh Rates
Response time, measured in milliseconds, determines how quickly LEDs react to audio transients or on-screen changes. Quality strips refresh at 400Hz or higher, ensuring flicker-free operation and instant response. For music sync, this translates to tight bass hits that feel synchronized rather than laggy. Movie sync demands sub-50ms total system latency from screen change to LED output, requiring both fast strips and optimized firmware.
Planning Your Installation
Successful installations begin with meticulous planning, not impulse purchases. Mapping your space and calculating requirements prevents mid-project redesigns and ensures consistent performance across all zones.
Space Mapping and Measurement Strategies
Start by identifying mounting locations—behind TVs, under couches, along crown molding, or behind speaker grilles. Use a laser measure for accuracy, then add 15% extra length for corners and cable management. Sketch a diagram noting distances between LED segments, power supply location, and microcontroller placement. For movie bias lighting, measure your screen’s perimeter and plan strips 2-4 inches from the wall for optimal light diffusion.
Power Budgeting and Distribution
Calculate total power draw by multiplying LED count by 0.06W (for RGB) or 0.08W (for RGBW) at full brightness. A 300-LED strip can consume 18-24 amps at 5V—far exceeding USB power limits. Plan for a dedicated power supply rated at 120% of your calculated draw to prevent overheating. For runs exceeding 16 feet, budget for multiple injection points every 10 feet to combat voltage drop, which causes the “red fade” effect where distant LEDs lose color accuracy.
Controller and Power Supply Placement
Mount your microcontroller within 3 feet of the first LED to maintain signal integrity. Power supplies should be centrally located to minimize long DC cable runs, which waste power and introduce voltage sag. Consider ventilation—enclosed power supplies generate significant heat at high loads. For aesthetic installations, hide components behind furniture but ensure they’re accessible for resets and updates.
Microcontroller Selection Guide
Your microcontroller choice dictates software compatibility, maximum LED count, and sync capabilities. While dozens of options exist, three platforms dominate the reactive lighting community.
ESP32: The Community Favorite
The ESP32’s dual-core 240MHz processor and built-in Wi-Fi make it the undisputed champion for DIY reactive lighting. It handles 1000+ LEDs while simultaneously running a web interface for configuration. Its abundant GPIO pins support multiple strip outputs, and the active WLED community provides pre-compiled firmware with music and movie sync features. The ESP32-S2 variant offers cost savings for simpler builds, while the ESP32-S3 adds USB OTG for direct HDMI capture.
Raspberry Pi for HDMI Sync
When true movie synchronization is the goal, a Raspberry Pi 4 with HDMI capture card becomes necessary. The Pi’s Linux environment runs HyperHDR or similar software that directly samples HDMI signals, achieving sub-20ms latency. This setup handles 4K HDR passthrough while extracting color data, something microcontrollers cannot do alone. The trade-off is complexity—Linux configuration, power consumption, and cost are significantly higher than ESP32 solutions.
Arduino for Simplicity
Traditional Arduino boards like the Uno or Mega offer plug-and-play simplicity for beginners but lack the horsepower for advanced effects. The Arduino Nano Every provides a middle ground, supporting 500 LEDs with basic music reactivity. However, their single-core architecture struggles with simultaneous Wi-Fi control and smooth animations. Consider Arduino only for small, isolated installations where simplicity trumps performance.
Software and Firmware Options
Software transforms hardware potential into breathtaking experiences. The ecosystem you choose determines ease of use, customization depth, and long-term maintainability.
WLED: The Open-Source Powerhouse
WLED firmware, designed for ESP32 and ESP8266, supports over 100 built-in effects, real-time audio sync via microphone or line-in, and E1.31 sACN protocol for professional lighting control. Its web interface eliminates app dependencies, and the active Discord community continuously develops new features. WLED’s Sound Reactive fork adds advanced spectrum analysis, beat detection, and multiple audio source support, making it ideal for music enthusiasts.
HyperHDR for Movie Enthusiasts
HyperHDR, a fork of the original Hyperion, specializes in screen capture synchronization. Running on Raspberry Pi or Windows, it samples screen regions at high frequency, calculates dominant colors, and streams data to LED controllers. Its HDR tone mapping preserves color accuracy in bright scenes, while black bar detection ensures LEDs only illuminate active picture areas. The software supports multiple grabbers, allowing simultaneous HDMI and USB camera input for hybrid setups.
Commercial Alternatives
While this guide focuses on DIY, understanding commercial options helps benchmark features. Phillips Hue Sync, Govee Immersion, and Nanoleaf Sync process audio and video through proprietary algorithms, offering polished apps but limited customization. These solutions justify their premium through convenience, not capability—your DIY build can match or exceed their performance at a fraction of the cost.
Music Synchronization Methods
Music reactivity spans a spectrum from simple volume pulsing to sophisticated frequency visualization. Understanding these methods helps you configure effects that match your aesthetic preferences.
Real-Time Spectrum Analysis
FFT (Fast Fourier Transform) algorithms break audio into 8-32 frequency bands, mapping each band to a segment of your LED strip. Low frequencies (bass) trigger warm colors on one end, while high frequencies (cymbals) illuminate the opposite end with cool tones. Configuring FFT range, bin count, and smoothing parameters in firmware like WLED lets you emphasize bass drops or vocal clarity based on music genre.
Beat Detection Algorithms
Simple volume thresholds create jarring, repetitive effects. Advanced beat detection uses onset detection—identifying spectral flux changes across multiple frequency bands to pinpoint genuine rhythmic events. This prevents false triggers from static noise and creates tighter synchronization. Most firmware allows adjusting sensitivity, decay time, and beat anticipation (pre-triggering lights slightly before the actual beat) to compensate for system latency.
Ambient vs. Rhythm-Based Effects
Ambient modes use slow color morphing and gentle pulsing for background atmosphere during parties or relaxation. Rhythm-based modes employ hard cuts, strobe effects, and chase patterns that aggressively follow musical structure. The best implementations offer blending—ambient base layers with rhythm accents overlaid. This dual-layer approach prevents visual fatigue during long listening sessions while maintaining engagement during chorus peaks.
Movie Sync Techniques
Movie synchronization presents unique challenges: latency must be imperceptible, color accuracy must match screen content, and the system must handle varying aspect ratios and HDR metadata.
HDMI Capture vs. Screen Sampling
HDMI capture uses hardware grabbers to intercept video signals before they reach your display, offering the lowest latency (15-30ms) and highest fidelity. This requires a Raspberry Pi or PC between your source and TV. Screen sampling uses software to read pixel data from your GPU, adding 50-100ms latency but requiring no additional hardware. For gaming, HDMI capture is mandatory. For casual movie watching, screen sampling suffices.
Ambient Light Replication
The goal isn’t to flood your wall with raw screen colors, but to create an ambient glow that extends the picture’s mood. Effective systems sample screen corners and edges, averaging colors over large regions to prevent jarring flicker from small, bright objects. Configuring smoothing parameters—averaging color values over 3-5 frames—and implementing gamma correction ensures the lighting enhances rather than distracts from the viewing experience.
Latency Compensation Strategies
Even the fastest systems introduce delay. Advanced firmware allows negative delay configuration, sending LED commands slightly before the video frame displays. This requires calibrating your specific setup: measure display input lag, processing time, and LED refresh rate, then offset accordingly. Some implementations use audio delay to synchronize LED effects with sound, creating a cohesive sensory experience despite inherent system latency.
Connectivity and Smart Home Integration
A reactive lighting system shouldn’t exist in isolation. Integration with broader smart home platforms multiplies its utility and convenience.
Wireless Protocols Compared
Wi-Fi offers unlimited range and high bandwidth for controlling thousands of LEDs, but adds complexity with network configuration and potential interference. Bluetooth simplifies pairing and works offline, yet limits control distance to ~30 feet and typically supports fewer LEDs. For reliability, Ethernet-connected controllers (via ESP32 with LAN8720 module) eliminate wireless variables entirely, ensuring consistent performance during critical movie scenes.
Alexa, Google, and HomeKit Compatibility
WLED and similar platforms expose devices as virtual RGB lights to smart home hubs. This allows voice commands like “Alexa, set movie mode” to trigger predefined brightness, color, and effect profiles. HomeKit integration via Homebridge enables Siri control and automation based on time of day or other sensor triggers. The key is selecting firmware with robust API support and MQTT integration for reliable, low-latency command execution.
Installation Mastery
Even premium components fail when installed poorly. Proper technique ensures longevity, safety, and professional appearance.
Surface Prep for Permanent Mounts
LED strips adhere poorly to dusty or textured surfaces. Clean mounting areas with isopropyl alcohol, then apply 3M VHB double-sided tape for permanent bonds. For painted drywall, prime the area first to prevent paint peeling during removal. Aluminum channels with diffusers not only protect strips but also create smooth, dot-free light lines by mixing pixel output—essential for movie bias lighting where individual LED visibility ruins immersion.
Managing Corners and Bend Management
Never fold LED strips at sharp 90-degree angles; this cracks copper traces and creates dead pixels. Instead, use corner connectors or cut strips and bridge with soldered wires. For flexible routing, create small service loops—5mm radius curves that relieve stress. When mounting behind TVs, leave 2-inch gaps at corners to prevent light hotspots and allow even diffusion across the wall.
Heat Management and Longevity
Addressable LEDs generate significant heat at full brightness—each pixel dissipates roughly 0.02W as thermal energy. Without heat sinking, temperatures can exceed 60°C, degrading phosphors and shortening lifespan from 50,000 to 10,000 hours. Mount strips to aluminum channels or extrusions that act as heat sinks. Reduce brightness to 70% for continuous operation; the perceived brightness difference is minimal while thermal load drops by 30%.
Power System Design
Inadequate power planning manifests as flickering, color distortion, and system crashes. Proper design treats power distribution as a critical engineering task, not an afterthought.
Calculating Amperage Requirements
Use the formula: Total Amps = (LED Count × 0.06W × Brightness %) ÷ Voltage. A 300-LED strip at 80% brightness on 5V draws 28.8 amps—requiring 8 AWG wire for main runs to prevent voltage drop. Always measure actual current draw with a clamp meter; manufacturer specs assume perfect conditions and often understate real-world consumption by 15-20%.
Voltage Injection for Large Installations
Voltage drop causes colors to shift toward red on distant LEDs. Inject power every 100-150 LEDs for 5V systems, every 200-250 LEDs for 12V. Run thick gauge wire (14 AWG minimum) from power supply injection points, connecting directly to strip pads—not daisy-chaining through the strip’s thin copper traces. This star topology ensures uniform brightness and color accuracy across the entire installation.
Fuse Protection and Safety Margins
Place a fast-blow fuse rated at 110% of expected draw on each power injection line. This prevents fire hazards from short circuits without nuisance tripping during normal operation. Use automotive blade fuses in inline holders for easy replacement. Add a master fuse at the power supply output, and never exceed 80% of the supply’s rated capacity for continuous loads—this extends component life and provides headroom for transient peaks.
Troubleshooting Common Issues
Even well-planned builds encounter problems. Systematic diagnosis saves hours of frustration.
Diagnosing Signal Degradation
Flickering or random colors on distant LEDs usually indicates signal integrity issues, not power problems. The data signal weakens over long wire runs between microcontroller and first LED. Solutions include: using a level shifter (5V signal from 3.3V microcontroller), reducing data line length to under 3 feet, or adding a sacrificial “pixel” near the microcontroller to regenerate the signal. Oscilloscope measurement of the data line reveals noise and voltage levels—aim for clean 5V square waves.
Color Calibration and Uniformity
Different LED batches produce varying color temperatures even with identical RGB values. Calibrate using firmware white balance settings: display pure white, then adjust individual RGB gains until wall illumination appears neutral. For multi-strip installations, buy all LEDs from the same production batch (check manufacturer date codes). If mixing batches, assign each strip its own color correction profile in software.
Minimizing Audio/Video Delay
Perceived latency often stems from mismatched processing paths. If LEDs lag video, reduce firmware smoothing and increase microcontroller clock speed. If LEDs lead audio, add audio delay in your receiver or TV settings. Measure round-trip latency using a high-speed camera filming both screen and LEDs simultaneously—adjust until synchronization appears natural to human perception (under 50ms total).
Advanced Customization Techniques
Once basics function flawlessly, advanced techniques elevate your build from functional to extraordinary.
Building Multi-Zone Setups
Segment your installation into logical zones—TV backlight, under-couch glow, ceiling cove—each controlled independently but synchronized through a master controller. Use E1.31 sACN protocol to stream different data streams to each zone from a central server running xLights or similar software. This allows bass frequencies to illuminate the floor zone while treble activates ceiling strips, creating a three-dimensional soundscape.
Creating Scene Presets
Develop presets for specific content types: “Cinematic” uses slow, warm color transitions with 30% brightness for movie dramas; “Gaming” employs high-contrast, low-latency effects at 80% brightness; “Party” activates aggressive music sync across all zones. Store these as JSON configurations in WLED’s preset slots, triggering them via API calls from your home automation system based on detected media type.
Developing Custom Effects
For unique visual signatures, modify firmware effect algorithms. WLED’s open-source nature allows custom C++ effect development—create brand-specific color wipes, logo reveals, or holiday-themed animations. Use the Arduino IDE to compile custom firmware, testing effects on small LED segments before deploying to full installations. Share your creations with the community, contributing to the ecosystem’s growth.
Safety and Best Practices
Reactive lighting installations operate continuously and unattended, making safety non-negotiable.
Electrical Code Considerations
Low-voltage DC systems (under 60V) generally avoid strict electrical code requirements, but best practices mirror AC wiring: use proper gauge wire, secure connections in junction boxes, and avoid running parallel to AC mains to prevent induced noise. For installations in walls or ceilings, use plenum-rated wire insulation to meet fire code if required by local regulations.
Fire Safety for Continuous Operation
Never leave high-power LED installations running unattended at full brightness. Install thermal probes near power supplies and dense LED clusters, programming automatic shutdown if temperatures exceed 70°C. Use metal enclosures for power supplies, not plastic, and maintain 6 inches of clearance from combustible materials. A smoke detector positioned near your installation provides cheap insurance against catastrophic failure.
Budgeting Your Project
Reactive lighting costs scale dramatically with LED count, density, and synchronization complexity. Strategic budgeting allocates funds where they matter most.
Component Cost Breakdown
For a typical 200-LED behind-TV installation: addressable RGBW strips ($40), ESP32 controller ($8), 5V 20A power supply ($25), connectors and wire ($15), and aluminum channels ($30) total approximately $118. HDMI capture adds $50-100 for hardware and requires a Raspberry Pi ($75). Budget 20% extra for contingency—failed components, shipping costs, or design changes.
Cost-Saving Strategies vs. Premium Upgrades
Save by using standard RGB strips instead of RGBW for music-focused builds, and by repurposing old USB chargers for small test installations. Splurge on quality power supplies (Mean Well brand) and aluminum channels—these affect reliability and aesthetics daily. Avoid cheap clone microcontrollers; genuine ESP32 boards have better voltage regulation and longevity. Buy LED strips in 5-meter reels rather than pre-cut lengths for maximum flexibility and lower per-meter cost.
Frequently Asked Questions
How many LEDs do I need for behind-TV bias lighting?
For a 55-inch TV, a single strip of 150-200 LEDs placed 2-3 inches from the wall provides even illumination. Larger screens (75-inch+) benefit from 250-300 LEDs or multi-zone setups that independently control top, bottom, and side segments for more accurate color representation.
Can I use my TV’s USB port to power the LED strips?
No—TV USB ports typically supply 0.5-1 amps, while reactive installations require 5-20 amps depending on LED count and brightness. Attempting this will cause flickering, incomplete colors, and potential damage to your TV’s USB controller. Always use a dedicated, appropriately rated power supply.
What’s the latency difference between music and movie sync?
Music sync via microphone or line-in typically has 30-50ms latency, which feels natural since light and sound travel at different speeds. Movie sync requires sub-20ms latency to avoid visible lag between on-screen action and wall illumination. HDMI capture achieves this; screen sampling methods often exceed 50ms and feel disjointed.
Do I need programming experience to build a reactive system?
No—pre-compiled firmware like WLED Sound Reactive installs via web browser and configures through a graphical interface. Basic computer skills suffice for most builds. Programming becomes necessary only for custom effects or deep integration with proprietary smart home systems.
Will reactive lighting work with streaming services like Netflix or Disney+?
Screen sampling methods capture any content playing on your computer, including streaming services. However, HDMI capture may encounter HDCP (copy protection) issues with some streaming devices. Using a splitter that strips HDCP or capturing from a PC’s graphics card output solves this legally and reliably.
How do I prevent LED strips from falling off over time?
Clean surfaces with alcohol, apply 3M VHB tape, and mount in aluminum channels. For problematic surfaces (textured walls, dusty environments), use hot glue at strip ends and every 12 inches along the length. Avoid moving or adjusting strips after initial mounting—adhesive strength degrades significantly after the first removal.
Can I sync multiple rooms together?
Yes—use a central controller running xLights or Jinx! software that streams synchronized data to multiple ESP32 receivers via Wi-Fi or Ethernet. Each room runs its own LED strip but receives coordinated commands, creating whole-home reactive effects for parties or immersive gaming experiences.
What’s the lifespan of a DIY reactive lighting system?
Quality LEDs last 50,000+ hours (17 years at 8 hours daily use) when properly cooled and operated at 70% brightness. Power supplies typically fail first after 3-5 years of continuous operation. Microcontrollers rarely fail but may become obsolete as software evolves. Design your system with replaceable controllers and power supplies for longevity.
Is it safe to leave reactive lights on 24/7?
Continuous operation is safe if thermal management is adequate and brightness is capped at 50-70%. At full brightness, LED temperatures can exceed safe limits, accelerating degradation. Implement automatic brightness scheduling—reduce to 30% during late night hours and increase for active viewing periods.
How do I sync lights to external speakers instead of TV audio?
Use a line-level audio splitter to feed your amplifier and microcontroller simultaneously. Connect the microcontroller’s audio input to your receiver’s pre-out or tape-out jacks, which provide fixed-level signals unaffected by volume changes. This ensures consistent light response regardless of master volume setting, and isolates your LED controller from speaker-level voltages that could damage inputs.