As climate patterns shift and wildfire seasons grow longer and more intense, the air we breathe has become increasingly unpredictable. For residents in wildfire-prone regions, checking the morning air quality has become as routine as checking the weather. But here’s the problem: official monitoring stations can be miles away, leaving you blind to dangerous smoke plumes that could be affecting your property, your livestock, or your family’s health right now.
This is where outdoor air quality sensors designed specifically for wildfire zones become not just helpful, but essential. Unlike generic monitors that wilt under extreme conditions, modern wildfire-ready sensors offer military-grade resilience and laboratory-grade accuracy. But with dozens of options flooding the market, how do you separate the truly capable from the merely adequate? The answer lies not in brand names, but in understanding the non-negotiable features that make a sensor trustworthy when everything is on the line.
Top 10 Outdoor Air Quality Sensors for Wildfire Zones
Detailed Product Reviews
1. Honeywell C7089U1006 Replacement Outdoor Temperature Sensor 10" Leads by Wholesale Sensors 12 Month Warranty
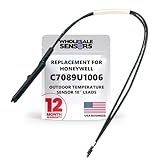
Overview: This is a wired outdoor temperature sensor designed as a direct replacement for Honeywell’s C7089U1006 model. Manufactured by Wholesale Sensors in the USA, it features 10-inch leads and integrates with various Honeywell thermostat systems to provide accurate outdoor temperature readings for optimized HVAC performance.
What Makes It Stand Out: The 12-month warranty from a USA-based manufacturer provides confidence in quality and support. Its broad compatibility spans multiple Honeywell thermostat families including VisionPRO, FocusPRO, and RTH series. The sensor enables smart thermostat adjustments based on real-time outdoor conditions, allowing your system to precondition your home and avoid unnecessary heating or cooling cycles.
Value for Money: At $18.99, this sensor offers exceptional value compared to OEM replacements that often cost significantly more. The energy efficiency gains from proper outdoor temperature monitoring can yield noticeable utility bill reductions, potentially recouping the investment within a single season. The included warranty eliminates the risk common with generic components.
Strengths and Weaknesses: Strengths include the USA manufacturing, comprehensive warranty, wide compatibility with Honeywell ecosystems, and straightforward installation for those comfortable with low-voltage wiring. The primary weakness is the wired design, which requires routing cable from outdoors to your thermostat location. The 10-inch leads may prove short for some installations, potentially requiring splicing. It’s also limited to Honeywell-compatible systems.
Bottom Line: For Honeywell thermostat owners seeking reliable outdoor temperature data without premium OEM pricing, this Wholesale Sensors replacement delivers solid performance and peace of mind. It’s an economical upgrade that enhances HVAC efficiency and comfort.
2. Ambient Weather PM2.5 Wireless Outdoor Particulate Monitor

Overview: This outdoor air quality monitor specializes in measuring PM2.5 particulate pollution around your property. Featuring a Swiss-made Sensirion sensor, it wirelessly transmits data to the Ambient Weather Network while integrating with major smart home platforms. The solar-powered design with battery backup ensures continuous operation without frequent maintenance.
What Makes It Stand Out: The high-quality Sensirion sensor provides laboratory-grade accuracy for fine particulate detection. Its seamless integration with the Ambient Weather Network enables detailed data logging, customizable alerts, and historical trend analysis. Voice control compatibility with Google Home and Amazon Alexa brings air quality data directly into your smart home ecosystem. The solar panel with Ni-MH battery backup eliminates the hassle of frequent battery changes.
Value for Money: Priced at $124.99, this monitor sits in the mid-range for dedicated outdoor PM2.5 sensors. The professional-grade sensor component and robust wireless infrastructure justify the cost compared to basic indoor-only units. Solar power reduces long-term operating expenses, while the smart features provide actionable insights that can inform health decisions and ventilation timing.
Strengths and Weaknesses: Key strengths include exceptional sensor accuracy, reliable wireless connectivity, comprehensive data platform access, smart home integration, and eco-friendly solar operation. The compact design withstands outdoor elements well. Weaknesses include reliance on the Ambient Weather Network for full functionality, potential connectivity issues in areas with poor Wi-Fi coverage, and reduced solar efficiency in heavily shaded locations. The price may exceed casual users’ budgets.
Bottom Line: For homeowners serious about monitoring outdoor air quality with professional-grade accuracy and smart home convenience, this sensor justifies its price through reliable performance and rich data insights. It’s particularly valuable for those in areas affected by wildfires or industrial pollution.
3. Honeywell C7089U1006 Replacement Outdoor Temperature Sensor 10" Made in The USA 12 Month Warranty

Overview: This USA-manufactured replacement sensor delivers the same functionality as Honeywell’s original C7089U1006 at a fraction of the cost. Designed for seamless integration with Honeywell’s thermostat ecosystem, it provides accurate outdoor temperature readings to optimize your HVAC system’s performance and efficiency. The product emphasizes domestic manufacturing quality and craftsmanship.
What Makes It Stand Out: The explicit “Proudly Made in the USA” commitment appeals to buyers prioritizing domestic manufacturing and quality control. Backed by Wholesale Sensors’ 12-month warranty, this component ensures reliable performance across Honeywell’s popular thermostat lines including VisionPRO and FocusPRO series. It transforms compatible thermostats into weather-responsive systems that anticipate heating and cooling needs based on actual outdoor conditions.
Value for Money: At $18.99, this sensor presents identical value to similar replacements while adding the premium of USA production. The energy savings from intelligent HVAC modulation can quickly offset the purchase price. For consumers who actively seek American-made products, this represents rare value in the electronics accessories market where overseas manufacturing dominates.
Strengths and Weaknesses: Strengths include domestic manufacturing quality assurance, comprehensive warranty protection, extensive Honeywell compatibility, and proven energy efficiency benefits. The wired installation provides reliable data transmission without wireless interference concerns. Weaknesses mirror similar units: the 10-inch lead length may require extensions, installation demands low-voltage wiring comfort, and it’s restricted to Honeywell-compatible systems. The physical sensor housing offers basic weather resistance but not premium sealing.
Bottom Line: This sensor serves Honeywell thermostat owners who value American manufacturing without paying premium prices. It delivers identical performance to import alternatives while supporting domestic production, making it an ethical and economical choice for enhancing home climate control.
4. Honeywell - Wireless Outdoor Air Sensor
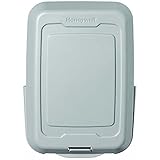
Overview: Honeywell’s wireless outdoor air sensor provides cord-free temperature and humidity monitoring for compatible Honeywell thermostat systems. Eliminating the need to route wires through walls, this sensor communicates via Honeywell’s proprietary wireless protocol to deliver accurate outdoor climate data. Positioned as a premium alternative to wired sensors, it targets homeowners seeking clean installation aesthetics and system flexibility.
What Makes It Stand Out: The wireless design removes the most challenging aspect of outdoor sensor installation—fishing wires through finished walls. As a genuine Honeywell component, it ensures seamless compatibility with RedLINK-enabled thermostats and other premium Honeywell climate control systems. The sensor typically monitors both temperature and humidity, providing comprehensive outdoor data that enables advanced features like automatic humidity control and intelligent recovery.
Value for Money: At $93.97, this sensor commands a significant premium over wired alternatives. However, the installation time savings and avoidance of wall modification costs can justify the expense, particularly in finished homes where wire routing would require professional assistance. For DIYers, the wireless convenience eliminates hours of labor. The Honeywell brand pedigree also promises longer service life and reliable connectivity.
Strengths and Weaknesses: Primary strengths include effortless installation, flexible sensor placement up to several hundred feet from the receiver, clean aesthetics without exposed wires, and integration with Honeywell’s ecosystem. The wireless protocol is robust against interference. Weaknesses include the premium price point, dependency on periodic battery changes, limited compatibility to Honeywell’s wireless-capable thermostats, and potential signal challenges in homes with thick masonry walls. Performance relies on maintaining clear line-of-sight.
Bottom Line: This wireless sensor justifies its higher cost through installation simplicity and placement flexibility. It’s ideal for existing homes where wiring is impractical and for Honeywell users wanting premium system integration without wall modifications.
Understanding Wildfire Smoke Composition and Sensor Requirements
The Invisible Threat: PM2.5 and Beyond
Wildfire smoke is a complex cocktail of gases and particulate matter that evolves as it travels. While most people focus on PM2.5—those microscopic particles that penetrate deep into your lungs—comprehensive monitoring requires a broader view. The most dangerous smoke plumes contain elevated levels of carbon monoxide (CO), nitrogen dioxide (NO2), volatile organic compounds (VOCs), and even hazardous air pollutants like formaldehyde and benzene. A sensor that only measures PM2.5 is like a smoke alarm that only detects heat: useful, but dangerously incomplete.
The chemical composition changes based on what’s burning, temperature, and distance from the fire. Fresh smoke from a crown fire in pine forest differs dramatically from aged smoke that has traveled 100 miles and picked up urban pollutants along the way. Your sensor needs to detect these variations, not just provide a single “smoke” reading.
Why Standard Air Quality Monitors Fall Short
Indoor air quality monitors are built for climate-controlled environments. When you place them outdoors in wildfire country, they fail in predictable ways. Consumer-grade sensors typically use optical particle counters that become saturated in heavy smoke, reporting artificially low readings when you need accuracy most. Their temperature ratings often stop at 104°F (40°C), making them useless during the extreme heat events that coincide with major fires.
More critically, standard monitors lack the data redundancy and power backup systems necessary during emergencies. When evacuation orders hit and grid power fails, your sensor becomes a paperweight unless it’s designed for true outdoor resilience. Wildfire-ready sensors use heated inlets to prevent condensation, optical paths that resist contamination, and materials that won’t off-gas when exposed to heat.
10 Must-Have Features for Wildfire-Zone Air Quality Sensors
The gold standard for particulate detection is laser scattering technology, but not all laser sensors are created equal. Look for units employing dual-frequency laser diodes that can differentiate particle sizes with greater precision. Single-frequency lasers struggle to distinguish between fine dust and combustion particles, leading to false positives during dust storms and false negatives during subtle smoke events.
Advanced sensors utilize 660nm and 780nm wavelengths simultaneously, creating a particle size distribution profile rather than a simple mass concentration. This matters because wildfire smoke particles have a specific size signature—typically peaking around 0.3 microns—that differs from traffic pollution or agricultural dust. The dual-frequency approach reduces the signal-to-noise ratio by up to 40% in field conditions, giving you confidence that a reading spike represents actual smoke, not a passing tractor.
When smoke rolls in at 2 AM, you can’t afford a sensor that batches data hourly or relies solely on your home WiFi. Professional-grade sensors offer cellular LTE-M/NB-IoT connectivity with automatic failover to WiFi or LoRaWAN mesh networks. This redundancy ensures data flows even when local internet infrastructure is compromised.
Transmission frequency is equally critical. Opt for sensors that publish data every 1-3 minutes during elevated events. Some advanced models use adaptive sampling—they’ll switch from 10-minute intervals during normal conditions to 60-second bursts when PM2.5 exceeds 35 µg/m³. This preserves battery while ensuring you get minute-by-minute updates when it matters most. Look for MQTT protocol support with SSL encryption, which provides faster, more secure data transfer than traditional HTTP APIs.
Your sensor must function when temperatures soar past 120°F and humidity plummets to single digits—the exact conditions during major fire events. Verify the operating range extends to at least -4°F to 140°F (-20°C to 60°C) with humidity tolerance from 0-100% RH non-condensing. The enclosure should include active thermal management, not just passive cooling.
Internal heating elements prevent frost buildup in winter and condensation during rapid temperature swings. Some sensors employ thermoelectric cooling to stabilize the optical chamber temperature, ensuring consistent readings regardless of ambient conditions. Without this, you’ll see drift of 15-30% in PM readings during extreme heat, precisely when accuracy is non-negotiable.
Calibration isn’t a “nice-to-have”—it’s the difference between actionable data and dangerous guesswork. Sensors with NIST-traceable calibration come with certificates linking their measurements back to national standards. More importantly, they offer field calibration ports or automated zero-point checks using internal HEPA filters.
During wildfire season, smoke residue coats optical components, causing gradual drift. The best sensors perform automatic baseline corrections every 24 hours using a built-in zero-air generator. For manual calibration, look for units that can be calibrated in under 30 minutes without returning to the factory. Some systems allow you to attach a certified calibration gas cylinder and run a semi-automated procedure via smartphone app, saving $200-400 in annual service costs.
A smoke-focused sensor must measure at minimum: PM1, PM2.5, PM10, CO, and NO2. Premium models add VOC detection using metal-oxide semiconductor (MOS) or photoionization detector (PID) technology. CO is particularly crucial—it indicates fresh, dangerous smoke, while elevated NO2 suggests photochemical aging or mixed urban-wildfire pollution.
The sensor suite should include environmental parameters: temperature, humidity, barometric pressure, and wind speed/direction (either integrated or via external anemometer). This meteorological data helps predict smoke behavior. For instance, dropping barometric pressure often precedes a smoke column collapse, which can cause sudden, localized air quality deterioration. Without these context clues, you’re reacting to data instead of anticipating threats.
The IP (Ingress Protection) rating tells you exactly how well a sensor withstands the elements. IP65 means complete dust protection and resistance to water jets from any direction—essential when firefighting aircraft drop retardant or water nearby. For coastal wildfire zones, consider IP67, which handles temporary immersion.
The enclosure material matters as much as the rating. Marine-grade 316 stainless steel or UV-stabilized polycarbonate won’t degrade under intense sun or release gases when heated. Avoid painted metal enclosures—the paint can off-gas VOCs that contaminate readings. The inlet design should include a rain hat and insect screen, plus a heated inlet tube to prevent moisture condensation that would otherwise destroy particulate data integrity.
In evacuation scenarios, you can’t service your sensor. Look for units with 12-24 month maintenance intervals and comprehensive self-diagnostics. The system should monitor fan speed, laser intensity, filter clogging, and communication health, sending alerts when intervention is needed.
Advanced sensors use reversible fans that can purge the inlet daily, reducing manual cleaning from monthly to quarterly. Optical windows with electrostatic repulsion keep particles from settling, maintaining accuracy with minimal intervention. The best systems provide a “health score” in the dashboard—if it drops below 85%, you know it’s time for maintenance before readings become unreliable.
Your personal sensor becomes infinitely more valuable when it feeds into broader alert networks. Seek sensors compatible with platforms like AirNow, PurpleAir, or local air quality management district APIs. This allows your data to validate official readings and fill coverage gaps.
Crucially, the sensor should support IFTTT or webhook integrations for personal alerts. Set up triggers like: “If PM2.5 > 100 µg/m³ for 10 minutes, then call my phone, flash my smart lights red, and activate HVAC recirculation mode.” During fast-moving fires, these automated responses buy precious minutes. Some sensors integrate directly with emergency alert systems, automatically posting to local community boards or NextDoor groups.
Grid power is unreliable during wildfires. Your sensor needs multiple power options: primary AC with PoE (Power over Ethernet), secondary solar panel with battery bank, and tertiary backup batteries. The system should seamlessly switch between sources without data interruption.
Battery capacity matters. During the 2020 California fires, some areas lost power for 5-7 days. A proper backup system should run 10-14 days on battery alone, using aggressive power management like shutting down non-critical sensors during low-power mode. Solar panels should be minimum 20W with MPPT charge controllers to maximize charging during smoke-dimmed sunlight. Some systems use wind turbines as supplemental power in windy fire corridors.
Your data should be yours, period. Avoid sensors that lock data behind proprietary apps without export options. Look for RESTful APIs with JSON output, allowing you to download historical data in CSV format or integrate with home automation systems.
The dashboard should offer more than pretty graphs. Seek platforms with machine learning anomaly detection that can differentiate between sensor drift and genuine events. Historical data retention matters too—minimum 2 years of storage lets you analyze patterns and prepare for future seasons. Open-source firmware support is a bonus, allowing community-driven improvements and ensuring your investment isn’t orphaned if the manufacturer discontinues support.
Installation Best Practices for Wildfire-Prone Areas
Strategic Placement and Height Considerations
Sensor placement follows the “breathing zone” principle but with wildfire-specific adjustments. Mount sensors 10-15 feet high to avoid ground dust and lawnmower interference, but below rooflines where heat accumulation occurs. Position them at least 10 feet from HVAC exhausts, dryer vents, or barbecue areas.
For property-wide monitoring, place sensors on the side most likely to receive initial smoke exposure—typically the prevailing windward side during fire season. If you live in a valley or canyon, add a second sensor at the highest elevation point on your property. Smoke pools in low-lying areas, and a 50-foot elevation difference can mean a 3x variation in PM2.5 concentration. The goal is creating a vertical profile, not just a single point measurement.
Protecting Your Investment from Extreme Heat
During a firestorm, radiant heat can exceed 200°F even before flames arrive. Install sensors on metal poles rather than directly on wooden structures. Use non-combustible mounting brackets and keep sensors at least 30 feet from overhanging trees. Some homeowners install automated sprinkler systems that activate when temperatures exceed 150°F, creating a cooling mist barrier around the sensor.
Thermal shielding helps too. A simple aluminum sunshade can reduce internal temperatures by 20-30°F. For maximum protection, consider sensors with automatic shutdown modes that retract sensitive optics when ambient temperatures exceed operating limits, then automatically recalibrate when conditions normalize. This prevents permanent damage during the most extreme events.
Network Density: How Many Sensors Do You Need?
A single sensor tells you what’s happening at one point. A network reveals the story. For a typical 1-acre property, one well-placed sensor suffices for personal safety. But for ranches, vineyards, or communities, deploy sensors in a grid pattern with 500-1000 foot spacing.
This density captures microclimates—smoke channels through vegetation differently than open fields. In community networks, this granularity helps identify safe evacuation routes. One California community used their sensor network to discover that a specific ridge road maintained acceptable air quality even when the main highway was blanketed in toxic smoke, providing a critical alternative exit during the 2021 Caldor Fire.
Data Interpretation: Beyond the AQI Number
Understanding the Air Quality Index (AQI) vs. Raw Data
The AQI is a simplified index designed for public communication, but it can obscure critical details. AQI calculations use 24-hour averages, which smooth out dangerous spikes. During a wildfire, you care about the current concentration, not yesterday’s average.
Learn to read raw microgram-per-cubic-meter (µg/m³) values for PM2.5. The EPA’s “unhealthy” threshold is 55 µg/m³, but sensitive individuals experience symptoms above 35 µg/m³. Real-time raw data lets you set personal thresholds. For example, asthmatic children might need to stay indoors when PM2.5 exceeds 25 µg/m³, even if the AQI shows “moderate.” Your sensor’s dashboard should display both AQI and raw data simultaneously, with the ability to toggle 1-hour, 10-minute, and real-time averages.
Setting Up Custom Alert Thresholds
Default alerts are too conservative for fire zones. Configure multi-level alerts: Warning at 35 µg/m³, Alert at 55 µg/m³, and Emergency at 150 µg/m³. But add rate-of-change triggers too—a 50 µg/m³ increase in 15 minutes signals an approaching plume, even if absolute levels are still “moderate.”
Use hysteresis to prevent alert spam. Set a “clear” threshold 10-15% lower than the “trigger” threshold so alerts don’t toggle on and off with minor fluctuations. Time-based conditions help too: only trigger emergency alerts if levels remain above 150 µg/m³ for 5 consecutive minutes, filtering out brief spikes from passing vehicles or local dust.
Correlating Sensor Data with Official Monitoring Stations
Your sensor readings will differ from the nearest EPA station—that’s expected and valuable. EPA stations use federal equivalent methods (FEM) with $50,000 equipment and hourly averaging. Your sensor provides hyperlocal, minute-by-minute data.
Create a baseline correlation. During clear days, compare your sensor’s 24-hour average to the EPA station. A 10-15% variance is normal. When your sensor suddenly diverges by 50% or more while the EPA station shows no change, you’ve detected a localized event: perhaps a small spot fire, a neighbor’s debris burning, or a smoke channel the official network missed. This hyperlocal detection is your competitive advantage. Document these patterns to understand your property’s unique smoke behavior.
Maintenance and Calibration in Harsh Environments
Seasonal Maintenance Checklists
Pre-fire season (typically late spring), perform a comprehensive service: clean the inlet with compressed air, inspect the solar panel for cracks, test battery capacity under load, and run a zero-air calibration check. Verify communication modules by temporarily disconnecting primary power to force failover.
Mid-season, perform quick visual inspections monthly—check for spider webs, debris buildup, or physical damage. After significant smoke events (>200 µg/m³ for 6+ hours), run a diagnostic cycle. Smoke deposits can coat optics within days of heavy exposure. Some sensors report “optical contamination index” in their dashboard; if this exceeds 15%, schedule a cleaning.
Post-season, deep clean all components and recalibrate using certified reference gases. Store backup batteries at 50% charge if removing them for winter, which maximizes battery lifespan. Update firmware—manufacturers often release seasonal improvements based on the previous fire year’s data.
When to Recalibrate: Wildfire Smoke Exposure Impact
Heavy smoke exposure accelerates calibration drift. A sensor might hold calibration for 12 months in clean suburban air but need recalibration after just 3 months of repeated smoke events. The key metric is “smoke load”—the cumulative PM exposure measured in microgram-hours.
Track your sensor’s smoke load in the dashboard. Above 50,000 µg-hours (equivalent to 10 days at 200 µg/m³), schedule recalibration. Some advanced sensors automatically adjust their calibration curves based on smoke load, extending manual calibration intervals to 18-24 months even in heavy use. However, never exceed the manufacturer’s maximum interval, as other components degrade independent of smoke exposure.
Cost Considerations and ROI Analysis
Initial Investment vs. Long-Term Value
Entry-level wildfire-ready sensors start around $800, while professional-grade units exceed $3,000. The difference isn’t just accuracy—it’s total cost of ownership. A $1,200 sensor with 5-year warranty and self-calibration costs less over time than an $800 unit needing $200 annual factory calibration.
Factor in installation costs: mounting hardware ($50-150), solar power kit ($200-400), and cellular data plan ($5-15/month). Some manufacturers bundle these; others charge à la carte. The hidden cost is time—a sensor requiring monthly cleaning consumes 12 hours annually versus 2 hours for a low-maintenance unit. At $50/hour opportunity cost, that’s a $500/year difference.
Calculate ROI based on prevented losses. One avoided asthma ER visit ($3,000) or protecting valuable livestock from smoke stress ($5,000+ in veterinary costs) justifies the investment. For businesses, maintaining operations during smoke events can save thousands in lost revenue.
Subscription Models vs. One-Time Purchase
Many sensors require ongoing subscriptions for data storage, cellular connectivity, or advanced analytics. Evaluate what you’re paying for: basic data access should be free; premium features like ML predictions or API access may warrant a fee.
Avoid subscriptions that lock core functionality. A $15/month fee for data you already own is a red flag. Instead, look for “freemium” models: free basic dashboard with optional $10/month for extended history or advanced alerts. Some community networks offer free cellular data in exchange for sharing your data publicly—an excellent option for residents who want to contribute to regional monitoring.
Consider cellular plan flexibility. Can you pause the $10/month plan during off-season? Can you switch from cellular to WiFi without penalties? The best providers offer month-to-month plans with no activation fees, recognizing that fire seasons are becoming year-round but still have quiet periods.
Community Networks vs. Individual Sensors
The Power of Crowdsourced Air Quality Data
A single sensor is a data point; a network is a prediction engine. Community sensor networks like those in Chico, California or Bend, Oregon provide block-level resolution that official stations can’t match. When 50 sensors in a 5-mile radius all show simultaneous spikes, the system can triangulate smoke source direction and speed.
Joining a network improves your sensor’s value through data validation. If your sensor reads 180 µg/m³ but neighbors show 40 µg/m³, you know to check for local contamination rather than a regional smoke event. Many networks use Bayesian correction algorithms, weighting readings based on each sensor’s historical accuracy and recent calibration status. This crowdsourced QC catches failing sensors before they spread misinformation.
Privacy and Data Ownership Considerations
Before joining a network, read the data policy. Who owns your data? Can you delete historical readings? Some networks claim perpetual license to your data, even after you leave. Opt for networks with clear data sovereignty terms—you own it, they can only use it while you’re a member.
Consider data anonymization. If your sensor is at your home address, do you want the exact location public? Good networks offer 500-meter location fuzzing for public maps while maintaining precise location for your private dashboard. For ranches or businesses, public location might be fine; for residential users, privacy matters.
Be wary of networks that sell your data to third parties without compensation. Some commercial networks monetize your free data while charging you subscription fees. Non-profit or university-run networks typically offer better terms, though they may have fewer fancy features.
Regulatory Compliance and Certification
EPA Alignment and Federal Standards
While consumer sensors aren’t required to meet EPA standards, alignment ensures your data compares meaningfully to official warnings. Look for sensors tested under the Air Quality Sensor Performance Evaluation Center (AQ-SPEC) program. These undergo field testing against reference-grade monitors in real smoke conditions.
The EPA’s “sensor scale” rating (A, B, C) indicates performance tier. Tier A sensors correlate within 10% of reference monitors during smoke events. Tier C sensors may deviate 30% or more. During the 2023 wildfire season, only Tier A and B sensors were used in official smoke mapping tools in California and Oregon. Using a Tier C sensor might save money but could provide dangerously inaccurate data when you need it most.
Local Air District Requirements
Some air quality management districts offer rebates or free sensors with strings attached. The Bay Area Air Quality Management District provides $200 rebates but requires data sharing and annual calibration verification. Others, like the San Joaquin Valley APCD, have specific placement requirements for sensors used in regulatory complaints.
If you plan to use sensor data for insurance claims or legal disputes (e.g., proving smoke damage to crops), verify your sensor meets your state’s evidence standards. Some jurisdictions require chain-of-custody documentation and professional installation for data admissibility. A $200 “certified installation” by a licensed technician can make the difference between a successful claim and dismissed evidence.
Future-Proofing Your Air Quality Monitoring Setup
Emerging Technologies on the Horizon
The next generation of wildfire sensors integrates gas chromatography and mass spectrometry (GC-MS) capabilities, allowing identification of specific toxic compounds. While currently lab-bound, portable MEMS-based GC-MS units are entering field testing. A sensor purchased today should have firmware-upgradeable hardware to support new detection modules.
Artificial intelligence is revolutionizing prediction. Some sensors now include edge AI that analyzes local wind patterns, temperature gradients, and particulate composition to predict smoke arrival 30-60 minutes before it happens. This “smoke forecasting” turns your sensor from a reporter into a sentinel. Ensure your sensor’s processor has spare capacity for future AI model updates—look for devices with ARM Cortex-A53 or better processors rather than basic microcontrollers.
Scalability and System Expansion
Start with one sensor, but plan for five. Choose a platform where adding sensors is plug-and-play, sharing the same cellular plan and dashboard. The best systems automatically mesh, creating redundant communication pathways. If one sensor loses cellular signal, it can route data through neighboring sensors via LoRaWAN.
Modular design is key. Can you add a gas detection module next year? Upgrade the particulate sensor without replacing the entire unit? Look for sensors with USB-C or M.2 expansion ports. This modularity extends system lifespan from 3-4 years to 7-10 years, spreading the investment over time. Avoid all-in-one sealed units unless cost is the absolute primary concern.
Frequently Asked Questions
How accurate are consumer-grade sensors compared to official EPA stations?
Tier A certified consumer sensors achieve within 10% accuracy for PM2.5 compared to EPA reference monitors during smoke events. However, they excel at temporal resolution—providing minute-by-minute data versus the EPA’s hourly averages—making them better for immediate decision-making despite slightly lower absolute accuracy. The key is proper calibration and understanding that your sensor measures your specific location, not a regional average.
Can one sensor cover my entire property?
One sensor effectively monitors about 1/4 acre in flat terrain. For larger properties, smoke behavior varies dramatically based on topography and vegetation. A 5-acre ranch needs 2-3 sensors: one near the home, others at property edges or near valuable assets like barns or vineyards. The goal is understanding smoke flow patterns, not just a single-point measurement.
How often do sensors need calibration in wildfire zones?
In heavy smoke zones, schedule calibration every 3-6 months or after cumulative smoke load exceeds 50,000 µg-hours. Light smoke exposure areas can extend to 12 months. Sensors with automatic zero-point checks and contamination indices can often double these intervals. Always recalibrate after physical cleaning of optical components, as this changes the sensor’s baseline.
What’s the difference between PM2.5 and AQI?
PM2.5 is the concentration of fine particles (micrograms per cubic meter), while AQI is a color-coded index that incorporates PM2.5, PM10, ozone, CO, NO2, and SO2 into a single number. AQI uses 24-hour averages, smoothing out dangerous spikes. For wildfire safety, focus on real-time PM2.5 concentrations, using AQI only as a general public health guideline.
Do I need WiFi for these sensors to work?
No. Professional sensors use cellular LTE-M/NB-IoT with 5-10 year battery life, making them independent of local infrastructure. This redundancy is crucial during power outages. WiFi is useful as a backup or for high-data-rate features like firmware updates, but should never be the sole connectivity method in fire-prone areas.
How long do outdoor air quality sensors typically last?
Quality sensors last 5-7 years in harsh environments, with the laser particulate counter typically being the first component to degrade. Sensors with replaceable modules can last 10+ years. The limiting factor is often battery capacity in solar units—LiFePO4 batteries handle 2000+ cycles but still degrade. Plan for battery replacement every 5 years, costing $100-200.
Can sensors detect when a wildfire is approaching?
Sensors detect smoke, not flames. However, advanced models with edge AI can identify “fresh smoke signatures”—high CO, specific VOC ratios, and rapid PM2.5 rise—indicating a fire within 5-10 miles. Combined with wind data, this provides 30-60 minutes of warning before visible smoke arrives. They’re not a replacement for official fire alerts but offer hyperlocal early warning.
Are these sensors difficult to install myself?
Most require basic DIY skills: mounting on a pole, connecting solar panel, and activating cellular service. The technical setup involves smartphone app pairing and dashboard configuration. Professional installation ($200-400) is recommended for permanent concrete mounts, integrating with home automation, or ensuring optimal placement. Many manufacturers offer video-guided installation that takes 1-2 hours for a handy homeowner.
What happens to sensor accuracy during extreme heat?
Without thermal management, accuracy can drift 15-30% above 120°F. Quality sensors with internal temperature stabilization maintain accuracy within 5% across their full operating range. The bigger issue is heat-induced component failure—solder joints cracking, battery thermal runaway. This is why extended temperature ratings and active cooling are non-negotiable for fire zones.
Is it better to join a community network or have my own private sensor?
Do both. Run a private sensor for personal alerts and property-specific data, and contribute a second sensor (or share data from your private one) to a community network. This gives you hyperlocal control while benefiting from regional data validation and prediction models. Many community networks offer free cellular data for shared sensors, effectively paying for your connectivity. The dual approach provides redundancy—if your private system fails, community data still protects you, and vice versa.