Transforming your house into a smart, secure sanctuary has never been more intuitive. Apple HomeKit has revolutionized how we interact with our home security systems, offering unprecedented levels of integration, privacy, and control. But with a growing ecosystem of compatible devices, navigating the landscape of HomeKit-enabled security alarms requires more than just scanning spec sheets—it demands a deep understanding of how these systems truly perform within Apple’s walled garden.
Whether you’re building a smart home from scratch or retrofitting existing security infrastructure, the decision to go all-in on HomeKit compatibility impacts everything from response times and automation possibilities to your long-term privacy and total cost of ownership. This comprehensive guide cuts through the marketing jargon to equip you with the expert knowledge needed to evaluate security systems that don’t just “work with” HomeKit, but integrate seamlessly into your digital lifestyle.
Top 10 Security Alarm Systems for Apple HomeKit
Detailed Product Reviews
1. eufy Security 5-Piece Home Alarm Kit, Home Security System, Keypad, Motion Sensor, 2 Entry Sensors, Home Alarm System, Control from The App, Links with eufyCam, Optional 24/7 Protection

Overview: The eufy Security 5-Piece Home Alarm Kit offers a streamlined entry into DIY home security with a budget-friendly approach. This system includes a HomeBase hub, keypad, motion sensor, and two entry sensors—covering essential entry points for apartments or small homes. Designed for self-installation, it promises setup in minutes without professional assistance.
What Makes It Stand Out: The zero-subscription model is this kit’s killer feature. Unlike competitors that gate core functionality behind paywalls, eufy provides full app control and instant alerts at no extra cost. The optional 24/7 professional monitoring service is genuinely optional, not mandatory. Integration with eufyCam cameras creates an expandable ecosystem, while the clean, minimalist hardware design blends into modern homes unobtrusively.
Value for Money: At $129.99, this kit dramatically undercuts the Ring Alarm 8-Piece Kit by over $100 while delivering comparable core functionality. The two included entry sensors limit initial coverage, but the ability to add sensors a la carte without committing to a subscription plan makes it economical for gradual expansion. For budget-conscious buyers wanting reliable security without recurring costs, this represents exceptional value.
Strengths and Weaknesses: Strengths include true no-monthly-fee operation, straightforward installation, responsive app notifications, and seamless eufy ecosystem integration. Weaknesses are the limited sensor count (only two entry sensors), smaller brand support network compared to Ring, and the fact that professional monitoring costs extra. The system also lacks native Z-Wave or Zigbee support, limiting third-party device compatibility.
Bottom Line: The eufy Security kit is ideal for renters and homeowners seeking affordable, no-frills security without subscription shackles. While it won’t suit those wanting comprehensive out-of-the-box coverage, its value proposition is unbeatable for the price-conscious DIYer.
2. Ring Alarm 8-Piece Kit (newest model), Home or business security system with optional 24/7 professional monitoring

Overview: Ring’s 8-Piece Alarm Kit represents the gold standard of consumer-friendly home security, designed for 1-2 bedroom homes. The comprehensive package includes a base station, keypad, four contact sensors, motion detector, and range extender—providing robust coverage from day one. As Amazon’s flagship security offering, it integrates seamlessly with the broader Ring ecosystem.
What Makes It Stand Out: The sheer completeness of this kit sets it apart. Four contact sensors allow securing multiple entry points immediately, while the range extender ensures reliable connectivity in larger spaces. The Ring app’s polish and reliability are industry-leading, offering intuitive control and rich notification options. Alexa integration is native and powerful, enabling voice arming and smart home routines that competitors struggle to match.
Value for Money: At $249.99, it’s double the price of budget alternatives but justifies the cost through superior hardware quantity and software refinement. The four sensors alone would cost $100+ if purchased separately. However, the true cost includes the Ring Protect subscription ($20/month for professional monitoring) which unlocks full potential. For those already invested in the Ring ecosystem or wanting Amazon’s seamless integration, the premium is worthwhile.
Strengths and Weaknesses: Strengths include comprehensive sensor coverage, exceptional app experience, reliable professional monitoring, and unmatched smart home integration. Weaknesses are the mandatory subscription for advanced features, Amazon’s privacy concerns, higher upfront cost, and ecosystem lock-in that discourages mixing with non-Ring devices.
Bottom Line: This kit excels for users wanting a polished, comprehensive security solution with professional backing. If you accept the subscription model and Amazon ecosystem, it’s the most user-friendly option available. Budget buyers should look elsewhere.
3. Abode 4 Piece Wireless Smart Security System - Works with Apple HomeKit, Z-Wave and Zigbee Devices - Expandable to Protect Your Whole Home - Easy DIY Installation - Optional Professional Monitoring
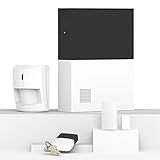
Overview: The Abode 4-Piece System targets smart home enthusiasts seeking maximum compatibility. Centered around a hub with built-in 93dB siren, it includes a motion sensor, key fob, and mini door/window sensor. Its standout feature is Works with Apple HomeKit certification—the only DIY system with this distinction—plus Z-Wave and Zigbee support.
What Makes It Stand Out: Unparalleled smart home integration is Abode’s crown jewel. HomeKit support means Siri control and automation through Apple’s Home app, while Z-Wave/Zigbee turns the hub into a universal smart home controller. The hub’s ethernet connectivity and battery backup provide reliability Wi-Fi-only systems can’t match. Professional monitoring starts at just 60 cents daily, offering flexibility competitors lack.
Value for Money: At $239.00, it’s pricey for only four components. You’re paying for the hub’s advanced connectivity and certifications rather than sensor quantity. Comparatively, you get less hardware than Ring’s 8-piece kit at a similar price. However, for Apple-centric households, this is the only legitimate choice. The value emerges through its role as a whole-home automation hub, not just a security system.
Strengths and Weaknesses: Strengths include best-in-class smart home integration, flexible monitoring options, reliable hub with backup, and expandability with virtually any Z-Wave/Zigbee device. Weaknesses are high cost-per-sensor, limited included hardware, complex setup for non-technical users, and no native Alexa/Google support (though works through HomeKit).
Bottom Line: Abode is the premium choice for Apple households wanting security integrated with whole-home automation. The high price and learning curve won’t suit everyone, but smart home power users will find it indispensable. Avoid if you just want simple plug-and-play security.
4. Onvis 4-in-1 Wireless Door Window Contact Sensor for Alarm System and Smart Home Automation ,Thermometer, Hygrometer, Only Works with Apple HomeKit (Thread) -Need to Upgrade The Firmware to 1.6.6

Overview: The Onvis sensor is a specialized HomeKit accessory that combines door/window monitoring with environmental sensing. This Thread-enabled device tracks open/close status, temperature, and humidity, serving multiple smart home functions simultaneously. It’s designed exclusively for Apple users with HomePod mini or Apple TV as a hub.
What Makes It Stand Out: Four sensors in one compact device at an affordable price point is impressive. Thread connectivity delivers instant, reliable alerts without the latency of Bluetooth-only sensors. The ability to trigger HomeKit automations based on temperature, humidity, or contact status creates unique possibilities—like turning on lights when a door opens or adjusting thermostat based on room conditions. No subscription or cloud dependency keeps data private.
Value for Money: At $34.99, it’s a bargain for HomeKit users. Individual contact sensors and temperature/humidity sensors would cost significantly more. However, the value is ecosystem-locked—you must have Apple devices and a HomeKit hub. For those invested in Apple’s ecosystem, it’s a no-brainer. For others, it’s worthless.
Strengths and Weaknesses: Strengths include multi-functionality, Thread reliability, Apple privacy focus, easy battery replacement, and no subscription fees. Weaknesses are HomeKit exclusivity, requires firmware update out of box, needs Apple hub for remote access, limited to 100 trigger records, and no Android support.
Bottom Line: This is a must-have for HomeKit users wanting affordable, multi-purpose sensors. Its Thread performance and four-in-one design are excellent. Absolutely avoid if you’re not committed to the Apple ecosystem, as it simply won’t work for you. Perfect for apartments and specific monitoring needs.
5. PGST Home Security System, Alarm System for Home Security, Phone Alert, Alarm Siren, Door/Window Sensors, Remotes, Compatible with Alexa, No Monthly Fee,for House Apartment Office

Overview: The PGST system is a budget-focused security powerhouse packing an unprecedented number of sensors. The kit includes a control panel, four motion sensors, eight door/window sensors, three RFID cards, three remotes, a siren, and an SOS button—providing comprehensive coverage for larger homes without subscription fees.
What Makes It Stand Out: The sheer sensor quantity is unmatched at this price point. Eight door sensors and four motion detectors cover extensive territory out of the box. Dual GSM/4G+WiFi connectivity ensures alerts reach your phone even during internet outages. The 120dB siren provides serious deterrence, while anti-tamper protection prevents disabling. Support for 99+ sensors allows massive expansion.
Value for Money: At $128.99, this is arguably the best hardware value in home security. You get 12 sensors plus accessories for the price of a basic 5-piece kit from major brands. The no-subscription model and dual connectivity add tremendous value. However, the unknown brand raises questions about long-term app support and reliability that premium brands don’t have.
Strengths and Weaknesses: Strengths include exceptional sensor count, dual connectivity, no monthly fees, anti-tamper features, and incredible expandability. Weaknesses are obscure brand reputation, potentially inferior app experience, no smart home integration (Alexa/Google mentioned but limited), and basic hardware aesthetics.
Bottom Line: PGST is perfect for budget buyers wanting maximum hardware coverage without subscriptions. It’s ideal for offices, warehouses, and large homes where quantity matters more than polish. Tech enthusiasts wanting smart home integration should invest elsewhere. For pure security value, it’s hard to beat.
6. SimpliSafe 8 Piece Wireless Home Security System - Optional 24/7 Professional Monitoring - No Contract - Compatible with Alexa and Google Assistant , White

Overview: The SimpliSafe 8 Piece Wireless Home Security System delivers serious protection without the complexity. This ready-to-deploy kit includes entry sensors for doors and windows plus motion detectors, all connecting to a central Base Station. Setup takes minutes through the intuitive SimpliSafe App—no drilling or wiring required. The system integrates seamlessly with Alexa and Google Assistant for voice control convenience.
What Makes It Stand Out: The optional 24/7 professional monitoring sets SimpliSafe apart from pure DIY solutions. You get one free month to experience rapid police response when alarms trigger, with plans starting under $1 daily and no long-term contracts. The motion sensors are thoughtfully designed to ignore pets under 60lbs, reducing false alarms. Entry sensors offer customizable “Secret Alerts” that notify you silently when private areas are accessed—ideal for medicine cabinets or home offices.
Value for Money: At $186.23, this kit undercuts traditional monitored systems by hundreds while offering comparable protection. The flexible monitoring model means you can self-monitor for free or activate professional oversight only when needed—perfect for vacations. Compared to ADT’s multi-year contracts, SimpliSafe’s month-to-month approach saves substantial money long-term.
Strengths and Weaknesses: Strengths include effortless installation, scalable design, pet-friendly operation, and the freedom of optional professional monitoring. The app provides complete remote control. Weaknesses are the US-only support, requirement of a subscription for advanced features, and limited smart home integration compared to some competitors.
Bottom Line: This system excels for homeowners wanting reliable professional monitoring without financial handcuffs. The eight-piece configuration covers essential entry points, making it an intelligent middle ground between basic DIY and expensive traditional security.
7. eufy Security, eufyCam 2C 2-Cam Kit, Security Camera Wireless Outdoor, Home Security System, HomeKit Compatibility, 1080p HD, IP67, Night Vision, Motion Only Alert, No Monthly Fee
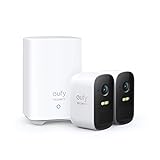
Overview: The eufyCam 2C 2-Cam Kit redefines wireless outdoor security with HomeKit compatibility and a steadfast commitment to zero subscription fees. These 1080p HD cameras deliver crisp footage day or night, boasting an IP67 weatherproof rating that laughs at harsh conditions. The wire-free design and impressive 180-day battery life eliminate maintenance headaches.
What Makes It Stand Out: HomeKit integration provides Apple users with seamless automation and secure local storage options. The intelligent Human Detection technology distinguishes people from passing cars or swaying branches using body shape and facial pattern analysis, dramatically reducing nuisance alerts. You get full feature access without the monthly fees that competitors like Ring and Arlo demand.
Value for Money: At $199.99 for two cameras, the value proposition is compelling when you factor in the six-month battery life and absence of recurring costs. Most cloud-based competitors charge $3-10 monthly per camera, making the eufyCam 2C pay for itself within two years. The IP67 durability ensures you won’t replace equipment after the first storm.
Strengths and Weaknesses: Strengths include exceptional battery longevity, true weatherproofing, Apple ecosystem integration, and accurate human detection. The 1080p resolution is adequate for most needs. Weaknesses include limited camera count in the base kit, potential range issues from the HomeBase, and less robust third-party smart home support outside Apple.
Bottom Line: For Apple-centric households seeking premium outdoor monitoring without subscription bloat, the eufyCam 2C is unmatched. The six-month battery life and intelligent detection make it a set-it-and-forget-it solution worth every penny.
8. Meross Smart Water Sensor Alarm 3 Pack, WiFi Water Leak Detector Support Apple HomeKit, SmartThings, IP67 Waterproof with App Alerts, Alarm, 100M Range for Home Basement Kitchen (Meross Hub Included)

Overview: The Meross Smart Water Sensor Alarm 3 Pack provides proactive defense against costly water damage. This comprehensive kit includes three IP67-rated sensors and a dedicated hub, creating a robust leak detection network for basements, kitchens, and bathrooms. The system integrates with Apple HomeKit (via bridge) and SmartThings, enabling smart home automation.
What Makes It Stand Out: The extraordinary 100-meter transmission range using SubG Wireless technology penetrates walls and floors that cripple WiFi signals, making basement monitoring reliable. The hyper-sensitive 0.5mm detection threshold catches leaks at their inception. Unlike basic alarms, these sensors can trigger automated responses—like cutting power to a fish tank pump when water is detected.
Value for Money: At $51.99 for three sensors plus a hub, this package borders on theft. Individual smart sensors typically cost $20-30 each without including a hub. The ability to expand to 16 sensors per hub future-proofs your investment, while the IP67 rating ensures longevity in humid environments where cheaper sensors fail.
Strengths and Weaknesses: Strengths include industry-leading range, included hub, waterproof construction, ultra-sensitive detection, and powerful automation capabilities. The local audible alarm provides immediate notification even without internet. Weaknesses require a Meross bridge for HomeKit, limited compatibility outside the Meross ecosystem, and the need for strategic sensor placement.
Bottom Line: Every homeowner should own this system. The negligible cost pales compared to average water damage claims exceeding $10,000. For comprehensive protection with smart automation, Meross delivers unmatched value and reliability.
9. tolviviov Alarm System for Home Security, Door Alarm Systems, App Alerts, 15Piece Kit, No Monthly fee, WiFi Alarm, Door Window Motion Sensor, for Home Security and Kids Safety

Overview: The tolviviov 15-Piece Alarm System offers comprehensive home security coverage without the burden of monthly fees. This expansive kit includes a base station, keypad, motion sensor, ten door/window sensors, and two remote controls—enough to secure most homes thoroughly. The 120dB siren delivers formidable deterrence while smartphone app alerts keep you informed remotely.
What Makes It Stand Out: The sheer sensor count at this price point is remarkable. Ten entry sensors allow protection of nearly every door and window in an average home. The system supports expansion up to 20 sensors and 5 remote controls, growing with your needs. Voice control through Alexa provides hands-free operation, while the absence of subscription fees means your total cost of ownership remains fixed.
Value for Money: At $139.99 ($9.33 per component), this kit dramatically undercuts competitors. SimpliSafe charges nearly as much for an 8-piece kit, and that doesn’t include the savings from zero monthly fees. The DIY installation eliminates professional setup costs, making professional-grade security accessible on any budget.
Strengths and Weaknesses: Strengths include extensive sensor coverage, loud siren, expandable design, no recurring costs, and Alexa compatibility. The 2.4GHz WiFi limitation is standard for IoT devices. Weaknesses include a lesser-known brand reputation, potentially less polished app experience, and limited advanced features like professional monitoring options.
Bottom Line: This is the budget champion for families wanting maximum coverage without financial strings. The 15-piece kit eliminates tough choices about which entry points to protect, delivering peace of mind and exceptional value.
10. tolviviov Home Alarm System(2nd Gen), 12 Pieces Smart Home Alarm Security System DIY No Monthly Fee, Phone Alert, Alarm Siren, Door/Window Sensors, Remotes, Work with Alexa, for House Apartment Office

Overview: The tolviviov Home Alarm System (2nd Gen) 12-Piece Kit democratizes home security with an almost unbelievable price point. This streamlined package includes a base station, two remotes, and nine contact sensors—ideal for apartments, offices, or smaller homes. The system operates over 2.4GHz WiFi, providing smartphone alerts and voice control without monthly fees.
What Makes It Stand Out: The second-generation design emphasizes effortless DIY installation, taking mere minutes without wall damage. Voice control via Alexa and Google Assistant offers sophisticated operation typically reserved for premium systems. The expandability to 20 sensors ensures the system scales with your security needs, while the backup battery provides 8 hours of emergency operation during power outages.
Value for Money: At $79.99 ($6.67 per piece), this represents the lowest cost of entry for a comprehensive smart security system in our review. The absence of subscription fees makes it cheaper than many standalone smart sensors. For renters or first-time homeowners, it delivers essential protection without financial strain.
Strengths and Weaknesses: Strengths include unbeatable pricing, simple setup, voice assistant integration, expandable architecture, and no ongoing costs. The nine sensors provide solid basic coverage. Weaknesses include the 2.4GHz-only connectivity, limited to 8-hour battery backup, fewer advanced features, and the base station’s requirement for constant AC power.
Bottom Line: Perfect for budget-conscious users seeking fundamental security without complexity. While it lacks bells and whistles, the tolviviov 12-piece system delivers reliable protection and smart home integration at a price that makes it an easy recommendation for apartments and starter homes.
Understanding Apple HomeKit Integration for Security Systems
What Makes a Security System “HomeKit-Compatible”?
True HomeKit compatibility extends far beyond a simple badge on the packaging. At its core, a genuinely integrated security system becomes a native citizen of your Apple ecosystem, appearing automatically in the Home app without requiring third-party bridges or workarounds. These systems communicate using Apple’s HomeKit Accessory Protocol (HAP), which ensures end-to-end encryption and local network control. This means your security devices can respond to commands instantly, even when your internet connection fails, because they operate on your local Wi-Fi or Thread network rather than routing through distant cloud servers.
The technical implementation matters tremendously. Look for systems that support HomeKit Secure Video for camera components, which processes footage locally on your HomePod or Apple TV before encrypting it and storing it in iCloud. For alarm panels and sensors, true integration means each component appears as an individual tile in the Home app, allowing granular control and automation rather than treating the entire system as a single black box.
The Difference Between Full and Partial HomeKit Support
Manufacturers often blur the lines between comprehensive and superficial HomeKit integration, leaving buyers with fragmented experiences. Full integration means every sensor, siren, and keypad in your security system appears as a separate, controllable device in the Home app. You can create automations based on any individual trigger—like a specific door opening or motion detected in a particular zone—and each component responds to Siri commands natively.
Partial support, by contrast, might limit HomeKit control to basic arming and disarming functions while relegating advanced features to the manufacturer’s proprietary app. Some systems only expose the alarm panel itself to HomeKit while keeping sensors hidden in the background, severely limiting automation possibilities. Others require a separate “bridge” hub that translates signals between your security system and HomeKit, introducing potential points of failure and latency. When evaluating systems, ask specifically whether each sensor type will appear individually in the Home app and if all automation triggers are available without opening a third-party application.
Why Choose a HomeKit-Enabled Security System?
Centralized Control Through the Home App
The single greatest advantage of a HomeKit-integrated security system is the elimination of app fatigue. Instead of juggling multiple interfaces for your locks, cameras, lights, and alarm panel, everything converges in Apple’s clean, intuitive Home app. This unified control plane means you can check your security status, view live camera feeds, and adjust automation rules from your iPhone, iPad, Mac, or Apple Watch with identical functionality across devices. The Control Center integration on iOS allows you to arm or disarm your system with a swipe and tap, while the Home app’s status overview gives you an at-a-glance security dashboard that updates in real-time.
Enhanced Privacy Standards
Apple’s privacy-first architecture fundamentally changes how security systems handle your most sensitive data. Unlike platforms that process everything in the cloud, HomeKit prioritizes local processing and end-to-end encryption. Your security system’s status, sensor triggers, and camera feeds are encrypted from the moment they leave the device until they reach your iPhone, with Apple itself unable to decrypt the data. HomeKit Secure Video ensures that camera footage gets analyzed locally on your HomePod or Apple TV using on-device intelligence to detect people, animals, vehicles, or packages before being encrypted and stored in your iCloud account. This approach keeps your security data out of third-party servers and protects it from potential breaches or unauthorized access.
Siri Voice Control Capabilities
Voice control transforms how you interact with your security system, making it truly hands-free. With HomeKit integration, you can arm your system by saying, “Hey Siri, good night,” or check if a specific door is locked with, “Hey Siri, is the front door secure?” The natural language processing understands context—you can create custom scenes like “I’m leaving” that arm the alarm, turn off lights, and adjust the thermostat simultaneously. Siri can also announce security events through your HomePod speakers, verbally alerting you that “motion was detected in the backyard” or “the garage door was opened.” This auditory feedback layer adds a dimension of awareness that visual notifications alone can’t match.
Geofencing and Location-Based Automation
HomeKit’s tight integration with your iPhone’s location services enables sophisticated geofencing that works reliably without draining your battery. You can create automations that automatically arm your security system when the last family member leaves home and disarm it when the first person returns—without anyone needing to remember. These location triggers are precise enough to distinguish between leaving your neighborhood versus just walking down the street. Combined with time-of-day conditions, you can build complex rules like “Arm the system at 11 PM only if everyone is home” or “Send me a notification if I leave and a window is still open.” The system respects privacy by processing location data on-device and only sharing abstracted “home” or “away” status with your accessories.
Key Features to Evaluate Before Buying
Device Response Time and Performance
In security applications, milliseconds matter. A HomeKit system’s performance hinges on how quickly sensors communicate status changes to your hub and how fast commands propagate back to devices. True Thread-enabled systems offer the lowest latency, often responding in under 100 milliseconds, while Wi-Fi-based systems might take 300-500 milliseconds. This difference becomes critical when you’re walking through your door and expect the disarm command to execute before the entry delay expires. Test systems by checking how quickly sensor status updates appear in the Home app when you open a door—if there’s a noticeable lag, the system may not be optimized for HomeKit’s local control architecture.
Sensor Variety and Expandability
A robust security system needs more than door/window sensors. Evaluate whether the ecosystem supports specialized sensors like glass break detectors, vibration sensors, water leak detectors, and environmental monitors that all integrate natively with HomeKit. The expandability matters just as much as the initial offering—can you add sensors incrementally without hitting arbitrary limits? Some systems support dozens of devices while others cap out at 10-12 sensors. Consider your home’s unique layout: multi-story houses might need more motion sensors, while homes with many windows require extensive entry sensor coverage. The best systems let you mix and match sensor types while maintaining consistent HomeKit integration across all devices.
Backup Connectivity Options
What happens when your internet goes down or your power fails? Professional-grade HomeKit security systems incorporate multiple communication pathways. Cellular backup ensures alarm signals still reach monitoring centers during internet outages, while battery backup keeps the local system operational for 12-24 hours. Some advanced systems also support Thread mesh networking, which can route signals through other Thread devices if one path fails. Ask about failover behavior specifically—does the system automatically switch to cellular backup, or does it require manual intervention? Will you still receive HomeKit notifications during an internet outage if you’re home on the same local network?
Camera Integration Quality
If your security system includes cameras, the HomeKit integration depth becomes paramount. Systems that support HomeKit Secure Video offer significant advantages over those that merely stream to the Home app. Secure Video provides activity zones, facial recognition (processed locally), and intelligent notifications that distinguish between people, animals, and vehicles. Check whether the cameras support two-way audio through the Home app and if recorded footage appears in the Home app’s timeline view. Some systems only allow live viewing in HomeKit while forcing you to use their proprietary app for recordings, creating a frustrating bifurcated experience. Also verify if camera-based motion can trigger other HomeKit automations, like turning on lights or unlocking doors for trusted visitors.
Professional Monitoring vs. Self-Monitoring with HomeKit
How Professional Monitoring Works with HomeKit
Professional monitoring adds a human layer of response to your HomeKit security system, but the integration varies widely. In optimal setups, alarm triggers automatically alert a monitoring center while simultaneously sending you HomeKit notifications. The monitoring center receives detailed information about which specific sensor was tripped, allowing them to dispatch appropriate emergency services. Some services can even arm or disarm your system remotely through secure protocols if you authorize it—useful if you need to let a neighbor in during a false alarm. The key question is whether the monitoring service respects HomeKit’s local control philosophy or requires disabling certain HomeKit features to function. Premium services integrate seamlessly, allowing you to maintain full HomeKit automation while they handle emergency response.
The Self-Monitoring Approach
Self-monitoring through HomeKit puts you in complete control, relying on notifications and automations to manage security events. When a sensor triggers, you receive rich notifications on all your Apple devices with options to view cameras, sound a siren, or call emergency services directly. This approach works best for people who are consistently reachable and comfortable handling potential emergencies themselves. HomeKit’s automation capabilities can simulate professional monitoring—triggering all lights to flash, sounding alarms through HomePod speakers, and sending notifications to multiple family members simultaneously. The trade-off is responsibility: you’re the single point of failure if you’re sleeping, in a meeting, or have your phone on silent.
Hybrid Monitoring Solutions
The sweet spot for many homeowners lies in hybrid approaches. Some systems offer optional professional monitoring that you can activate during vacations or deactivate when you’re working from home. Others provide “monitoring-lite” services that verify alarms through video clips before dispatching authorities, reducing false alarm fees while maintaining human oversight. Look for systems that let you customize which sensors trigger professional monitoring—perhaps you want door sensors monitored 24/7 but only want motion sensors to send you personal notifications. This flexibility allows you to balance cost, privacy, and peace of mind while preserving full HomeKit functionality.
Installation Pathways: DIY vs. Professional Setup
Benefits of DIY Installation
DIY-friendly HomeKit security systems have matured dramatically, offering adhesive-mounted sensors, wireless connectivity, and guided setup through the Home app. The primary advantage is cost savings—no installation fees—and the ability to expand your system gradually. DIY installation also gives you intimate knowledge of your system’s layout, making troubleshooting easier. Most HomeKit systems use QR code pairing that automatically populates device information, and the Home app’s room assignment feature keeps everything organized. However, DIY requires comfort with basic home networking, understanding sensor placement principles, and patience for firmware updates and initial configuration.
When to Consider Professional Installation
Professional installation becomes valuable for larger homes, complex layouts, or when integrating with existing hardwired systems. Installers can identify optimal sensor placement that balances coverage with false alarm prevention, properly mount cameras for ideal viewing angles, and ensure robust network coverage throughout your property. They’re also invaluable for integrating security systems with other home infrastructure like HVAC, electrical panels, or legacy alarm wiring. Some insurance companies offer discounts only for professionally installed systems, and certain monitored services require certified installation for liability reasons. The downside is cost—typically $100-300 plus potential limitations on HomeKit access if the installer locks you out of administrative settings.
Hybrid Installation Models
Emerging hybrid models let you start with DIY installation and add professional assistance for specific components. You might install door sensors yourself but hire an electrician to hardwire the hub to a central location with battery backup. Some manufacturers offer virtual installation support via video call, where a technician guides your DIY setup without the full cost of an on-site visit. This approach lets you handle straightforward tasks while getting expert help for complex decisions like hub placement, network optimization, or integrating with existing doorbell wiring. The key is choosing a system that doesn’t penalize you for self-installation later when you need professional monitoring or support.
Decoding HomeKit Security Levels and Encryption
End-to-End Encryption Requirements
HomeKit’s security architecture mandates that all communications between accessories and your Apple devices use ChaCha20-Poly1305 encryption with secure key exchange. For security systems, this means sensor states, alarm commands, and status updates are encrypted at the device level before ever touching your network. The pairing process uses secure element chips to generate unique encryption keys that never leave your local network. This is fundamentally different from many cloud-based systems that encrypt data in transit but process it unencrypted on company servers. When evaluating systems, verify they advertise “HomeKit-certified” rather than “works with HomeKit”—the former guarantees full encryption compliance while the latter might use limited, less-secure integration methods.
Understanding HomeKit Secure Video
HomeKit Secure Video represents Apple’s most advanced security feature for camera integration. It processes video analysis locally on your HomePod, Apple TV, or iPad acting as a home hub, using on-device intelligence to detect motion types before anything gets uploaded to iCloud. This means footage of your family isn’t analyzed on some company’s servers. The system supports activity zones, facial recognition for known people, and package detection—all processed locally. Recorded clips are encrypted end-to-end and stored in your iCloud account without counting against your storage limit. However, Secure Video requires a specific iCloud+ plan and a compatible home hub, and not all “HomeKit” cameras support it—some only offer live streaming. For true security integration, prioritize cameras with full Secure Video support.
Local vs. Cloud Processing
The debate between local and cloud processing defines modern smart home security. HomeKit prioritizes local processing—your iPhone can disarm the system directly over your Wi-Fi network without internet connectivity. This architecture keeps your security functional during outages and reduces latency. However, some security features inevitably require cloud components: push notifications when you’re away, firmware updates, and professional monitoring services. The key is understanding which functions remain local and which require the cloud. A well-designed HomeKit system keeps critical operations like arming, disarming, and basic automations local while using cloud services only for non-time-sensitive features. Be wary of systems that route all sensor data through manufacturer clouds before reaching HomeKit, as this introduces unnecessary privacy risks and potential failure points.
Building Your Ecosystem: Sensors and Accessories
Entry Sensors and Contact Detectors
Entry sensors form the backbone of any security system, and their HomeKit integration quality varies significantly. Premium sensors report not just “open” or “closed” but also temperature, allowing them to double as climate monitors. Look for sensors with adjustable sensitivity to prevent false alarms from heavy winds or minor door shifts. The best HomeKit sensors support Thread networking for improved reliability and battery life, often lasting 2-3 years on a single coin cell. Consider the installation method—adhesive mounts work for renters but screw-mounted options provide more permanent security. Also evaluate whether sensors come in different colors or can be painted to match your door frames, as aesthetics matter for devices visible throughout your home.
Motion Detectors and Occupancy Sensors
Motion sensors for security differ from typical smart home occupancy sensors in their sensitivity and purpose. Security-grade motion detectors should offer pet-immunity settings that ignore animals under a certain weight (typically 40-80 pounds) while still detecting human intruders. HomeKit integration allows these sensors to serve dual purposes—triggering security alerts when armed but controlling lights or HVAC when disarmed. Look for sensors with adjustable detection ranges and the ability to set different sensitivity levels for different times of day. Some advanced models include built-in light sensors, enabling automations like “turn on lights only if motion is detected and the room is dark.” The mounting flexibility matters too—can they be wall-mounted, corner-mounted, or placed on shelves?
Environmental Sensors (Smoke, CO, Water)
The smartest HomeKit security systems integrate environmental monitoring seamlessly. Smoke and carbon monoxide detectors that support HomeKit can trigger your security alarm while simultaneously sending rich notifications to all family members with specific location details. Water leak sensors placed near water heaters, washing machines, and under sinks can shut off smart valves automatically while alerting you through the Home app. When evaluating these sensors, check whether they meet UL standards for safety devices and if they include built-in sirens that can be silenced through HomeKit. Battery life is crucial for environmental sensors—some last 5+ years, while others need annual replacement. Also consider whether they support interconnected alerting, where one sensor’s alarm triggers all others in the system.
Glass Break and Vibration Sensors
Specialized sensors for glass break and vibration detection add crucial layers to perimeter security. Glass break acoustic sensors listen for the specific frequency patterns of shattering glass and can cover multiple windows in a single room. Vibration sensors mounted directly on windows or doors detect forced entry attempts before an intruder even gains access. HomeKit integration for these sensors is less common but invaluable when available, as they can trigger different responses than standard entry sensors—perhaps flashing all lights and sounding a siren immediately rather than waiting for an entry delay. Look for sensors with adjustable sensitivity to prevent false alarms from thunderstorms or passing trucks, and verify they can distinguish between different types of glass breakage patterns.
Automation and Scene Creation
Creating Security-Focused Scenes
HomeKit’s scene functionality transforms your security system from a passive alarm into an active home manager. A “Good Night” scene can arm your system in stay mode, lock all doors, dim lights, and lower the thermostat with a single command or automated trigger. The “I’m Away” scene might arm the system in away mode, turn on random lights to simulate occupancy, and activate motion-activated recording for all cameras. The sophistication lies in conditional logic—scenes can include “if” statements that check device states before executing. For example, a scene might only arm the system if all doors are confirmed closed, or send you a notification asking to verify arming if a window is open. This prevents the frustration of scenes failing silently due to conflicting device states.
Time-Based Automation Strategies
Time-based automations add intelligence to your security system’s operation. You can create schedules that automatically arm the system in away mode at 8 AM on weekdays if no one is home, or switch to stay mode at 11 PM regardless of occupancy. The real power comes from combining time with other triggers—like arming the system 30 minutes after the last person leaves rather than at a fixed time. Consider automations that adjust based on sunrise and sunset times, which HomeKit calculates automatically. For example, you might want perimeter motion sensors to trigger indoor lights only during nighttime hours. The best systems also support multi-condition time automations, such as “arm the system at 10 PM only if all family members’ iPhones show as home.”
Multi-Device Triggering Scenarios
Advanced HomeKit security leverages multiple device states to create contextual awareness. A single motion sensor trigger can initiate different responses based on which family members are home, the time of day, and even recent activity patterns. If motion is detected in the hallway at 2 AM while everyone should be sleeping, the system might flash bedroom lights and sound a chime before triggering a full alarm. The same motion during the day might simply turn on a light. You can chain devices so that a door opening triggers the hallway camera to start recording, the thermostat to pause, and a notification to be sent with a snapshot from the camera. This orchestration requires each device to be individually addressable in HomeKit, which is why full integration matters more than partial support.
Privacy Considerations and Data Handling
Apple’s Privacy Architecture
Apple’s privacy model fundamentally limits what manufacturers can do with your security data. When you add a HomeKit accessory, it receives a unique identifier that rotates periodically, preventing long-term tracking. All communication is encrypted end-to-end, and Apple provides no way for manufacturers to access your data without explicit permission. For security systems, this means the manufacturer can’t see when you’re home, which doors you use, or your daily routines. Even crash logs and diagnostic data are anonymized. This architecture extends to Siri requests—when you ask Siri to arm your system, the voice processing happens on-device when possible, and Apple can’t see which specific security commands you issue.
Third-Party Data Policies
While Apple locks down HomeKit data, manufacturers often collect information through their proprietary apps and cloud services. Before purchasing, investigate the manufacturer’s privacy policy regarding data retention, sharing, and sale. Some companies keep detailed logs of all system events indefinitely, while others delete data after 30 days. Consider whether the manufacturer requires creating an account and if that account is necessary for HomeKit functionality or just for optional cloud features. The most privacy-respectful systems allow full HomeKit operation without ever creating a manufacturer account, using the account only for professional monitoring or advanced features you explicitly opt into.
Guest Access and Permissions
HomeKit’s granular permission system lets you give house sitters, dog walkers, or family members limited access without compromising security. You can grant temporary access that expires automatically, or provide access only to specific accessories—like allowing a guest to disarm the alarm but not view cameras. The system respects these permissions across all Apple devices, so a restricted user can’t bypass limits by switching from iPhone to iPad. For rental properties or Airbnb setups, you can create automation-based guest codes that work only during reservation periods. The key is choosing a security system whose native features respect these HomeKit permissions rather than overriding them with their own access controls.
Cost Analysis and Subscription Models
Upfront Hardware Costs
HomeKit security systems span a wide price spectrum, but the total cost depends on expandability and included features. Entry-level starter kits typically include a hub, 2-3 door/window sensors, and a motion detector, representing the minimum viable system. However, the real cost emerges as you expand—individual sensors range from $20-60 each, and a typical 3-bedroom home needs 8-12 entry sensors plus multiple motion detectors. Factor in environmental sensors, cameras, and smart locks, and a comprehensive system can easily exceed $1,000 in hardware alone. Consider whether the hub supports multiple communication protocols (Wi-Fi, Thread, Zigbee) as this future-proofs your investment and prevents needing to replace the hub when adding new device types.
Monthly Subscription Fees
The subscription landscape for HomeKit systems is complex. Some systems offer full HomeKit functionality with no subscription, charging only for optional professional monitoring or cloud storage. Others require a subscription for basic features like push notifications or remote access, which should be deal-breakers since HomeKit provides these natively. Professional monitoring typically costs $10-30 monthly, with premium services offering video verification, cellular backup, and smart home integration support. HomeKit Secure Video requires an iCloud+ plan, but this covers all cameras in your home and includes other iCloud benefits. Be wary of systems that charge per-camera fees on top of HomeKit Secure Video, as this double-charges for functionality Apple already provides.
Hidden Costs to Watch For
The true cost of ownership includes several often-overlooked expenses. Battery replacement for wireless sensors can cost $20-40 annually depending on sensor count and battery type. Some systems require proprietary batteries that cost more than standard coin cells. Cloud storage beyond what iCloud+ provides, extended warranties, and firmware update plans can add ongoing costs. Installation accessories like mounting brackets, range extenders, or spare power supplies might not be included. If you opt for professional monitoring, false alarm fees from your municipality can range from $50-200 per incident. Finally, consider the cost of your time—systems with poor HomeKit integration require constant troubleshooting and maintenance, which has its own value.
Troubleshooting Common Integration Issues
Wi-Fi and Thread Network Optimization
HomeKit security systems are only as reliable as your network infrastructure. Wi-Fi-based sensors need strong signal strength (above -65 dBm) to respond consistently, which often requires mesh Wi-Fi systems in larger homes. Thread devices create their own mesh network but need adequate “router” devices (like HomePod minis or Apple TV 4K) spaced throughout your home to maintain connectivity. If sensors show “no response” intermittently, the issue is almost always network-related. Solutions include adding Thread border routers, optimizing Wi-Fi channel selection to avoid interference, and ensuring your security system’s hub has a wired Ethernet connection rather than Wi-Fi. Some systems include network diagnostic tools in their apps that show signal strength for each device—use these during installation to identify dead zones before mounting sensors permanently.
Firmware Update Challenges
Firmware updates can temporarily break HomeKit integration or introduce bugs. Apple’s certification requires updates to maintain compatibility, but manufacturers sometimes push updates that reset HomeKit pairings or change device behaviors. The best practice is to wait 1-2 weeks after a firmware update is released before installing it, monitoring user forums for reported issues. Always update through the manufacturer’s app rather than the Home app, as manufacturer updates include device-specific optimizations. If an update breaks HomeKit functionality, you may need to remove and re-add the accessory, which can destroy existing automations. Some systems allow rolling back firmware, but this is rare. Keep a backup of your HomeKit configuration using third-party apps before major updates to simplify restoration if needed.
Hub and Bridge Requirements
Many “HomeKit-compatible” security systems actually require a proprietary hub that then bridges to HomeKit. This hub becomes a critical point of failure—if it goes offline, you lose both security monitoring and HomeKit integration. Evaluate whether the hub supports battery backup and cellular failover, and what happens to HomeKit control during an internet outage. Some hubs continue providing local HomeKit control even without internet, while others become paperweights. The hub’s placement matters too—it should be centrally located, protected from tampering, and connected via Ethernet. Systems that support multiple hubs or can use an Apple TV as a backup controller offer greater resilience. Also consider what happens if the manufacturer discontinues the hub—does the system support local control indefinitely, or does it become obsolete?
Future-Proofing Your Investment
Matter Standard Compatibility
Matter, the new smart home standard backed by Apple, Google, and Amazon, will reshape HomeKit integration. While HomeKit will continue to exist, Matter-compatible security devices will offer broader ecosystem support and more reliable connectivity. When evaluating systems, prioritize those that have committed to Matter support via future firmware updates. This ensures your devices will work with future Apple home hubs and potentially with other platforms if you ever switch. Matter over Thread devices offer the best combination of reliability and future compatibility. However, be cautious of first-generation Matter implementations in security devices, as the standard is still maturing and early adopters may face compatibility issues.
Over-the-Air Update Policies
A manufacturer’s update policy reveals their commitment to long-term support. Check how frequently they release updates and whether they provide security patches for older devices. Companies that update every 2-3 months demonstrate active development, while those with annual updates may be neglecting their products. The best manufacturers publish update changelogs detailing bug fixes and new features, allowing you to make informed decisions about when to update. Also investigate how long they commit to supporting a product—some guarantee 5+ years of updates, while others abandon devices after 2-3 years. This matters enormously for security systems that should remain secure against evolving threats.
Manufacturer Longevity and Support
The smart home industry has seen countless companies discontinue products, leaving users with expensive paperweights. Research the manufacturer’s financial stability, history of product support, and community engagement. Companies with active user forums, responsive customer support, and transparent roadmaps are more likely to support their products long-term. Consider whether the system can function entirely locally without manufacturer servers—this ensures basic security continues even if the company goes out of business. Open-source or standards-based systems offer additional protection, as community developers can sometimes maintain compatibility even after official support ends. For security systems, avoid startups without established track records, as your family’s safety depends on ongoing support.
Comparing HomeKit to Other Smart Home Platforms
Integration Depth Differences
HomeKit’s approach to security differs fundamentally from platforms like SmartThings or Alexa. While competitors often offer more device variety, HomeKit prioritizes privacy, local control, and seamless Apple ecosystem integration. SmartThings might support more sensor types but routes everything through Samsung’s cloud, introducing latency and privacy concerns. Alexa offers voice control but lacks HomeKit’s end-to-end encryption and local processing. Google Home provides powerful AI features but mines your data for advertising. HomeKit’s limitation is often device selection, but the devices that are certified offer deeper, more reliable integration. For security, this trade-off favors HomeKit’s privacy and reliability over competitors’ broader but shallower ecosystems.
Cross-Platform Compatibility Strategies
Some households use multiple platforms, requiring careful planning. Certain security systems support HomeKit, Alexa, and Google Home simultaneously, but this often requires enabling multiple skills or integrations that can conflict. For example, arming through Alexa might not update the status in HomeKit, breaking your automations. The most successful multi-platform setups use HomeKit as the primary security controller while using other platforms for non-security functions. If you must use multiple platforms for security, create clear rules about which platform controls what to avoid conflicts. Some advanced users run HomeBridge or Home Assistant to bridge non-HomeKit devices into HomeKit, but this adds complexity and potential failure points that may not be suitable for critical security applications.
Making Your Final Decision
Assessing Your Home’s Specific Needs
Start with a security audit of your property. Walk around your home and identify all entry points—doors, windows, garage doors, and basement accesses. Consider your lifestyle: Do you have pets that will trigger motion sensors? Do you rent or own? What’s your neighborhood’s actual risk level? Map out where you’ll place the hub for optimal connectivity and how you’ll power it during outages. Think about future expansion: Are you planning to add a basement apartment, pool house, or detached garage? Your security system should scale with these plans. Also evaluate your technical comfort level—are you prepared to diagnose network issues, or do you need a system that “just works” with minimal intervention?
Creating a Prioritized Feature List
Rank features by importance to avoid overspending on capabilities you’ll never use. If you live in an apartment, a simple system with 3-4 entry sensors and a siren might suffice. Homeowners with families might prioritize environmental sensors and professional monitoring. Tech enthusiasts might value advanced automation and Matter compatibility. Create three lists: must-have features (like HomeKit Secure Video support), nice-to-have features (like glass break sensors), and deal-breakers (like requiring a subscription for basic notifications). Use this list to evaluate systems objectively, ignoring marketing fluff that highlights features you don’t need. Remember that the best security system isn’t the most expensive or feature-rich—it’s the one that reliably protects your specific home while integrating seamlessly into your daily routine.
Frequently Asked Questions
1. Will my HomeKit security system work if my internet goes down?
Yes, but with limitations. Core functions like arming/disarming and local automations continue working over your Wi-Fi network since HomeKit processes commands locally. However, you won’t receive push notifications when away from home, and professional monitoring may switch to cellular backup. Cameras won’t upload footage to iCloud, but some may record locally to an SD card. Ensure your system hub has battery backup to maintain local control during power outages.
2. Do I need an Apple TV or HomePod for my security system to work with HomeKit?
You need at least one Apple TV (4th gen or newer) or HomePod to serve as a home hub for remote access, automations, and HomeKit Secure Video. The hub processes commands when you’re away and enables location-based automations. For larger homes, multiple hubs improve Thread network coverage and provide redundancy. Without a hub, you can only control devices locally when connected to the same Wi-Fi network.
3. Can I mix sensors from different brands in one HomeKit security system?
Absolutely. HomeKit’s strength is interoperability—you can combine door sensors from one brand, motion detectors from another, and cameras from a third, all controlled through the Home app. However, for professional monitoring, you typically need sensors from a single ecosystem that the monitoring service recognizes. For self-monitoring, mixing brands works seamlessly as long as each device is HomeKit-certified.
4. What’s the difference between HomeKit and HomeKit Secure Video?
HomeKit is the overall framework for smart home control, while HomeKit Secure Video is a specific feature for cameras. Secure Video processes footage locally on your home hub, provides intelligent notifications (person, animal, vehicle, package), stores encrypted recordings in iCloud without counting against storage limits, and supports activity zones. Regular HomeKit camera integration only offers live viewing and basic motion alerts in the Home app.
5. How reliable are HomeKit geofencing automations for arming/disarming?
HomeKit geofencing is highly reliable when set up correctly. It uses a combination of GPS, Wi-Fi network association, and Bluetooth beaconing to determine location accurately. The system typically triggers within 200-500 meters of your home. Reliability improves when all family members have stable cellular connections and location services enabled for the Home app. False triggers are rare but can occur in high-rise buildings or dense urban areas; you can mitigate this by increasing the geofence radius or adding confirmation prompts.
6. Will adding more HomeKit devices slow down my security system’s response time?
Not significantly. HomeKit is designed for scalability, and local processing means device count has minimal impact on latency. Thread devices actually become more reliable as you add more, since they create a mesh network. Wi-Fi devices depend more on your router’s capacity—consumer routers typically handle 30-50 devices comfortably. If you experience slowdowns, the issue is usually network congestion or a weak mesh, not HomeKit itself.
7. Can I use my existing non-HomeKit security system with HomeKit?
Sometimes. Solutions like HomeBridge or Home Assistant can bridge certain non-HomeKit systems into HomeKit, but this requires technical expertise and a dedicated device like a Raspberry Pi. The integration is often limited—typically only arming/disarming the main panel rather than exposing individual sensors. Some security companies offer official HomeKit modules for existing systems, but these are increasingly rare. For full sensor-level integration, replacing the system with a native HomeKit solution is usually more reliable.
8. How does professional monitoring handle HomeKit automations?
Professional monitoring services typically run parallel to your HomeKit automations without interfering. When a sensor triggers, both the monitoring center and your HomeKit automations receive the signal simultaneously. The monitoring center can’t see or control your HomeKit scenes, and you maintain full automation control. However, some services require you to disable certain automations that might generate excessive false alarms. Choose a monitoring service that explicitly supports HomeKit and understands its local control model.
9. Are there any monthly fees required just to use HomeKit features?
No legitimate HomeKit features require monthly fees. Arming, disarming, notifications, automations, and local control are all free through Apple’s ecosystem. However, HomeKit Secure Video requires an iCloud+ subscription (starting at $0.99/month), which includes other iCloud benefits. Some manufacturers charge for optional cloud features, but these should never be required for basic HomeKit functionality. Be skeptical of any system that locks core features behind a paywall.
10. What’s the best way to start small and expand my HomeKit security system over time?
Begin with a hub and 2-3 entry sensors covering your most vulnerable doors. Add a motion sensor in the main hallway and perhaps a water sensor near your water heater. This minimal setup teaches you the system’s behavior and reliability. Expand gradually by adding sensors to remaining entry points, then incorporate cameras with HomeKit Secure Video. Finally, add environmental sensors and smart locks. This phased approach spreads costs over time and lets you optimize placement based on real-world usage patterns. Always ensure your hub supports more devices than you initially plan to install, leaving room for growth.