The modern drummer’s practice space has evolved from a simple basement setup into a sophisticated acoustic environment where technology and artistry converge. As urban living becomes denser and noise regulations grow stricter worldwide, the days of wailing away without consequence are firmly behind us. By 2026, sound monitoring isn’t just about keeping the neighbors happy—it’s become an essential tool for protecting your hearing, refining your technique, and even enhancing your creative process. Whether you’re a weekend warrior in an apartment building or a touring pro with a home studio, understanding how to measure, monitor, and manage your acoustic footprint has become as fundamental as mastering the paradiddle.
What separates today’s monitoring solutions from the basic decibel meters of yesterday is their intelligence. These aren’t just gadgets that beep when you’re too loud; they’re comprehensive acoustic analysis systems that provide real-time feedback, historical data trends, and integration with your entire digital workflow. The right sensor strategy can tell you not just how loud you’re playing, but why certain frequencies are causing problems, which techniques are pushing you into the danger zone, and how your room’s acoustics are affecting your sound. Let’s dive into everything you need to know to build a monitoring setup that works as hard as you do.
Top 10 Sound & Noise Monitoring Sensors for Drummers’ Practice Rooms
Detailed Product Reviews
1. Decibel Meter Recorder 13 Inches Sound Level Meter, Wall Mount Noise Meter for Classroom Sound Meter with 16.4ft Sensor, Buzzer Alarm and Unlimited Data Logging, Noise Meter Decibel for Studio, Home

Overview: The DANOPLUS Decibel Meter Recorder is a professional-grade noise monitoring solution designed for permanent or semi-permanent installation in classrooms, studios, and homes. Its massive 13-inch HD display and extensive data logging capabilities set it apart from consumer-grade alternatives, making it ideal for users who need continuous, long-term sound level tracking with documentation.
What Makes It Stand Out: The standout feature is its ability to record decibel data every 2 seconds for up to one year, with export capabilities via PC software for detailed analysis. The generous 16.4-foot sensor cable provides exceptional flexibility in placement, allowing you to position the sensor optimally while keeping the display in a convenient viewing location. The combination of audible and visual alarms with customizable thresholds makes it perfect for enforcing noise policies in real-time.
Value for Money: At $98.89, this is the premium option in our comparison, but the price is justified for professional applications. The unlimited data logging alone adds significant value for facility managers, teachers, and studio engineers who need documented compliance or trend analysis. Competing data-logging meters often cost 50-100% more, making this a cost-effective solution for serious noise monitoring requirements.
Strengths and Weaknesses: Strengths:
- Massive 13-inch HD display with 4-inch digits for excellent visibility
- One-year continuous data logging with PC export functionality
- Extra-long 16.4-foot sensor cable for versatile installation
- Customizable audible and visual alarms
- Both desktop and wall-mount options
Weaknesses:
- Highest price point may be excessive for casual home use
- Requires PC connection to access full data logging features
- No mention of temperature/humidity monitoring
- May be overkill for users needing only spot-check measurements
Bottom Line: An excellent investment for educators, studio professionals, and facility managers who need robust, long-term noise monitoring with documentation capabilities. Casual users should consider more affordable alternatives.
2. Decibel Meter 13 inches 30~130dB Sound Level Meter, Large LCD Display Wall Hanging Sound Gauge, Noise Level Detector, Decibel Monitoring Device, Time, Temperature, Humidity for Studio Classroom Home

Overview: This 13-inch Decibel Meter offers a compelling blend of visibility and functionality for studios, classrooms, and home environments. With its large LCD display and integrated environmental monitoring, it serves as a comprehensive sound level awareness tool rather than just a basic measurement device, providing real-time feedback on noise conditions.
What Makes It Stand Out: The color-coded indicator system provides immediate visual feedback, displaying green, yellow, or red to represent safe, moderate, and dangerous noise levels. This intuitive approach makes it ideal for classroom management or studio environments where quick visual assessment is crucial. The addition of temperature and humidity monitoring transforms it into a multi-function environmental station, eliminating the need for separate devices.
Value for Money: Priced at $47.90, this meter strikes an excellent balance between features and affordability. The large display and multi-function capabilities offer strong value compared to basic meters in the $30-40 range. While it lacks data logging, the visual alarm system and environmental sensors provide practical functionality that justifies the mid-range price point for users wanting more than simple dB readings.
Strengths and Weaknesses: Strengths:
- Large 13-inch display with adjustable brightness
- Color-coded visual alerts for immediate noise level recognition
- Integrated temperature and humidity monitoring
- Adjustable alarm thresholds (30-130dB) or disable option
- User-friendly design with multiple display options
Weaknesses:
- No data logging or PC connectivity capabilities
- LED screen may not be as crisp as true HD displays
- Sensor cable length not specified, likely shorter than premium models
- Accuracy of +/-1dB is good but not exceptional
Bottom Line: A versatile, well-priced noise meter perfect for classrooms and studios that need visual noise management tools without professional data logging requirements.
3. Power Supply Available Decibel Meter, Gedaye Sound Level Meter, A/C Weighted SPL Meter, Noise Measure Device 30-130dB, Noise Detector Sound Monitor Decibel Reader Classroom Factory Noisy Neighbor

Overview: The Gedaye Decibel Meter positions itself as a professional-grade SPL meter with A/C weighting capabilities at a consumer-friendly price point. Designed for both industrial and residential applications, it offers measurement precision that meets IEC standards, making it suitable for everything from factory noise compliance to documenting noisy neighbor complaints with credible data.
What Makes It Stand Out: The A and C frequency weighting options provide professional-level acoustic analysis typically found in more expensive equipment. A-weighting simulates human ear response for environmental noise assessment, while C-weighting captures peak impacts better. The fast/slow response settings add another layer of professional versatility, allowing accurate measurements in both stable and fluctuating noise environments.
Value for Money: At $49.99, this meter delivers professional features that rival devices costing twice as much. The IEC compliance and dual weighting modes make it particularly valuable for users needing credible measurements for official purposes. While the display is smaller than the 13-inch models, the feature set focuses on measurement accuracy rather than display prominence, offering excellent value for serious users.
Strengths and Weaknesses: Strengths:
- Professional A/C weighting for versatile acoustic analysis
- IEC standards compliance for credible measurements
- Fast (125ms) and slow (1s) response time options
- Max/Min hold and data hold functions for capturing peaks
- Built-in thermometer with -4°F to 140°F range
Weaknesses:
- Display size not specified, likely much smaller than 13-inch models
- No integrated alarm or color-coded warning system
- Lacks continuous data logging capabilities
- Wall-mounting options not emphasized
Bottom Line: An excellent choice for users prioritizing measurement accuracy and professional features over display size, ideal for industrial compliance and serious residential monitoring.
4. Portable Decibel Meter, Sound Level Monitoring and Noise Volume, MAX/MIN Noise Measurement with Data Hold LCD Backlight and Accuracy of +/-1.5dB
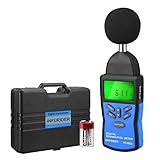
Overview: This Portable Decibel Meter offers essential noise monitoring capabilities in a compact, budget-friendly package. Perfect for users who need reliable sound level measurements without advanced features, it delivers A/C weighting functionality and respectable accuracy at a fraction of the cost of larger, fixed-installation units, making professional noise assessment accessible to everyone.
What Makes It Stand Out: The dual A and C weighting capability is remarkable at this price point, typically reserved for mid-range meters. Its true portability, complete with carrying case, makes it ideal for mobile assessments across multiple locations. The automatic shutoff feature after 10 minutes preserves battery life, addressing a common frustration with portable meters left on accidentally.
Value for Money: At $29.99, this is the value champion of our comparison. It provides accurate measurements within +/-1.5dB and professional weighting options that exceed expectations for the price. While it lacks the large displays and data logging of premium models, it delivers core functionality that satisfies most residential and small business needs without unnecessary expense.
Strengths and Weaknesses: Strengths:
- Most affordable option with professional A/C weighting
- Portable design with included carrying case
- Automatic shutoff preserves battery life
- Max/Min measurement with data hold function
- Easy-to-read backlit LCD display
Weaknesses:
- Small display lacks visibility for group settings
- No continuous monitoring or alarm functions
- No environmental sensors (temperature/humidity)
- Requires manual operation, not ideal for permanent installation
- Basic accuracy compared to premium models
Bottom Line: The perfect entry-level decibel meter for budget-conscious buyers who need accurate, portable measurements without advanced logging or display features.
Why Every Drummer Needs a Sound Monitoring Strategy in 2026
The stakes for unmonitored drumming have never been higher. Municipal noise ordinances are increasingly specific, with some cities implementing decibel limits as low as 55 dB during evening hours—quieter than a normal conversation. Beyond legal compliance, hearing conservation has become a non-negotiable priority. Acoustic drums can easily produce peaks of 120-130 dB, enough to cause permanent damage in under 15 minutes of unprotected exposure. A robust monitoring strategy transforms your practice room from a liability into a controlled environment where you can push boundaries safely.
Moreover, consistent volume tracking reveals patterns in your playing that affect everything from studio recording quality to live sound consistency. Drummers who monitor their levels develop better dynamic control, more consistent ghost notes, and a refined touch that engineers love. In 2026, this data-driven approach to dynamics isn’t just for session players—it’s becoming the standard for serious musicians at every level.
Understanding Decibel Levels: The Science Behind Drum Volume
Decibels operate on a logarithmic scale, meaning each 10 dB increase represents a tenfold increase in sound intensity. This is crucial for drummers to grasp because the difference between 90 dB and 100 dB isn’t just “a little louder”—it’s exponentially more powerful. A typical acoustic snare hit ranges from 110-125 dB at the source, while kick drums produce lower frequencies that travel through walls more effectively despite registering lower on a standard meter.
Peak vs. Average Levels: What Drummers Must Know
Peak levels capture the instantaneous maximum volume of each stick impact, while average (or Leq) levels measure sound energy over time. For hearing protection, peak levels are critical—a single rimshot at 130 dB can cause immediate damage. For neighbor relations and legal compliance, however, average levels over 15-minute or 1-hour periods matter more. Your monitoring system should display both metrics simultaneously, as optimizing for one without considering the other creates blind spots. The best 2026 sensors offer customizable time-weighted averages that let you see exactly how your 30-minute practice session registers against local ordinances.
Frequency Weighting: A-Weighting vs. C-Weighting Explained
A-weighting (dBA) filters frequencies to mimic human hearing sensitivity, de-emphasizing low frequencies where drums produce much of their energy. This makes dBA measurements legally relevant but potentially misleading for drummers. C-weighting (dBC) provides a flatter, more accurate representation of low-frequency content—essential for understanding why your kick drum seems to penetrate walls despite “acceptable” dBA readings. Modern sensors offer simultaneous dual-weighting displays, letting you toggle between human-perceived loudness and actual acoustic energy. For drum-specific monitoring, prioritize systems that emphasize Z-weighting (zero filtering) for the most transparent data.
Types of Noise Monitoring Sensors: Finding Your Perfect Match
The monitoring landscape offers four distinct categories, each serving different practice room scenarios. Your choice depends on budget, technical comfort level, and whether you need portable flexibility or permanent installation.
Handheld Decibel Meters: Portable Precision
These remain the entry point for most drummers, but 2026 models have evolved far beyond basic gadgets. Look for devices with 1/1 and 1/3 octave band analysis, which breaks down your sound into frequency components. This reveals whether your floor tom’s 98 Hz fundamental or your snare’s 5 kHz crack is causing complaints. The best handheld units now feature MEMS microphones with ±1.0 dB accuracy, USB-C data export, and companion apps that turn your phone into a secondary display. They’re ideal for drummers who need to monitor multiple locations or take measurements at gigs.
Wall-Mounted Monitors: Set-and-Forget Solutions
Permanent installations provide continuous monitoring without eating up floor space. These units typically feature larger displays visible from behind the kit and can be hardwired for power, eliminating battery concerns. Advanced models include directional microphones that focus on your playing position while ignoring ambient noise from outside. Some integrate with room correction systems, automatically adjusting your monitor speakers’ volume when your drumming exceeds thresholds. The installation requires careful consideration of wall material—mounting on drywall versus concrete dramatically affects low-frequency readings.
Smart IoT Sensors: The Connected Practice Room
Internet of Things sensors represent the cutting edge in 2026. These compact devices connect to your Wi-Fi network, streaming data to cloud dashboards accessible from anywhere. They can trigger smart home actions—dimming lights when you hit 100 dB as a visual cue, or automatically texting your neighbor when levels approach their complaint threshold. IoT sensors excel at long-term trend analysis, building profiles of your practice habits and correlating volume with time-of-day, duration, and even your calendar events. The data export capabilities make them invaluable for drummers renting commercial spaces who need to prove compliance.
Wearable Monitoring Devices: Personal Protection Tech
Clip-on sensors worn on your collar or mounted to headphones provide the most personal data—actual exposure at your ears, not just somewhere in the room. These devices track cumulative daily exposure against OSHA and NIOSH standards, vibrating discreetly when you exceed safe limits. For drummers who also play live, they seamlessly transition from practice room to stage, maintaining a continuous hearing health log. The latest models include bone conduction sensors that measure sound transmitted through your drum throne and floor, a surprisingly significant exposure source many drummers overlook.
Key Features That Separate Good Sensors from Great Ones
With dozens of specifications to evaluate, focusing on drum-specific capabilities cuts through the marketing noise. Accuracy is paramount—look for Type 1 or Type 2 classification under IEC 61672 standards, with Type 1 offering ±1 dB precision for professional applications. Sampling rate matters more than you might think; 48 kHz sampling captures transient drum hits more faithfully than the standard 8 kHz found in budget models.
Real-Time Display and Alert Systems
Your sensor’s display should be readable from your drum throne without breaking concentration. High-contrast e-paper screens work better than LCDs in variable lighting, while customizable color-coding—green under 85 dB, yellow at 90 dB, red at 95 dB—provides instant visual feedback. Audible alerts are counterproductive for musicians, so prioritize units with haptic feedback or integration with in-ear monitors that can pipe a subtle click when thresholds are breached. The alert hysteresis setting is critical; it prevents the alarm from chattering when you’re hovering near a limit.
Data Logging and Historical Analysis
Memory capacity determines how much practice data you can retain. Minimum specs for 2026 should include 30 days of 1-minute logging resolution, but serious drummers need more. Look for devices that store individual hit peaks alongside average levels, letting you identify which specific techniques produce problematic spikes. Export formats matter—CSV files for spreadsheet analysis are standard, but JSON or SQLite databases enable deeper custom analysis. Some systems now integrate with practice journal apps, correlating volume data with metronome speeds or song sections you’re working on.
Connectivity: Bluetooth, Wi-Fi, and Beyond
Bluetooth 5.3 offers the low latency needed for real-time phone displays, but its range limitations frustrate drummers with large rooms. Wi-Fi 6E support enables cloud connectivity without hogging your home network’s bandwidth. For studio integration, prioritize sensors with MIDI over USB or 5-pin DIN, allowing your DAW to log volume data alongside your performance. Thread and Matter protocols, emerging in 2026, let your sensor communicate directly with smart home hubs without proprietary apps—a major step forward for reliability.
Placement Strategies for Accurate Readings
Location dramatically affects measurements. A sensor placed directly in front of your snare will read 10-15 dB higher than one positioned at ear level behind the kit. Neither is “wrong”—they’re just measuring different things.
The Sweet Spot: Where to Position Your Primary Sensor
The ideal position is at your listening position, typically where your head sits while playing. Mount the sensor at ear height (roughly 4-5 feet from the floor) and at least 3 feet from any wall to avoid boundary effect amplification. If you must wall-mount, use a correction factor—most sensors include room compensation settings for corner, wall, or free-field placement. For drummers with multiple kits (acoustic and electronic), position the sensor equidistant between them to monitor both setups fairly.
Multi-Point Monitoring: Creating a Sensor Network
Single-point monitoring misses the complex way sound propagates. A floor sensor captures low-frequency buildup from the kick and toms, while a ceiling-mounted unit measures how sound travels to upstairs neighbors. Adding a hallway sensor reveals what actually escapes your practice room. Networked systems let you view all points simultaneously, identifying which frequencies need treatment versus which are contained. This approach is non-negotiable for drummers in multi-unit buildings or those building professional studios where client comfort matters.
Avoiding Acoustic Traps and Reflection Issues
Never place sensors in corners where bass frequencies accumulate, or directly on reflective surfaces like windows. Microphone diffusers—small foam spheres that surround the sensor’s mic—prevent standing waves from creating false readings. For rooms with low ceilings, angle the sensor slightly downward to minimize ceiling reflection interference. If your practice room includes acoustic panels, position the sensor in the “listening position” you’ve created with your treatment, not in an untreated reflection zone.
Integration with Your Existing Drum Setup
Standalone monitoring provides data; integrated monitoring provides solutions. The most powerful 2026 sensors don’t just measure—they actively participate in your sound management ecosystem.
Syncing with Electronic Drums and V-Drums
Modern e-kit modules output MIDI velocity data that correlates with acoustic volume. Advanced monitoring systems can receive this data via Bluetooth MIDI, creating a hybrid view of your playing. When you switch from mesh heads to acoustic drums, the sensor automatically adjusts thresholds based on your e-kit’s typical velocity range. Some systems even use machine learning to predict acoustic volume from your e-kit playing style, letting you practice silently while receiving feedback on what your acoustic volume would be—a game-changer for late-night technique work.
Connecting to DAWs and Recording Software
For recording drummers, volume data should live alongside your audio tracks. Sensors with ReWire or Ableton Link integration can create automation lanes showing dB levels throughout your performance. This reveals which fills are unexpectedly loud in the mix and helps gate engineers set thresholds more intelligently. Pro Tools and Logic Pro now support direct VST/AU plugins that receive data from network-enabled sensors, displaying real-time levels in your DAW’s mixer view. This integration is invaluable for self-producing drummers who need to maintain consistent levels across multiple takes.
Triggering Automated Volume Controls
The ultimate integration lets your sensor control your environment. When levels exceed 90 dB, smart outlets can automatically lower your monitor speaker volume or engage a secondary layer of acoustic treatment via motorized curtains. Some drummers rig systems that flash hue lights when they hit threshold, creating a visual metronome for dynamics. For those with soundproof booths, sensors can trigger ventilation fans to increase speed when high temperatures from loud playing are detected—a surprisingly important feature for comfort during intense sessions.
Legal Compliance: Staying on the Right Side of Noise Ordinances
Ignorance of local noise laws isn’t a defense, and “I didn’t know I was that loud” won’t appease a noise complaint officer. Most municipalities classify drumming as “impulsive noise,” which faces stricter limits than continuous sound like music playback.
Understanding Local dB Limits for Residential Areas
Typical ordinances specify both absolute maximums (often 55-65 dBA at property lines during daytime) and time-based restrictions (lower limits after 10 PM). The key phrase is “at the property line”—not in your room. This means you need to measure sound transmission, not just source level. Advanced sensors include “outdoor mode” that applies standard transmission loss calculations based on your wall construction type. For apartment dwellers, some systems let you input your building’s STC (Sound Transmission Class) rating to estimate neighbor exposure from in-room measurements.
Creating Compliance Reports for Landlords and Neighbors
Proactive communication prevents conflicts. Exportable PDF reports showing your 30-day average levels, practice schedule adherence, and peak limitation efforts demonstrate good faith. The most sophisticated systems generate neighbor-friendly dashboards—a private URL where your upstairs neighbor can view real-time levels (without seeing your playing schedule) and receive automatic text alerts before levels become problematic. This transparency transforms you from “that noisy drummer” into a responsible neighbor who respects shared spaces.
Time-Based Restrictions and Automated Scheduling
Your sensor should know your local ordinance schedule. Program it to enforce stricter thresholds automatically after 9 PM, or to prevent practice entirely during legally quiet hours. Some IoT sensors integrate with municipal noise monitoring networks in cities like London and New York, receiving real-time updates when temporary restrictions are enacted (during festivals or public events). This future-proofs your setup against changing regulations without requiring manual reprogramming.
Beyond Volume: Advanced Metrics for Serious Drummers
Volume is just the beginning. Modern sensors provide acoustic analysis that directly improves your playing and room sound.
Tracking Frequency Spectrum Analysis
1/3 octave band analysis reveals which drums are causing specific complaints. That 125 Hz spike? It’s your kick drum’s fundamental frequency resonating with your room’s dimensions. The 2 kHz buildup? Your snare wires are overpowering in that space. With this data, you can make targeted adjustments—tuning your kick up or down 5 Hz to avoid room modes, or adding a specific weight of tape to your snare to tame problematic frequencies. The best systems overlay your frequency data on top of a typical drum kit spectrum, highlighting which drums need attention.
Monitoring Room Modes and Standing Waves
Low-frequency standing waves create pockets of booming volume in corners and nulls elsewhere. Advanced sensors with multiple microphones can map your room’s modal response, showing you exactly where to position your kit and listener. They track how your room’s response changes when you open a door or window, providing data for creating consistent monitoring conditions. This is crucial for drummers who also mix in their practice space, as it ensures your recordings translate accurately to other systems.
Measuring Reverberation Time (RT60)
RT60—the time for sound to decay 60 dB—directly affects drum clarity. In a room with 1.2 seconds of reverb, your fast 32nd-note grooves blur into mush. Sensors that measure RT60 help you calibrate acoustic treatment, showing whether that new bass trap actually reduced decay from 1.0 to 0.8 seconds at 100 Hz. For hybrid drummers, this data helps match your acoustic room sound to your electronic reverb settings, creating seamless blends between real and sampled drums.
Budget Considerations: From Entry-Level to Professional
Price correlates with accuracy, features, and durability, but the most expensive sensor isn’t always the best for your specific needs.
What to Expect at Different Price Points
Entry-level systems ($50-150) provide basic A-weighted measurements with limited logging. They’re sufficient for apartment drummers who simply need to avoid complaints. Mid-range units ($200-400) add C-weighting, data export, and basic connectivity—the sweet spot for most serious hobbyists. Professional systems ($500-1000+) offer Type 1 accuracy, multi-point networking, and API access for custom integrations. These are justified for recording studios, teaching facilities, or drummers with commercial neighbors. Enterprise solutions ($1500+) include certified calibration, legal-grade reporting, and integration with building management systems.
Hidden Costs: Calibration, Accessories, and Subscriptions
That $200 sensor requires annual calibration ($50-75) to maintain accuracy. Windscreens for outdoor measurements, extension microphones for hard-to-reach placements, and cloud storage subscriptions for historical data all add up. Some IoT platforms charge monthly fees for advanced analytics or neighbor dashboard features. Factor these into your total cost of ownership. A $300 sensor with free lifetime cloud storage often costs less over three years than a $200 sensor with a $10/month subscription.
Future-Proofing Your Investment: 2026 and Beyond
Technology moves fast, but certain standards ensure your purchase won’t be obsolete by 2027.
AI-Powered Predictive Monitoring
Emerging sensors use on-device machine learning to predict volume spikes before they happen. By analyzing your playing patterns, they can warn you that your upcoming chorus typically runs 8 dB louder than your verse, letting you adjust before the red light flashes. Some systems even suggest specific technique modifications—“tighten your hi-hat grip” or “move your crash cymbal 4 inches left”—based on correlation analysis between your movements and volume data. While still nascent, this AI coaching represents the future of sensor utility.
Integration with Smart Home Ecosystems
Matter protocol support ensures your sensor works with Apple HomeKit, Google Home, and Amazon Alexa without proprietary bridges. This lets you create scenes like “Practice Mode” that automatically closes smart blinds, engages sound treatment, and sets your thermostat to compensate for heat buildup. As smart home adoption accelerates, this integration becomes less a luxury and more an expectation for seamless living.
Emerging Standards in Audio Monitoring
The new IEC 61672-2:2025 standard, fully implemented in 2026, requires impulse noise accuracy ratings specifically for percussive instruments. Sensors certified to this standard provide more reliable drum-specific measurements than older units. Additionally, the Open Sound Control (OSC) protocol is replacing MIDI for sensor data transmission, offering higher resolution and lower latency. Prioritizing devices with OSC support ensures compatibility with next-generation audio software.
Installation and Setup Best Practices
Even the best sensor provides garbage data if installed incorrectly. Proper setup is non-negotiable for reliable monitoring.
DIY vs. Professional Installation
Most wall-mounted and IoT sensors are designed for DIY installation with included templates and level apps. However, professional acoustic consultants provide value when integrating sensors into complex studio builds. They’ll perform baseline measurements, verify calibration against reference standards, and position sensors to avoid HVAC interference. For drummers investing over $1000 in a monitoring network, the $200-300 consultation fee pays dividends in data accuracy and system longevity.
Calibration Procedures for Drum-Specific Environments
Factory calibration uses reference tones at 1 kHz, but drums produce broadband impulses. Use a pistonphone calibrator (94 dB or 114 dB tone) before first use and quarterly thereafter. For drum-specific calibration, some manufacturers offer “percussive calibration” using a standardized drum hit at a known distance. This accounts for your sensor’s impulse response characteristics. Always calibrate in your final mounting position; removing and reinstalling a sensor can shift its microphone alignment enough to affect readings.
Software Configuration and App Setup
Initial setup should include creating multiple profiles: “Solo Practice,” “Band Rehearsal,” “Recording,” and “Quiet Time.” Each needs different thresholds and alert behaviors. Configure your app to log data locally first, then sync to cloud when on Wi-Fi—this prevents data loss during network outages. Set up push notifications for threshold breaches, but disable them during scheduled practice times to avoid distraction. Most importantly, enable data export automation so your logs back up to Google Drive or Dropbox weekly without manual intervention.
Interpreting Your Data: From Numbers to Actionable Insights
Raw decibel numbers are meaningless without context. The goal is transforming data into practice improvements.
Setting Personal Thresholds and Goals
Start by measuring your current playing for one week without trying to change anything. This baseline reveals your natural dynamic range. Then set progressive goals: reduce average level by 3 dB over the next month while maintaining the same perceived intensity. This is achievable through technique refinement rather than just playing softer. Use your sensor’s histogram view to see what percentage of your practice falls in each volume bracket—aim for 80% under 90 dB with occasional peaks only for accents.
Identifying Problem Frequencies in Your Playing
Export your 1/3 octave data to a spreadsheet and look for frequencies that consistently spike 6+ dB above adjacent bands. These are your “signature peaks.” If 250 Hz is always hot, your rack tom is likely tuned too low for the room. If 4 kHz dominates, your cymbals are too bright or you’re overplaying them. Use this data to make targeted equipment changes—thicker cymbals, different drumheads, or adjusted tuning—rather than guessing. The sensor becomes your objective second set of ears.
Correlating Volume with Technique Improvements
Log your sensor data alongside video recordings of your practice. When you notice a 5 dB drop in average level while maintaining the same groove, review the footage to identify what changed—maybe you started using more fingers in your grip or relaxed your shoulders. This creates a feedback loop where the sensor validates technique adjustments. Over time, you’ll build a personal database of which technical changes produce the most significant acoustic benefits, accelerating your progress.
Common Mistakes Drummers Make with Monitoring Equipment
Even experienced musicians fall into these traps, undermining their investment and data quality.
Relying on a Single Measurement Point
One sensor tells a fraction of the story. Your ears experience different levels than your neighbor’s wall. A sensor by your foot measures kick drum coupling with the floor, while your ears are bombarded by cymbal overheads. Multi-point monitoring isn’t overkill—it’s necessary for complete understanding. At minimum, use two sensors: one at ear position and one at the room’s most problematic boundary (shared wall, floor, or ceiling).
Ignoring Room Acoustics in Readings
A 120 dB reading in a live, reflective room impacts neighbors differently than 120 dB in a heavily treated space. Your sensor measures source level, not transmission. Always note your room’s treatment status in your logs. When you add bass traps or diffusers, measure before and after to quantify improvement. Without this context, you’re comparing apples to oranges across different practice sessions.
Forgetting Regular Recalibration
Microphones drift. Temperature and humidity affect sensitivity. A sensor that’s 3 dB off after six months can mean the difference between compliance and a violation. Set calendar reminders for quarterly calibration checks. If your sensor takes a fall or gets hit by a stick (inevitable), recalibrate immediately. Keep a logbook of calibration dates and results—this demonstrates due diligence if your data is ever questioned.
Maintaining Your Monitoring System for Long-Term Accuracy
Like drumheads and cymbals, sensors require maintenance to perform their best.
Cleaning and Physical Maintenance
Dust and stick splinters affect microphone ports. Use compressed air monthly and a soft brush weekly. For wall-mounted units, check mounting screws quarterly—vibration loosens them over time, shifting the sensor’s angle and affecting readings. If your sensor has a removable windscreen for outdoor calibration, wash it in mild soap monthly to prevent oil buildup from hands and air.
Software Updates and Firmware Management
Manufacturers release firmware updates that improve impulse response algorithms and add features. Enable automatic updates but schedule them for non-practice days. Before updating, export all historical data—updates occasionally reset storage. Review release notes carefully; some updates change default calibration curves, requiring recalibration. Join user forums to learn about bugs before they affect your system.
When to Replace Sensors and Components
Microphones have a finite lifespan, typically 5-7 years of regular use. If calibration fails repeatedly or readings become erratic, the capsule may be failing. Battery-powered units need battery replacement every 2-3 years even if they still hold charge, as voltage droop affects accuracy. For IoT sensors, plan for obsolescence when manufacturers announce end-of-cloud support—usually 5-8 years after release. Budget for sensor replacement every 5 years to maintain professional-grade accuracy.
Frequently Asked Questions
How loud is too loud for my apartment practice room?
Most residential ordinances limit sound to 55-65 dBA at your property line, which typically translates to 80-85 dBA in your room if you share walls. Use a sensor with outdoor measurement capability to check levels at your neighbor’s wall, not just by your drums. Always practice during permitted hours, usually 9 AM to 8 PM.
Can a noise sensor help me play more quietly without losing intensity?
Absolutely. Sensors with frequency analysis reveal that much of your perceived volume comes from specific frequency ranges. By tuning drums differently, using dampening, or adjusting cymbal selection based on data, you can maintain musical intensity while reducing overall dB levels. Many drummers find they can cut 5-7 dB through technique and gear changes alone.
What’s the difference between a $50 and $500 decibel meter?
Accuracy, features, and durability. A $50 meter might be ±3 dB accurate with only A-weighting and no data logging. A $500 professional unit offers ±1 dB accuracy, simultaneous A/C/Z weighting, 1/3 octave analysis, and network connectivity. For legal compliance or professional studio work, the precision and documentation features justify the cost. For casual apartment playing, a mid-range model around $200 often provides the best value.
Do I need multiple sensors, or will one suffice?
One sensor is better than none, but two provide dramatically more useful data. Position one at your listening position and one near your most problematic shared surface (floor or wall). This reveals the difference between what you hear and what neighbors experience. For serious recording studios, a three-sensor network is standard practice.
How often should I calibrate my sound sensor?
At minimum, calibrate quarterly using an acoustic calibrator. If you drop the sensor, move it to a new location, or notice inconsistent readings, recalibrate immediately. Professional studios calibrate monthly. Keep a log of all calibrations with dates and results—this documentation is essential if your readings are ever legally challenged.
Can these sensors integrate with my electronic drum module?
Yes, many modern sensors accept MIDI input from e-kit modules, correlating acoustic measurements with your electronic playing. This hybrid view shows how your touch on pads translates to acoustic volume when you switch to real drums. Look for sensors with Bluetooth MIDI or USB connectivity for seamless integration.
What’s the best placement for accurate drum monitoring?
Mount the sensor at ear height (4-5 feet) in your normal listening position, at least 3 feet from walls. Avoid corners and direct reflections. For multi-point setups, place secondary sensors at boundary surfaces where sound transmits to neighbors. The goal is measuring what you hear and what they hear, not just source level.
Will a noise sensor protect my hearing?
A sensor alone doesn’t protect hearing, but it provides the awareness needed to do so. Use it to identify when levels exceed 85 dB (the start of risk) and 100 dB (immediate danger with extended exposure). Pair sensor data with proper hearing protection and breaks using the 60/60 rule: 60 minutes of playing, 60 minutes of rest when consistently above 95 dB.
How do I interpret frequency spectrum data?
Look for frequencies that spike 6+ dB above adjacent bands. These are your problem areas. If 125 Hz is hot, your kick or floor tom is resonating with the room. If 4 kHz dominates, your cymbals or snare wires are overpowering. Use this data to make targeted tuning, dampening, or equipment changes rather than guessing.
Are smartphone decibel apps reliable enough for drum monitoring?
Not for critical applications. While some 2026 apps using external calibrated microphones approach professional accuracy, most rely on your phone’s internal mic, which is designed for voice, not high-SPL impulse noise. They can give a general sense of loudness but lack the accuracy, dynamic range, and impulse response needed for legal compliance or hearing safety. Use them for casual checking, but invest in a dedicated sensor for serious monitoring.