Tomatoes are finicky light connoisseurs. Give them too little radiation and they stall; blast them with excessive UV and they shut down photosynthesis, thicken their skins defensively, or develop blotchy fruit. In the high-stakes world of modern greenhouse cultivation, where a 10% yield swing can mean tens of thousands of dollars in revenue, flying blind on light conditions is no longer an option. Smart greenhouse operators are increasingly turning to sophisticated UV and radiation sensors as their secret weapon for tomato optimization—not just to measure light, but to orchestrate it.
The right sensor network transforms your greenhouse from a static structure into a responsive ecosystem that adapts to cloud passes, seasonal shifts, and even the subtle growth stage changes of your tomato crop. But not all sensors speak the same language, and choosing the wrong technology can leave you drowning in meaningless data or, worse, making costly decisions based on inaccurate readings. This guide cuts through the technical jargon to give you a master-level understanding of what to look for, how to deploy it strategically, and how to translate photon measurements into profitable fruit production.
Top 10 UV Sensors for Smart Greenhouses
Detailed Product Reviews
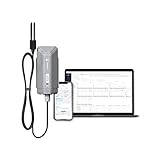
1. SONOFF SNZB-02WD IP65 Zigbee LCD Smart Temperature Humidity Sensor, Waterproof for Greenhouse/Bathroom, App Monitoring with Charts, Flexible Installation

Overview: The SONOFF SNZB-02WD is a compact Zigbee-enabled temperature and humidity sensor designed for moisture-prone environments. With its IP65 waterproof rating and integrated LCD display, it provides real-time environmental monitoring for greenhouses, bathrooms, and warehouses. The device pairs with smart home hubs to deliver data to a companion app for remote tracking and analysis.
What Makes It Stand Out: Unlike basic indoor sensors, this unit’s IP65 certification and specialized waterproof breathable membrane allow reliable operation in humid conditions without compromising accuracy. The combination of local LCD display and app-based chart visualization with data export capability gives users both immediate feedback and long-term trend analysis. Flexible magnetic or hanging installation adapts to virtually any space, from greenhouse frames to bathroom walls.
Value for Money: At $19.90, this sensor significantly undercuts many competitors while offering premium features like waterproofing and data export. Zigbee devices typically require a hub (like SONOFF’s own or Samsung SmartThings), but the total investment remains lower than most WiFi alternatives with similar durability. For greenhouse operators or homeowners monitoring multiple damp locations, the cost-per-sensor is highly attractive.
Strengths and Weaknesses: Strengths include robust IP65 waterproofing, versatile installation options, real-time LCD readout, detailed charting with export functionality, and seamless Zigbee integration. Weaknesses are the hub requirement (not included), limited 2.4GHz Zigbee range compared to WiFi, and dependency on compatible ecosystems. Battery life varies with reporting frequency.
Bottom Line: An excellent choice for smart home enthusiasts needing reliable moisture-resistant monitoring. Ideal for greenhouses, bathrooms, or basements where WiFi sensors would fail. Ensure Zigbee hub compatibility before purchasing.
2. Urageuxy WiFi Weather Station with 8.3 inch Color Display – Wireless Outdoor Sensor Measures Rain Gauge, Wind Speed/Direction, Temperature, Humidity, UV, Forecasts, Barometer

Overview: The Urageuxy WiFi Weather Station is a comprehensive 7-in-1 meteorological system designed for weather enthusiasts and homeowners seeking professional-grade data. The package includes a large 8.3-inch color display console and a robust outdoor sensor array that tracks temperature, humidity, wind speed/direction, rainfall, UV index, barometric pressure, and light intensity. Data automatically syncs to popular weather platforms via WiFi.
What Makes It Stand Out: This station’s standout feature is its extensive sensor suite combined with seamless WiFi integration to Weather Underground, PWSweather, and WeatherCloud, enabling community data sharing and historical analysis. The vibrant color display offers four brightness levels and customizable alerts for multiple parameters. A 328-foot wireless range provides flexibility in sensor placement, while manual calibration ensures accuracy across all measurements.
Value for Money: At $159.99, this weather station delivers exceptional value compared to professional units costing twice as much. The inclusion of rain gauge, anemometer, and UV sensor in one package eliminates need for separate devices. Integration with weather networks adds significant value for enthusiasts tracking microclimates. While not Davis Instruments-grade, it offers 90% of functionality at a fraction of the price.
Strengths and Weaknesses: Strengths include comprehensive sensor array, WiFi auto-upload to multiple platforms, excellent display readability, long wireless range, and weatherproof construction. Weaknesses involve 2.4GHz WiFi limitation, potential signal interference in dense areas, and the need for occasional sensor calibration. The display requires constant power, limiting portable use.
Bottom Line: Highly recommended for weather hobbyists, gardeners, and homeowners wanting detailed local conditions. The feature set and connectivity rival more expensive systems, making it an outstanding mid-range choice for serious weather monitoring.
3. Seeed Studio SenseCAP S2105 - LoRaWAN Wireless Soil Moisture, Temperature, and EC Sensor with Bluetooth Configuration, Outdoor Smart Sensor with Alerts, Soil Moisture Meter with IP66 Enclosure.
Overview: The Seeed Studio SenseCAP S2105 is an industrial-grade LoRaWAN sensor designed for precision agricultural and environmental monitoring. It measures soil moisture, temperature, and electrical conductivity (EC)—a critical indicator of nutrient availability. Encased in an IP66-rated enclosure, it withstands harsh outdoor conditions while delivering data over impressive distances via LoRaWAN networks like Helium or TTN.
What Makes It Stand Out: The S2105’s industrial design combines three essential soil parameters with LoRaWAN’s ultra-low power consumption, enabling up to 10 years of battery life. Its Bluetooth configuration simplifies setup to under one minute, while the 2km urban range (10km line-of-sight) far exceeds WiFi or Zigbee alternatives. The EC measurement capability distinguishes it from consumer-grade moisture sensors, providing actionable insights for serious growers.
Value for Money: At $269.00, this sensor targets professional users rather than casual gardeners. The price reflects industrial durability, multi-parameter sensing, and decade-long operational lifespan. Compared to traditional soil testing labs or multiple single-parameter sensors, it offers continuous monitoring and substantial long-term savings. For commercial agriculture, research, or smart farming operations, the ROI justifies the investment.
Strengths and Weaknesses: Strengths include exceptional IP66 durability, triple-parameter measurement, extraordinary battery life, kilometer-range wireless, rapid Bluetooth setup, and compatibility with major LoRaWAN networks. Weaknesses are the high upfront cost, requirement for LoRaWAN gateway (not included), steeper learning curve for non-technical users, and limited appeal for hobbyists with small gardens.
Bottom Line: Ideal for commercial farmers, agricultural researchers, and IoT professionals needing reliable, long-range soil monitoring. The premium price delivers industrial performance and longevity that consumer sensors cannot match. Not recommended for casual home use.
Understanding the Light Spectrum in Smart Greenhouses
The Science Behind UV and PAR
Light isn’t just “bright” or “dim”—it’s a complex spectrum of electromagnetic waves that affect your tomatoes in dramatically different ways. Photosynthetically Active Radiation (PAR) spans 400-700 nanometers and drives the energy production your plants need for growth. But the spectrum extends beyond this range into ultraviolet (UV-A at 315-400 nm, UV-B at 280-315 nm) and infrared wavelengths that signal stress, trigger protective compounds, and influence fruit development.
Smart sensors don’t just measure intensity; they quantify specific spectral bands that correlate directly with tomato physiological responses. A basic lux meter might tell you how bright it looks to human eyes, but it completely misses the UV-B that triggers flavonoid production or the far-red light that influences leaf expansion. Modern greenhouse sensors use diffusers, interference filters, and photodiodes tuned to specific wavelengths, giving you a molecular-level view of your light environment.
How Radiation Affects Tomato Physiology
Tomatoes respond to radiation at multiple levels. At the leaf surface, UV-B activates stress-response genes that can either enhance flavor compounds or suppress photosynthesis if the dose is too high. Below the epidermis, specific wavelengths drive chlorophyll absorption peaks at 430 nm and 662 nm, while blue light (450-495 nm) regulates stomatal opening and stem elongation. Red and far-red ratios control the phytochrome system, influencing everything from germination to fruit ripening timing.
Understanding these mechanisms is crucial because it determines what you measure. A sensor that only captures total radiation might show “optimal” levels while your plants are actually experiencing harmful UV stress or insufficient blue light for proper stomatal regulation. The interplay between intensity, duration, and spectral quality creates a three-dimensional challenge that requires equally sophisticated monitoring.
Why Tomato Crops Demand Precision Light Monitoring
Photosynthesis Optimization
Tomatoes have a light saturation point around 800-1000 µmol/m²/s for PAR. Beyond this, additional photons don’t increase photosynthesis and can actually cause photoinhibition, where excess energy damages the photosynthetic apparatus. But here’s the catch: this saturation point moves. It drops during heat stress, shifts with CO₂ levels, and changes as plants transition from vegetative growth to fruit loading.
Precision sensors allow you to track these moving targets in real-time. By monitoring PAR levels at canopy height throughout the day, you can trigger shade curtains before photoinhibition occurs or adjust supplemental lighting to maintain optimal DLI (Daily Light Integral) during short winter days. Without this data, you’re either wasting electricity on unnecessary lighting or losing potential yield to suboptimal conditions.
Stress Prevention and Fruit Quality
Excessive UV exposure triggers tomatoes to produce reactive oxygen species that damage cell membranes and reduce fruit marketability. You might notice this as silvering, blistering, or uneven ripening. But by the time these symptoms appear visually, you’ve already lost quality and yield.
UV sensors detect harmful radiation before damage occurs, enabling proactive responses like deploying diffuse screens, activating misting systems, or adjusting ventilation. Conversely, controlled UV stress at specific growth stages can actually enhance pigment development and flavor compounds. The key is precision—knowing exactly when and how much UV your crop receives allows you to harness benefits while avoiding damage.
Types of UV and Radiation Sensors Explained
Broadband UV Sensors
These workhorses measure integrated UV intensity across broad bands (typically UV-A or UV-B). They’re cost-effective and robust, making them ideal for monitoring overall UV stress levels. Most use filtered photodiodes that respond to specific wavelength ranges, providing simple analog or digital outputs proportional to UV intensity.
For tomato operations, broadband sensors excel at triggering protective responses. When UV-B levels exceed your crop’s stress threshold, they can automatically deploy shade screens or activate cooling systems. However, they lack spectral detail, so you won’t know if you’re getting beneficial UV-A or harmful UV-B dominance. They’re best used in conjunction with more sophisticated instruments or for operations focused primarily on stress prevention rather than spectral optimization.
Spectroradiometers
These instruments split light into discrete wavelengths using diffraction gratings, measuring intensity every nanometer or few nanometers across the entire spectrum. They’re the gold standard for understanding your complete light environment, revealing peaks, gaps, and spectral imbalances invisible to broadband sensors.
While historically expensive and lab-bound, modern mini-spectroradiometers now offer greenhouse-grade durability and continuous monitoring. For tomato growers, this means identifying when your HPS lights are producing too much far-red compared to your LEDs, or detecting that your polycarbonate glazing is filtering out beneficial UV-A. The data volume can be overwhelming, but when integrated with smart analytics platforms, spectroradiometers provide unprecedented control over light quality.
Quantum PAR Sensors
Quantum sensors measure photosynthetic photon flux density (PPFD) in µmol/m²/s—the actual currency of photosynthesis. Unlike lux meters, they weight photons equally regardless of wavelength within the PAR range, giving you a true measure of photosynthetic potential. Advanced models now separate this into blue, green, and red/far-red channels, offering spectral insight without full spectroradiometer complexity.
For tomato yield optimization, quantum sensors are non-negotiable. They directly quantify the light driving your crop’s growth, allowing precise DLI management. Models with spectral channels help you maintain optimal blue:red ratios for compact, healthy vegetative growth or adjust far-red levels to influence fruiting patterns. Look for cosine-corrected diffusers that ensure accurate readings at low sun angles—critical for early morning and late afternoon measurements.
Pyranometers and Albedometers
Pyranometers measure total global solar radiation (typically 300-3000 nm), capturing everything from UV to infrared. Albedometers pair two pyranometers—one facing up, one down—to measure reflected radiation and calculate canopy light interception efficiency. For tomatoes grown in high-wire systems, this reveals how much light actually reaches the lower leaves versus what bounces back from the floor.
These sensors are invaluable for energy balance calculations and irrigation scheduling. High radiation loads increase transpiration demand, and when combined with VPD sensors, pyranometer data can trigger precise irrigation events. The reflected radiation measurement helps optimize planting density and leaf pruning strategies to maximize light capture without creating excessive shade within your canopy.
Critical Features to Evaluate Before Investing
Spectral Range and Accuracy
Sensor specifications often highlight “high accuracy” without defining what that means in practice. For UV sensors, accuracy should be within ±5% of full scale, with repeatability better than ±2%. PAR sensors need cosine responses within ±5% at 75° zenith angle to maintain accuracy during morning and evening hours—crucial for accurate DLI calculations.
Check the spectral response curves provided by manufacturers. A PAR sensor should have minimal response outside 400-700 nm, while a UV-B sensor must sharply cut off above 315 nm to avoid UV-A contamination. Ask for calibration certificates traceable to NIST or ISO standards, and understand that field calibration drifts—plan for annual recalibration budgets of 10-15% of sensor cost.
Durability in Harsh Environments
Greenhouses are brutal on electronics—condensing humidity swings from 40% to 100%, temperatures from near-freezing to 50°C, corrosive nutrients in the air, and constant UV degradation of plastics. IP67-rated housings are minimum; look for vented designs that prevent internal condensation while blocking water ingress.
Optics matter enormously. Quartz or high-grade silica diffusers withstand UV degradation better than acrylic, which can yellow and drift within a single season. Internal desiccant chambers should be user-replaceable, and connectors need gold-plated contacts to resist corrosion. Some premium sensors include internal heaters to prevent dew formation on optics—essential for early morning readings in humid climates.
Connectivity and IoT Integration
Standalone sensors with display screens belong in the 1990s. Modern greenhouse operations require seamless data flow into centralized management platforms. Look for native support for Modbus RTU/TCP, MQTT, or RESTful APIs—protocols that integrate directly with climate computers like Hoogendoorn, Ridder, or custom Node-RED setups.
Wireless options (LoRaWAN, WiFi 6, or mesh networks) reduce installation costs but verify range in dense greenhouse environments where foliage and metal structures interfere with signals. Power-over-Ethernet (PoE) combines data and power in one cable, simplifying installation. Most importantly, ensure the sensor supports time-synchronized data logging—when you’re correlating light data with climate responses, timestamps must align within seconds, not minutes.
Calibration and Maintenance Requirements
Every sensor drifts. UV sensors drift fastest due to filter degradation; PAR sensors are more stable but still require annual checks. Understand the calibration process before purchase: Can you do it in-house with reference standards, or must you ship the unit back to the manufacturer? In-house calibration capability saves weeks of downtime and shipping costs.
Look for sensors with user-accessible calibration coefficients that you can adjust via software. Some advanced models include internal reference detectors that continuously monitor drift and auto-correct—a game-changer for maintaining long-term accuracy. Budget 2-3 hours per sensor annually for cleaning optics, checking desiccants, and verifying connections. Neglecting maintenance turns your precision instrument into an expensive paperweight within two growing seasons.
Strategic Sensor Placement for Maximum Impact
Vertical Positioning Strategies
Tomato canopies are three-dimensional, and light varies dramatically from top to bottom. Place PAR sensors at three heights: above the canopy to measure incoming radiation, at fruiting zone height (typically 1.5-2 meters) where photosynthesis matters most, and near the base to monitor light penetration to lower leaves. This vertical profile reveals when your canopy becomes too dense and needs leaf pruning.
UV sensors should primarily monitor exposure at the fruit level, where damage occurs. Position them at the height of your developing trusses, but be aware that fruit shading by leaves creates microclimates. Consider mobile sensor systems on irrigation booms that traverse the greenhouse, building high-resolution maps of UV exposure across your crop. Fixed sensors give you time-series data; mobile systems reveal spatial variability that fixed points miss entirely.
Horizontal Distribution Patterns
Light uniformity in greenhouses often varies 30-40% from center to edge due to structure shading and ventilation window patterns. A single central sensor can be misleading. Deploy sensors in a grid pattern based on your greenhouse’s characteristic dimensions: one per 500-1000 m² for uniform glasshouses, more frequently under diffuse coatings or in gutter-connected structures.
Map your sensor locations to plant performance zones. If your east side consistently produces smaller fruit, place additional sensors there to quantify the morning light deficit. Use sensor networks with automatic data aggregation that calculates greenhouse-wide averages, minimums, and maximums—knowing your average PAR is 600 µmol/m²/s means little if half your crop is at 400 and the other half at 800.
Integrating Sensors with Your Greenhouse Management System
Data Protocols and API Compatibility
Your sensor is only as smart as its ability to talk to your climate computer. Before purchasing, verify physical compatibility: Does your system use 4-20 mA analog inputs, digital Modbus registers, or require MQTT brokers? Many modern sensors offer multiple output options, but configuration complexity varies wildly.
Request the Modbus register map or API documentation before buying. Some manufacturers provide elegant, well-documented APIs; others offer cryptic spreadsheets requiring reverse engineering. Test integration using the manufacturer’s demo software or a simple Python script. If you can’t get clear integration documentation during the sales process, imagine the support nightmare when something fails mid-season. Open-source integration examples on GitHub often indicate a manufacturer that understands the modern IoT ecosystem.
Automated Response Triggers
The real value of sensors emerges when they automatically trigger greenhouse responses. Configure your system to deploy shade curtains when UV-B exceeds 0.5 W/m² during fruit ripening stages. Set PAR-based triggers for supplemental lighting: turn on HPS when natural PPFD drops below 200 µmol/m²/s, but prioritize LED zones when the ratio of blue light falls below 15% of total PAR.
Advanced setups create cascading logic: High radiation + low humidity = immediate misting. High UV + young seedlings = activate thermal screen. The key is crop-stage specificity—a vegetative tomato can handle UV levels that would destroy ripening fruit. Your automation system must support conditional logic based on both sensor values and crop stage inputs from your cultivation schedule.
Interpreting Sensor Data for Tomato-Specific Outcomes
Establishing Crop-Specific Thresholds
Generic crop recommendations are starting points, not gospel. Your specific tomato variety, graft combination, and local climate create unique optimal ranges. Begin by logging everything for one full growing season while manually tracking fruit quality metrics: size distribution, Brix levels, incidence of disorders like yellow shoulder or blossom end rot.
Correlate these quality parameters with your sensor data to establish variety-specific thresholds. You might discover that your cherry tomatoes develop optimal sugar content when DLI reaches 22 mol/m²/day with UV-A constituting 3-5% of total radiation, while your beefsteak variety shows stress above 18 mol/m²/day. These crop-specific insights transform generic sensor data into a variety-specific recipe for premium yields.
Seasonal Adjustment Strategies
Tomato light requirements shift dramatically through the season. Young transplants need gentle light around 150-200 µmol/m²/s to avoid stretch. Vegetative growth pushes this to 400-600 µmol/m²/s. Fruit production peaks at 600-800 µmol/m²/s, but only if temperatures and humidity support it.
Program your sensor monitoring system with seasonal setpoints that automatically adjust weekly. In spring, prioritize DLI accumulation to build strong plants. Summer requires UV stress management and afternoon PAR reduction to prevent fruit disorders. Fall demands maximizing every photon as natural light declines. Winter focuses on maintaining minimum DLI while managing energy costs. Sensors that simply display current values miss this temporal dimension; you need trending and predictive analytics that anticipate seasonal transitions.
Calculating ROI: When Sensors Pay for Themselves
Yield Improvement Metrics
Quantifying sensor ROI starts with measuring what you couldn’t see before. A typical 1-hectare greenhouse producing 50 kg/m² of tomatoes might see 5-8% yield increases from optimized light management—that’s 2,500-4,000 kg of additional premium fruit. At €2/kg, that’s €5,000-8,000 in extra revenue.
Quality improvements often deliver higher ROI than quantity. Reducing UV damage from 15% to 5% of fruit means 10% more premium-grade tomatoes instead of discounted seconds. For a greenhouse generating €200,000 annually, a 10% quality upgrade can increase revenue by €15,000-20,000. Sensors that prevent just one major stress event per season—like a forgotten shade curtain during a heatwave—can save an entire week’s harvest worth €3,000-5,000.
Resource Savings Analysis
Sensors optimize inputs beyond just yield. Precise PAR monitoring can reduce supplemental lighting electricity by 15-20% by ensuring lights only run when needed and at optimal intensity. For a 1-hectare operation with 100 kW of supplemental lighting, that’s €8,000-12,000 saved annually at typical European electricity rates.
Water and nutrient savings accrue through better transpiration modeling. Pyranometer data integrated with climate control reduces overwatering by 10-15%, saving both water and fertilizer costs while improving root health. Combined, resource savings alone often justify sensor investments within 18-24 months, with yield improvements as pure profit thereafter.
Common Installation Mistakes to Avoid
The most expensive sensor delivers worthless data if installed poorly. Avoid mounting sensors directly to greenhouse structures that vibrate in wind—this creates noise in your data. Never place them where they’ll be shaded by equipment, vents, or hanging baskets, even intermittently. Condensation on optics is the silent killer of accuracy; position sensors where morning dew can evaporate quickly, or invest in heated optics.
Cable management matters. UV degrades standard PVC cable jackets within two seasons; specify UV-resistant cabling or conduit. Ground loops from improper electrical grounding create erratic readings; use isolated power supplies and signal conditioners. Most critically, document every sensor’s exact position and height. When you move irrigation booms or change trellising systems, you’ll need to relocate sensors accordingly. A sensor map integrated into your management software prevents data interpretation errors months later.
Future-Proofing Your Sensor Investment
Technology evolves rapidly. Choose sensors with firmware-upgradeable capabilities so new algorithms or spectral calculations can be added without hardware replacement. Modular designs that allow swapping sensor heads—upgrading from broadband UV to spectroradiometer modules—protect your initial infrastructure investment.
Consider emerging standards like the ASABE S613 standard for greenhouse light measurement, which specifies sensor performance requirements. Purchasing sensors that exceed current standards ensures compatibility with future analytics platforms. Finally, demand open data formats. Proprietary software that locks your data into a vendor’s ecosystem becomes a liability when better analysis tools emerge. CSV exports and open APIs are insurance policies for your data’s future value.
Frequently Asked Questions
1. How many sensors do I actually need for a 1-hectare tomato greenhouse?
For a standard Venlo-type greenhouse, plan for three PAR sensors (above canopy, fruiting zone, base), two UV sensors (fruiting zone east and west sides), and one pyranometer for energy balance. Add more sensors if you have known uniformity issues or variable shading. Start with this core array and expand based on data insights.
2. Can I use outdoor weather station sensors inside my greenhouse?
No—outdoor sensors lack the accuracy and spectral tuning for greenhouse applications. Their calibration drifts rapidly in high-humidity environments, and they can’t measure the subtle spectral differences that affect tomatoes. Invest in sensors specifically designed for controlled environment agriculture, even if they cost more initially.
3. How often should I recalibrate my UV and PAR sensors?
PAR sensors need annual recalibration; UV sensors require every 6-12 months depending on cumulative exposure. If you notice sudden drift or after any physical cleaning of optics, recalibrate immediately. Keep a reference sensor stored in darkness as a calibration check between formal recalibrations.
4. What’s the difference between DLI and PPFD, and why does it matter for tomatoes?
PPFD is instantaneous photon flux (µmol/m²/s), like speed. DLI (Daily Light Integral) is the total photons over 24 hours (mol/m²/day), like distance traveled. Tomatoes need consistent DLI of 20-30 mol/m²/day for optimal yields. You could have high PPFD at noon but still fall short on DLI if mornings and evenings are dark, which is why continuous monitoring matters.
5. Do I need separate sensors for LED and natural sunlight measurement?
Modern PAR sensors measure both accurately, but spectral sensors help optimize LED ratios. The real issue is dynamic range—some sensors can’t accurately measure both the 2000 µmol/m²/s of full sun and the 50 µmol/m²/s of minimal supplemental light. Choose sensors with adjustable gain or high dynamic range (HDR) capability for mixed lighting environments.
6. How do I protect sensors from nutrient spray and greenhouse chemicals?
Mount sensors with small roof overhangs or use hydrophobic coatings on optics. Never spray directly toward sensors; turn them off and cover them during crop protection applications. Rinse optics monthly with distilled water and soft cloths—never solvents. Some growers install automated air curtains that blow a gentle stream of filtered air across sensor optics.
7. Can sensor data really improve my tomato flavor and Brix levels?
Absolutely. UV-A exposure around 3-5% of total radiation enhances sugar accumulation and pigment development. Spectral sensors help you maintain this ratio by controlling screen deployment and glazing selection. One European grower increased average Brix from 4.8 to 5.6 by optimizing UV-A exposure during the final 3 weeks before harvest.
8. What’s the typical payback period for a complete sensor system?
Most commercial tomato operations see payback within 18-30 months. The fastest returns come from energy savings in supplemental lighting (often under 18 months), followed by quality improvements (24 months), then yield increases (30+ months). Operations in high-radiation climates see faster returns due to stress prevention value.
9. Should I choose wired or wireless sensors for my retrofit greenhouse?
Wired sensors (PoE or 4-20 mA) offer superior reliability and no battery concerns—ideal for permanent installations. Wireless works well for mobile sensors on irrigation booms or temporary monitoring of problem zones. Many modern systems use hybrid approaches: wired backbone with wireless extensions. Avoid pure battery-powered sensors; they always die at the worst moment.
10. How do I correlate sensor data with actual tomato yield and quality?
Implement a digital crop registration system that logs harvest data by greenhouse zone. Modern greenhouse management software can overlay yield maps with light distribution data, revealing correlations. Start simple: tag fruit harvested from sensor-proximate plants and compare quality metrics. Over one season, patterns emerge that let you establish zone-specific light targets for subsequent crops.