If your Raspberry Pi-powered smart home hub is starting to feel like a relic from a bygone era, you’re not alone. While these versatile single-board computers revolutionized DIY home automation years ago, the rapid evolution of connectivity standards has left many early adopters wrestling with compatibility issues and frustrating range limitations. Enter Thread—the mesh networking protocol that’s become the backbone of the Matter standard—and the humble USB dongle that can breathe new life into your aging setup.
Upgrading your Raspberry Pi hub with Thread connectivity isn’t just about keeping pace with technology; it’s about unlocking a future where your smart devices respond instantly, maintain rock-solid connections, and play nicely across different ecosystems. But not all Thread USB dongles are created equal, and choosing the right one requires understanding a complex interplay of hardware specifications, software support, and real-world performance factors that manufacturers rarely advertise. This guide cuts through the marketing noise to arm you with the technical knowledge needed to make an informed decision.
Top 10 Thread USB Dongles for Raspberry Pi Smart Hubs
Detailed Product Reviews
1. SONOFF Zigbee 3.0 & Thread Dongle Lite (EFR32MG21) | USB Stick Coordinator for Home Assistant & Zigbee2MQTT | Compact Gateway with Easy Firmware Flashing & Extension Cable

Overview: The SONOFF Zigbee 3.0 & Thread Dongle Lite is a versatile USB coordinator for DIY smart home enthusiasts. Built around the reliable EFR32MG21 chipset, this compact stick enables low-latency Zigbee 3.0 and Thread communication. It works seamlessly with Home Assistant and Zigbee2MQTT, providing an excellent foundation for a robust, locally-controlled smart home ecosystem.
What Makes It Stand Out: This dongle offers remarkable firmware flexibility—flash it to operate as a Zigbee Coordinator, Router, or Thread RCP using SONOFF’s tools. The included USB extension cable mitigates interference from USB 3.0 ports, a common issue that degrades Zigbee performance. Its compact form factor fits even cramped Raspberry Pi or mini-PC setups.
Value for Money: At $19.90, this dongle delivers exceptional value, undercutting premium alternatives like the ConBee III by over 50% while offering comparable compatibility with Philips Hue, Aqara, and IKEA Tradfri. The ability to repurpose the device across modes extends its lifespan, making it a smart investment for tinkerers.
Strengths and Weaknesses: Strengths include the proven EFR32MG21 chipset, multi-platform support, firmware versatility, and included extension cable. The main weakness is that firmware flashing requires technical comfort, which may intimidate beginners. Documentation could be more comprehensive for first-time users.
Bottom Line: Perfect for budget-conscious DIYers building a Home Assistant setup. The SONOFF dongle offers professional-grade hardware at an entry-level price, provided you’re willing to navigate initial configuration.
2. MakerSpot Micro USB OTG Hub for Raspberry Pi Zero 4 Port High Speed Sync and Extension Cable Adapter Also Works with Android Tablet Raspbian Jessie Linux
Overview: The MakerSpot Micro USB OTG Hub transforms a single Micro USB port into four standard USB 2.0 ports, specifically designed for Raspberry Pi Zero boards and select Android devices. This plug-and-play solution eliminates the need for external power adapters, drawing all necessary current directly from the host device. It’s an essential accessory for Pi Zero users who need to connect keyboards, mice, storage drives, or other peripherals simultaneously.
What Makes It Stand Out: Its universal compatibility spans beyond Raspberry Pi to include numerous Android tablets and smartphones from Samsung, Sony, and Toshiba. The hub requires no drivers on modern systems, making it truly plug-and-play. At under eight dollars, it’s one of the most affordable ways to expand connectivity on ultra-compact devices where every millimeter and dollar counts.
Value for Money: At $7.99, this hub is remarkably inexpensive. However, the low price reflects inherent limitations: USB 2.0 speeds max out at 480 Mbps, and power delivery is constrained by the host device’s capabilities. For basic input devices and low-power peripherals, it’s unbeatable, but it cannot handle power-hungry external drives reliably.
Strengths and Weaknesses: Strengths include rock-bottom pricing, broad device compatibility, driverless operation, and compact design. Weaknesses are the lack of external power input, USB 2.0 bandwidth limitations, and potential instability when connecting multiple high-draw devices. The plastic construction feels functional but not premium.
Bottom Line: An excellent budget solution for Raspberry Pi Zero hobbyists and Android users needing basic USB expansion. Just temper expectations regarding power delivery and data speeds.
3. iUniker USB Dongle Expansion Breakout Module Kit for Raspberry Pi Zero/W, Both Front & Back Side Can Be Inserted
Overview: The iUniker USB Dongle Expansion Breakout Module Kit addresses a specific pain point for Raspberry Pi Zero users: the lack of standard USB connectivity. This clever adapter enables bidirectional insertion and transforms your Pi Zero into a USB Ethernet gadget, allowing direct computer access via SSH without traditional networking hardware. It’s designed for developers who frequently reflash SD cards or need headless operation with convenient wired access.
What Makes It Stand Out: The reversible insertion design eliminates orientation frustration—a genuine quality-of-life improvement when working with the Pi Zero’s tiny form factor. Its primary superpower is enabling USB gadget mode, letting the Pi Zero appear as an Ethernet device to host computers. This creates a direct, reliable SSH pathway that bypasses Wi-Fi configuration headaches.
Value for Money: At $9.99, it’s reasonably priced for a specialized tool that solves a real problem. However, its value is entirely contingent on your workflow. If you regularly develop on Pi Zero boards, the time saved justifies the cost immediately. Casual users who simply need basic USB expansion would be better served by a standard OTG hub.
Strengths and Weaknesses: Strengths include the innovative bidirectional design, stable connectivity, straightforward assembly, and excellent documentation for configuring gadget mode. Weaknesses are its narrow focus—it’s useless for non-Pi Zero devices—and the required software configuration, which may confuse beginners. The PCB design is functional but lacks protective casing.
Bottom Line: A must-have for serious Raspberry Pi Zero developers. For everyone else, a standard OTG adapter offers more versatility at a similar price point.
4. Phoscon ConBee III - Universal Zigbee 3.0 USB Gateway dongle, incl. deCONZ & Phoscon App, Home Automation, Home Assistant, ioBroker, Zigbee2MQTT

Overview: The Phoscon ConBee III represents the premium tier of Zigbee USB coordinators, engineered for serious smart home enthusiasts who demand maximum reliability and range. This universal Zigbee 3.0 gateway supports virtually every major brand—including Philips Hue, Aqara, and IKEA—while delivering exceptional indoor and outdoor coverage. Operating entirely cloud-free, it ensures complete data sovereignty by running locally on Raspberry Pi, PC, or NAS systems.
What Makes It Stand Out: The ConBee III’s signal amplifier achieves impressive distances—up to 30 meters indoors and 200 meters outdoors—far exceeding most competitors. Its self-healing mesh network automatically optimizes device pathways, maintaining stability even as you add sensors. The built-in backup function simplifies migration between systems, a feature power users deeply appreciate. Setup takes under five minutes across Windows, macOS, Linux, and Docker environments.
Value for Money: At $42.63, the ConBee III commands a premium price, but delivers commensurate performance. For large homes with 50+ devices or outdoor sensor deployments, the extended range alone justifies the cost. Compared to budget dongles, you’re paying for superior RF engineering, robust construction, and polished software integration that reduces troubleshooting time.
Strengths and Weaknesses: Strengths include outstanding range, universal compatibility, multi-platform support, reliable performance, and effortless backup/restore. The primary weakness is cost—it’s overkill for small apartments with only a handful of devices. Some users report the deCONZ software can be resource-intensive compared to Zigbee2MQTT.
Bottom Line: If you’re building a comprehensive smart home with dozens of devices spanning multiple floors or outdoor areas, the ConBee III is worth every penny. For modest setups, consider budget alternatives.
5. Micro USB OTG to Ethernet Adapter with Powered Hub - Compatible with Raspberry Pi Zero, Older Android Devices, and Google Chromecast
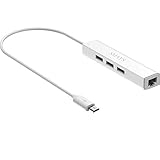
Overview: This Micro USB OTG to Ethernet Adapter with Powered Hub serves dual purposes: adding both wired network connectivity and three USB 2.0 ports to devices with Micro USB OTG support. Designed primarily for Raspberry Pi Zero, older Android tablets, and Chromecast devices, it solves connectivity limitations in compact systems. The integrated 10/100 Mbps Ethernet port provides stable internet where Wi-Fi is unreliable, while the USB expansion supports keyboards, storage, or other peripherals.
What Makes It Stand Out: The built-in DC power port is a game-changer, allowing external 5V power injection to support hungrier USB devices—something most OTG hubs lack. Its driver-less design works natively with Windows 8.1+, macOS 10.9+, Android 6.0+, and Chrome OS, eliminating software installation headaches. This makes it particularly valuable for Raspberry Pi Zero projects requiring both network stability and USB expansion.
Value for Money: At $13.99, you’re getting two accessories in one: an Ethernet adapter and a powered USB hub. Dedicated USB Ethernet adapters alone often cost $10-15, making this hybrid device a smart value. However, the 10/100 Mbps Ethernet feels dated in 2024, and the power adapter isn’t included, adding hidden cost if needed.
Strengths and Weaknesses: Strengths include the versatile dual-function design, optional external power, broad OS compatibility, and plug-and-play simplicity. Weaknesses are the limited Android compatibility (requires specific kernel support), modest Ethernet speeds, and potential power limitations when running without the optional adapter. The micro-USB connection is increasingly obsolete.
Bottom Line: An excellent, affordable solution for Raspberry Pi Zero builds needing reliable wired networking. Android users must verify device compatibility before purchasing.
6. MakerSpot 4-Port Stackable USB Hub HAT for Raspberry Pi Zero V1.3 (with Camera Connector) and Pi Zero W /2W (with Bluetooth & WiFi)
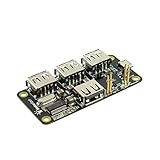
Overview: The MakerSpot 4-Port Stackable USB Hub HAT solves the single-port limitation of Raspberry Pi Zero boards by adding four USB 2.0 ports through a clever pogo pin design. This compact expansion board attaches directly to the Pi Zero’s test pads, eliminating cable clutter while maintaining the device’s tiny footprint. Designed specifically for the Zero series, it supports both bus-powered operation and external power input via micro-USB.
What Makes It Stand Out: This hub’s stackable architecture is its signature feature, allowing you to mount it directly beneath your Pi Zero while preserving access to the GPIO header. The gold-plated pogo pins ensure reliable connectivity without soldering. Its intelligent power management system includes over-current protection with LED warnings and 2-way back-power protection, preventing damage from power conflicts. The ability to deliver up to 2.3A with external power means you can run hungrier peripherals without instability.
Value for Money: At $13.99, this hub sits in the sweet spot for Pi Zero accessories. While basic OTG cables cost less, they lack the integration, protection circuits, and clean mounting solution. Competing HATs with similar features often run $15-20, making this a cost-effective choice for permanent installations where reliability matters.
Strengths and Weaknesses: Strengths include seamless stacking, robust power protection, flexible powering options, and clean pogo pin connectivity. The LED status indicators provide at-a-glance diagnostics. Weaknesses are its Zero-only compatibility—no support for larger Pi models—and USB 2.0 speed limitations inherent to the platform. The external power micro-USB port placement may conflict with some cases.
Bottom Line: Perfect for Pi Zero projects requiring multiple USB devices in a compact form factor. The protection features and stackable design justify the price for serious makers building permanent solutions. Skip if you need Ethernet or plan to upgrade to a full-size Pi.
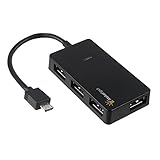
7. Luskinno 4-in-1 Micro USB OTG Adapter Hub with 3 USB Ports and 1 Ethernet Adapter, Reliable Data Sync for Raspberry Pi Zero/2W, Older Android Tablets, Nvidia Shield K1, Fire TV Cube Gen 2
Overview: The Luskinno 4-in-1 OTG Adapter Hub addresses two critical limitations of single-port devices: connectivity and networking. This versatile adapter splits one Micro USB OTG port into three USB 2.0 ports plus a 10/100M Ethernet connection. Targeted at Raspberry Pi Zero/2W users and owners of legacy Android devices like the Nvidia Shield K1, it transforms limited hardware into fully-connected workstations without driver headaches.
What Makes It Stand Out: Unlike basic USB hubs, the integrated RTL8152B-VB-CG Ethernet chip provides stable wired networking, eliminating Wi-Fi instability for server projects or streaming. The activity LED offers immediate visual feedback—surprisingly rare in budget hubs. Its broad compatibility across OTG-enabled Micro USB devices maximizes utility beyond just the Pi ecosystem, making it valuable for troubleshooting older tablets and media devices.
Value for Money: Priced at $13.59, this hub undercuts buying separate USB and Ethernet adapters while reducing cable clutter. Dedicated Pi Ethernet HATs often cost $15-25, and generic OTG adapters lack the robust chipsets and indicator features. For legacy device support alone, it pays for itself.
Strengths and Weaknesses: Strengths include the reliable Ethernet chipset, plug-and-play simplicity, visual status indicator, and cross-device versatility. The compact all-in-one design is travel-friendly. Weaknesses: only three USB ports (versus four on most competitors), Micro USB limits its future-proofing, and the short cable may strain some port placements. No external power option restricts peripheral choices.
Bottom Line: Ideal for Pi Zero projects requiring wired networking or for breathing life into older OTG-compatible devices. The Ethernet addition justifies the slight premium over basic hubs. Avoid if you need four USB ports or plan to use power-hungry peripherals.
8. Ethernet/USB HUB HAT Expansion Board for Raspberry Pi 5/4B/3B+/3B/2B/Zero/Pi Zero W/Pi Zero 2W,with RJ45 10/100M Ethernet Port (Based on RTL8152B Chip) and Three USB Ports,Compatible with USB2.0/1.1

Overview: This Ethernet/USB HUB HAT delivers hybrid connectivity for virtually all Raspberry Pi models, combining three USB 2.0 ports with a 10/100M Ethernet interface. Its dual-purpose design accommodates both the compact Zero series and full-sized Pi boards through a unified layout. The board’s 65mm × 30mm dimensions mirror the Zero’s footprint, enabling clean stacking while remaining usable on larger models via USB cable connection.
What Makes It Stand Out: The universal compatibility across Pi generations is the headline feature—one HAT for your entire Pi collection. The RTL8152B Ethernet chip ensures reliable wired networking, while individual status LEDs for power, Ethernet, and each USB port provide comprehensive diagnostics at a glance. This level of monitoring is typically reserved for pricier industrial boards.
Value for Money: At $19.19, it commands a premium over USB-only hubs but undercuts buying separate Ethernet and USB HATs. Competitors with similar cross-model support often exceed $25. For users maintaining multiple Pi projects, the versatility offsets the cost. However, if you only own a Zero, cheaper Zero-specific options exist.
Strengths and Weaknesses: Strengths include exceptional cross-model compatibility, detailed LED diagnostics, and the proven RTL8152B chipset. The mounting holes align perfectly with Zero cases. Weaknesses are the limited three USB ports (not four) and lack of external power input, restricting high-current peripherals. The price jump over basic hubs may not justify features for single-board owners.
Bottom Line: The Swiss Army knife of Pi connectivity HATs. Perfect for makers juggling multiple Pi models who need both Ethernet and USB expansion. Choose a cheaper, dedicated hub if you own only one Pi variant and don’t need network connectivity.
9. 4-Port Raspberry Pi USB HUB HAT for Raspberry Pi 4B/3B+/3B/2B/B+/A+/Zero/Zero W, 4 USB Ports Compatible with USB2.0/1.1 Onboard USB to UART Onboard Multi Indicators

Overview: This 4-Port USB HUB HAT prioritizes port quantity and developer-friendly features over network connectivity. It transforms any Raspberry Pi into a USB powerhouse with four USB 2.0 ports while integrating a USB-to-UART converter for streamlined serial debugging. The board’s flexible design fits both the Zero series and full-sized Pi models, making it a versatile expansion option for makers and developers alike.
What Makes It Stand Out: The onboard UART converter with a physical enable/disable switch is a standout feature for developers, eliminating the need for separate USB-to-TTL adapters. This simplifies troubleshooting and firmware updates while preventing conflicts when not needed. Multi-LED indicators for power, UART status, and individual USB ports provide exceptional visibility into system operations—a rarity in this price bracket.
Value for Money: Priced at $16.31, this hub occupies the middle ground. It costs slightly more than basic 4-port hubs but adds $10-15 worth of UART debugging capability. For developers, it’s a bargain. Casual users may find the UART feature unnecessary, making cheaper alternatives more appealing.
Strengths and Weaknesses: Strengths include four full USB ports, integrated UART with switchable control, comprehensive LED monitoring, and broad Pi compatibility. The design fits Zero cases perfectly. Weaknesses: no Ethernet port limits networking options, no external power input restricts peripheral choices, and the UART feature adds complexity for beginners. USB 2.0 speeds cap data transfer rates.
Bottom Line: An excellent choice for developers and advanced users who regularly debug Pi projects. The UART integration and four ports justify the modest premium. Casual users wanting simple USB expansion should opt for cheaper, simpler hubs without the debugging features.
10. Waveshare USB HUB HAT (B) for Raspberry Pi Series Extended 4X USB 2.0 Ports

Overview: The Waveshare USB HUB HAT (B) embraces simplicity, offering four USB 2.0 ports for the entire Raspberry Pi lineup without frills or complexity. Its innovative dual-connection approach—pogo pins for Zero series and a standard USB connector for larger Pi models—maximizes compatibility while maintaining a clean, compact design. This is a straightforward expansion solution focused purely on multiplying USB connectivity.
What Makes It Stand Out: The hybrid connection system is the key differentiator, serving both Zero and standard Pi users with one product. Unlike hubs requiring separate cables or permanent soldering, this HAT provides tool-free attachment to Zero boards while offering cable flexibility for other models. The minimalist approach strips away unnecessary features, focusing resources on reliable USB expansion at the lowest possible price point.
Value for Money: At $12.99, it’s the most affordable 4-port Pi HAT in its class. Basic OTG adapters cost slightly less but lack the clean HAT mounting and dual-connection versatility. Competing 4-port HATs typically start at $15+, making this an exceptional value for budget-conscious makers who need straightforward USB expansion without networking or debugging extras.
Strengths and Weaknesses: Strengths include rock-bottom pricing, four USB ports, innovative dual-connection design, and plug-and-play simplicity. The compact footprint suits space-constrained projects. Weaknesses are notable: no external power option limits high-current devices, no Ethernet or UART features, and minimal status indicators. The pogo pin connection may wear with frequent reassembly.
Bottom Line: The go-to choice for basic USB expansion on a budget. Perfect for educators, beginners, and projects needing simple port multiplication. If you don’t need Ethernet, UART debugging, or power-hungry peripherals, this hub delivers maximum value. Advanced users should look elsewhere for feature-rich alternatives.
Understanding Thread Technology and Its Role in Modern Smart Homes
Thread represents a fundamental shift from traditional hub-and-spoke network topologies to resilient mesh architectures. Unlike Wi-Fi’s star configuration where each device depends on a central router, Thread nodes automatically create redundant pathways, allowing your smart home to self-heal when devices drop offline. This IEEE 802.15.4-based protocol operates in the 2.4 GHz band but uses clever channel hopping and low-power design to avoid interference while maintaining battery life on end devices.
The protocol’s true power lies in its native IPv6 support, which eliminates the need for protocol translation layers that traditionally introduced latency and complexity. When you add a Thread USB dongle to your Raspberry Pi, you’re essentially giving it a radio that speaks this new language directly, enabling it to join the same network as your Nanoleaf bulbs, Eve sensors, and other Matter-certified devices without relying on cloud bridges or proprietary gateways.
Why Your Old Raspberry Pi Hub Desperately Needs a Thread Upgrade
Legacy Raspberry Pi smart hubs typically depend on Zigbee or Z-Wave radios, which, while functional, create isolated islands of connectivity. These older protocols require dedicated hubs for each ecosystem, leading to the infamous “hub salad” problem where enthusiasts stack multiple devices just to control different brands. Thread integration collapses these silos by providing a unified radio that speaks the Matter standard.
Beyond ecosystem consolidation, Thread delivers tangible performance improvements. Mesh networking extends coverage to every corner of your property without demanding additional repeaters. The protocol’s low latency—often under 100ms—makes voice commands feel instantaneous, while its power efficiency means battery-operated sensors can last years instead of months. Perhaps most importantly, Thread’s built-in security features, including AES-128 encryption and secure key exchange, address vulnerabilities that plague older protocols.
Key Technical Specifications That Actually Matter
When evaluating Thread USB dongles, the chipset inside matters more than the brand name on the outside. Look for devices built around the nRF52840, EFR32MG21, or similar modern System-on-Chip (SoC) designs. These chips pack ARM Cortex-M4 processors that can handle the cryptographic overhead of Thread security without breaking a sweat, ensuring your hub doesn’t become a bottleneck.
Radio sensitivity, measured in dBm, directly impacts your mesh network’s range and reliability. A dongle rated at -100 dBm or better will pick up faint signals from distant sensors that weaker radios might miss. Transmit power matters too, but more isn’t always better—FCC regulations limit 2.4 GHz devices to +20 dBm, and excessive power can actually increase interference. The sweet spot lies in balanced TX/RX capabilities paired with a quality PCB antenna or, ideally, a connector for external antennas in challenging RF environments.
Compatibility Matrix: Ensuring Your Dongle Works Seamlessly
Not every Thread dongle plays nice with every Raspberry Pi model. The Raspberry Pi Zero’s limited USB power budget can struggle with dongles that lack proper power management, while the Pi 4’s USB 3.0 ports, despite their speed advantages, can generate RF interference that degrades 2.4 GHz performance. Optimal placement often means using a USB 2.0 port with a short extension cable to physically separate the dongle from the Pi’s noisy circuitry.
Software compatibility proves even more critical. The dongle must support the OpenThread stack, preferably with RCP (Radio Co-Processor) firmware that offloads timing-critical mesh operations from the Pi’s CPU. Check for mainline Linux kernel support—drivers merged into the official kernel tree receive long-term maintenance and security updates, while out-of-tree modules often become abandonware. Compatibility with popular home automation platforms like Home Assistant’s ZHA integration or the Matter Server add-on should be non-negotiable requirements on your checklist.
The Installation Process Demystified
Installing a Thread USB dongle involves more than simple plug-and-play, though modern Linux distributions have simplified the process considerably. After physically connecting the dongle, you’ll need to verify kernel recognition using dmesg and lsusb commands. The device should appear as a serial TTY, typically /dev/ttyACM0 or similar, which home automation software can then bind to.
Firmware flashing represents the most complex step. Most dongles ship with generic firmware that requires replacement with Thread-specific RCP firmware. This process, often done through pyspinel or manufacturer-provided utilities, demands precise timing and can brick the device if interrupted. Always flash firmware with the dongle connected directly to the Pi’s USB ports—not through a hub—to avoid power fluctuations. After flashing, a system reboot ensures the new firmware loads cleanly and the device gets assigned stable device names.
Power Consumption: The Hidden Factor Nobody Talks About
That unassuming USB dongle can silently drain your Raspberry Pi’s limited power budget, especially on models sharing USB and Ethernet power rails. A poorly designed dongle might draw 200mA continuously, causing voltage drops that lead to SD card corruption or random reboots. Quality dongles implement proper sleep modes, dropping consumption to under 10mA when the mesh network is idle.
Power management becomes even more critical if you’re running your hub on PoE (Power over Ethernet) or battery backup. Calculate your total system power budget by summing the Pi’s base consumption (typically 600mA for a Pi 4), the dongle’s active power, and any attached peripherals. Leave a 20% margin below your power supply’s rated output to ensure stability during peak transmission bursts when the dongle temporarily draws more current.
Form Factor and Physical Design Considerations
In cramped smart home racks or wall-mounted enclosures, every millimeter counts. Compact dongles that sit flush against the Pi’s USB ports might look clean but can block adjacent ports and suffer from heat buildup. Slightly larger dongles with metal shielding often provide better thermal performance and RF isolation, though they require careful cable management.
The antenna design fundamentally determines performance. PCB trace antennas offer convenience but sacrifice range, typically achieving 30-50 meters in open space. Dongles with external antenna connectors allow you to position high-gain antennas optimally, potentially extending range to 100+ meters and penetrating walls more effectively. Some premium designs include u.FL connectors for flexible antenna placement, letting you route the antenna outside metal enclosures that would otherwise block signals completely.
Firmware Update Strategies for Long-Term Reliability
Thread is an evolving standard, and firmware updates deliver not just bug fixes but protocol improvements and security patches. The best dongles support over-the-air (OTA) updates through your home automation platform, allowing you to upgrade without physically accessing the device. This feature becomes invaluable once your hub is deployed in a hard-to-reach location.
Manual firmware updates require a different approach. Maintain a dedicated directory on your Pi for firmware binaries, and document the exact version and flash date for each dongle. Some manufacturers provide version-specific firmware optimized for different use cases—RCP firmware for hub operation, NCP (Network Co-Processor) firmware for gateway applications. Understanding these distinctions prevents compatibility issues that can render your dongle unusable until properly re-flashed.
Performance Optimization Techniques
Once installed, optimizing Thread performance involves tuning parameters most users never touch. The channel mask setting controls which 2.4 GHz channels the dongle scans for mesh formation. In Wi-Fi-heavy environments, restricting Thread to channels 15, 20, and 25—located between Wi-Fi channels 6 and 11—minimizes interference. This configuration requires editing the OpenThread configuration files or setting parameters through your automation platform’s UI.
TX power settings demand similar fine-tuning. While maximum power seems appealing, reducing TX power to +8 dBm often creates more stable meshes by preventing distant, weak links from joining the network. This forces devices to connect through closer neighbors, improving overall reliability. Monitor your network’s routing table using ot-ctl commands to visualize the mesh topology and identify suboptimal connections that manual tuning can correct.
Security Implications and Best Practices
Thread’s security model relies on a Commissioner role that authorizes new devices onto the network. Your USB dongle must support this functionality securely, storing network keys in write-protected memory regions that resist extraction. Avoid dongles that store keys in plain text or lack secure boot capabilities, as compromised dongles can become attack vectors into your entire smart home.
Network segmentation adds another layer of protection. Run your Thread network on a separate VLAN from your main LAN, allowing only your home automation software to bridge between them. This containment prevents a compromised IoT device from accessing sensitive computers or NAS systems. Regularly rotate your Thread network passphrase using the Commissioner API, and monitor join logs for unauthorized devices attempting to infiltrate your mesh.
Integration with Major Smart Home Platforms
Home Assistant users should prioritize dongles with native ZHA (Zigbee Home Automation) and Thread border router support. The platform’s new Matter Server integration expects Thread dongles to expose a standard RCP interface that Home Assistant can bind to directly. This eliminates the need for separate Docker containers or complex multi-protocol bridges that add latency.
Apple HomeKit enthusiasts face different requirements. Thread dongles must support the HomeKit Accessory Protocol over Thread (HAP-Thread), which demands specific cryptographic primitives and pairing procedures. While Raspberry Pi hubs can’t become official HomeKit hubs, they can bridge Thread devices into HomeKit using Homebridge or Home Assistant’s HomeKit Controller integration. Verify dongle compatibility with these bridging solutions before purchase to avoid disappointment.
Community Support and Documentation Quality
Even the best hardware becomes frustrating without proper documentation. Evaluate potential dongles by examining their GitHub repositories for active maintenance, clear flashing instructions, and troubleshooting guides. Projects with recent commits, responsive maintainers, and detailed wiki pages indicate healthy community support that will prove invaluable when you encounter issues.
Forum activity serves as another quality indicator. Search Reddit’s r/homeassistant, the Home Assistant Community Forums, and manufacturer-specific Discord channels for real-world experiences. Pay attention to how quickly developers respond to bug reports and whether they provide detailed technical explanations or generic platitudes. Dongles with strong community backing often receive unofficial improvements and optimizations that surpass manufacturer offerings.
Cost vs. Value: Making Smart Investment Decisions
Budget dongles priced under $20 might seem attractive, but they often cut corners on critical components like RF shielding, crystal oscillators, and flash memory quality. These savings translate into higher failure rates, poor range, and frustrating debugging sessions. Mid-range options between $25-40 typically offer the best value, providing reliable chipsets, proper certifications, and adequate documentation without premium branding markups.
Consider total cost of ownership, not just purchase price. A $15 dongle that requires a $10 external antenna and hours of troubleshooting may cost more in time and frustration than a $35 all-in-one solution. Factor in the expense of potential replacements—cheap dongles failing after 12-18 months of 24/7 operation can turn your “bargain” into a recurring cost. Established manufacturers offering 2-3 year warranties demonstrate confidence in their designs and provide peace of mind for critical infrastructure.
Troubleshooting Common Issues Like a Pro
When your Thread network refuses to form, start with RF diagnostics. Use iwlist or specialized tools like kismet to scan for Wi-Fi interference on your chosen Thread channels. A simple channel change often resolves connectivity issues that appear as hardware failures. Check the dongle’s LED indicators—most flash specific patterns for different failure modes, documented in technical manuals but rarely in quick-start guides.
USB enumeration problems plague many installations. If lsusb shows the dongle as an unknown device, USB power issues are likely culprits. Try connecting through a powered USB hub or adding max_usb_current=1 to your /boot/config.txt file on older Pi models. For persistent issues, compile a custom kernel with verbose USB debugging enabled to capture detailed enumeration logs that reveal subtle compatibility problems.
Future-Proofing Your Setup
Thread 1.3, the specification backing Matter, introduces enhanced security and improved commissioning flows. Ensure your chosen dongle’s chipset supports firmware updates to this version and beyond. The nRF52840 and EFR32MG21 both have hardware headroom for future protocol versions, while older chipsets like the CC2538 lack the memory and processing power for upcoming features.
Consider multi-protocol support as a future-proofing strategy. Some advanced dongles can simultaneously operate Thread and Zigbee radios, allowing gradual migration without replacing all devices at once. This dual-mode operation requires careful firmware configuration to prevent channel conflicts, but it provides a smooth transition path as you slowly replace legacy Zigbee devices with Thread equivalents. Evaluate whether the dongle supports dynamic multi-protocol (DMP) firmware that can switch protocols on demand rather than requiring separate firmware flashes.
Frequently Asked Questions
Will adding a Thread dongle slow down my Raspberry Pi’s overall performance?
No, modern Thread dongles with RCP firmware offload all mesh networking tasks from the Pi’s CPU. The Pi simply sends high-level commands via serial and lets the dongle handle timing-critical operations. CPU impact is typically under 2-3% during normal operation, far less than running a Zigbee2MQTT bridge.
Can I use multiple Thread dongles on the same Raspberry Pi for better coverage?
While Linux supports multiple USB serial devices, Thread border router software generally expects a single radio. Running multiple dongles creates separate Thread networks that can’t merge. For extended coverage, focus on building a robust mesh with mains-powered Thread devices acting as routers rather than adding multiple coordinators.
Do I need to replace all my existing Zigbee devices when upgrading to Thread?
Absolutely not. Thread and Zigbee can coexist peacefully on separate channels. Your Thread dongle will create a new network alongside your existing Zigbee mesh. Migrate devices gradually as you replace them with Thread-compatible models, running both networks in parallel during the transition period.
How does Thread’s range compare to Zigbee in real-world conditions?
Thread typically offers 20-30% better range due to more efficient modulation and better interference avoidance. In a typical home, expect 40-60 meters indoor range versus Zigbee’s 30-45 meters. Both protocols improve dramatically with each mains-powered routing device added to the mesh.
Will my Thread dongle work if I move my Raspberry Pi to a different location?
Yes, but the mesh network will need to reconverge. Thread devices automatically detect the coordinator’s new position and rebuild optimal routing paths. This process takes 5-15 minutes and may temporarily increase latency. Avoid moving the hub frequently as it triggers network-wide recalculations.
Can I flash any Thread firmware onto my dongle, or must I use manufacturer-provided images?
Stick to manufacturer-provided or OpenThread project’s official RCP firmware. Generic firmware lacks device-specific calibrations for the RF frontend, antenna matching, and crystal accuracy. Using incorrect firmware can result in poor range, regulatory violations from excessive TX power, or complete device failure.
What’s the difference between a Thread dongle and a Matter dongle?
There is no such thing as a “Matter dongle.” Matter is an application layer that runs on top of Thread (for IP-based communication) and Wi-Fi. A Thread dongle provides the network connectivity, while Matter support comes from your home automation software. Ensure your platform (Home Assistant, etc.) has Matter Server capabilities.
How many devices can a single Thread dongle support?
Thread networks support over 250 devices theoretically, but practical limits depend on traffic patterns. A Raspberry Pi with adequate RAM can comfortably handle 50-75 active Thread devices, including sensors, lights, and locks. Beyond that, consider network segmentation or upgrading to a more powerful coordinator platform.
Do Thread dongles require special USB cables or powered hubs?
Quality matters more than special certification. Use short, shielded USB cables to minimize interference, especially if separating the dongle from the Pi. Powered hubs help on power-constrained setups but introduce potential latency. For permanent installations, soldered USB connections provide the most reliable power delivery.
Can I use a Thread dongle in a virtualized Raspberry Pi environment?
USB passthrough to virtualized environments (KVM, Proxmox) works but introduces latency and reliability challenges. Thread’s timing-sensitive nature makes it poorly suited for virtualization. For production smart home hubs, run Thread directly on bare-metal Raspberry Pi OS or use a dedicated coordinator device.