Transforming your basement into a cinematic sanctuary promises incredible rewards—until you press play and realize the space sounds more like a concrete bunker than a premium theater. The unique acoustic fingerprint of underground rooms creates challenges that standard living room setups never face: unbreakable concrete walls that bounce sound like a racquetball court, low ceilings that compress vertical imaging, and HVAC systems that drone beneath every quiet dialogue scene. This is precisely why audio calibration and room correction have evolved from luxury features into absolute necessities for basement theaters.
As we look toward 2026, the technology landscape has shifted dramatically. Modern calibration systems now wield processing power that would have seemed science fiction just five years ago, using sophisticated algorithms to map your room’s acoustic personality with surgical precision. But with greater capability comes greater complexity—choosing the right solution requires understanding not just what these systems do, but how they interact with the specific challenges of subterranean spaces. This guide cuts through the marketing noise to equip you with the knowledge to select a calibration kit that will unlock your basement theater’s true potential.
Top 10 Audio Calibration Kits for Basement Theaters
Detailed Product Reviews
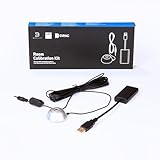
1. Bluesound High-Performance Omnidirectional Microphone Room Calibration Kit | Compatible with Dirac Live for Node, Icon, Nano, Powernode & More
Overview:
The Bluesound Room Calibration Kit is a purpose-built microphone designed to optimize your Bluesound Dirac Live Ready player for your room’s unique acoustics. Developed in partnership with Dirac, this certified omnidirectional mic captures frequencies from 20 Hz to 20 kHz, enabling precise digital room correction through the Dirac Live software platform.
What Makes It Stand Out:
Unlike generic measurement microphones, this kit carries Dirac’s official certification, ensuring reliable calibration results. The true plug-and-play design automatically loads correction files when connected via USB-A, eliminating manual configuration headaches. Its omnidirectional pattern captures room reflections accurately, while driverless compatibility with Windows and macOS makes setup remarkably straightforward.
Value for Money:
At $49, this kit represents excellent value compared to professional-grade measurement microphones that often exceed $150. For Bluesound owners investing in Dirac Live’s advanced room correction capabilities, this microphone is essentially mandatory equipment. The cost is justified by its certified accuracy and seamless integration—attempting calibration with inferior mics would compromise the entire Dirac Live investment.
Strengths and Weaknesses:
Strengths include Dirac certification, effortless setup, comprehensive frequency response, and cross-platform compatibility. The automatic correction file loading is particularly impressive. Weaknesses are its exclusivity to Bluesound Dirac Live Ready devices, USB-A only connection (adapters needed for newer devices), and the requirement to purchase Dirac Live software separately.
Bottom Line:
If you own a compatible Bluesound player and want to unlock Dirac Live’s full potential, this affordable, certified microphone is an essential purchase that delivers professional-grade room correction without complexity.
2. Reed Instruments R8090 (SC-05) Sound Level Calibrator for 1/2" Diameter Microphones, +/-0.5dB Accuracy,Black

Overview:
The Reed Instruments R8090 is a professional sound level calibrator that generates stable acoustic signals at 94dB and 114dB to verify and adjust the accuracy of your sound level meter. Designed for 1/2-inch diameter microphones, this compact device ensures your measurements remain traceable and reliable for noise compliance, workplace safety, and acoustic analysis.
What Makes It Stand Out:
This calibrator delivers impressive +/-0.5dB accuracy at a fraction of lab-grade equipment costs. The dual output levels allow calibration at both standard reference points, accommodating different measurement ranges. Operation is brilliantly simple—just place it on the microphone and power it on. The stable frequency and amplitude output provides consistent reference signals essential for professional applications.
Value for Money:
At $207, the R8090 occupies a sweet spot between budget calibrators and expensive laboratory standards. For professionals conducting OSHA compliance, environmental noise studies, or audio system tuning, measurement accuracy is non-negotiable. This device’s precision justifies its price by preventing costly errors and ensuring defensible data. Casual users may find it expensive, but professionals will recognize its value.
Strengths and Weaknesses:
Strengths include exceptional accuracy, dual calibration levels, straightforward operation, and stable output signal. It accommodates industry-standard 1/2-inch microphones reliably. Weaknesses include limited compatibility (no 1/4-inch or 1-inch adapters included), reliance on a 9V battery that must be purchased separately, and a price point that exceeds hobbyist budgets. It’s also single-function focused.
Bottom Line:
The R8090 is an excellent investment for professionals requiring certified calibration accuracy. For serious acoustical work, its precision and reliability far outweigh the cost, making it a smart alternative to more expensive lab equipment.
Why Basement Theaters Demand Specialized Audio Calibration
The Unique Acoustic Challenges of Underground Spaces
Basements aren’t just regular rooms with fewer windows—they’re acoustic anomalies. Concrete foundation walls reflect nearly 99% of sound energy above 500Hz, creating flutter echoes and harsh high-frequency buildup that consumer-grade calibration struggles to tame. The lack of natural absorption means your room correction system needs significantly more filter resolution to address these powerful reflections. Meanwhile, that coveted concrete slab floor couples directly with your subwoofer, turning the entire foundation into a resonant membrane that can produce standing waves strong enough to rattle dishes two floors up.
Your ceiling height—often seven feet or less—creates a critical quarter-wavelength cancellation zone between 40-80Hz, right where action movie explosions live. Standard calibration presets designed for typical 8-9 foot residential ceilings simply can’t compensate for this fundamental physics problem. Add in the fact that most basements house mechanical equipment, and you’re battling a noise floor that’s 10-15dB higher than above-ground theaters. The right calibration kit must not only correct frequency response but also intelligently manage dynamic range compression to preserve dialogue clarity over that constant HVAC hum.
How Room Correction Differs from Basic Speaker Setup
Many enthusiasts confuse running an AV receiver’s auto-setup routine with true room correction. Basic speaker setup measures distances, sets levels, and applies generic EQ curves—it’s like using a sledgehammer when you need a scalpel. Professional-grade room correction kits for basement theaters perform time-domain analysis, measuring how long specific frequencies linger in your concrete-walled space and creating finite impulse response filters that surgically remove those resonances without destroying the natural decay of musical instruments.
The distinction matters because basement acoustics are time-domain nightmares. Sound waves reflecting off concrete take longer to decay than in drywall rooms, smearing transients and collapsing soundstage depth. Advanced calibration systems measure these reflections and apply correction in both frequency and time domains, preserving the direct sound from your speakers while taming the room’s contribution. This is why investing in a sophisticated solution pays dividends you can actually hear.
Understanding the Core Technologies Behind Modern Calibration Systems
Digital Signal Processing (DSP) Explained
At the heart of every calibration system lies a DSP engine that performs millions of calculations per second. For basement theaters, you’ll want a system with 64-bit floating-point precision rather than older 32-bit fixed-point designs. The increased bit depth prevents rounding errors when applying extreme correction curves—essential when compensating for concrete-induced peaks that might require 12dB of cut. Look for processing latency under 2ms; anything higher introduces noticeable lip-sync issues, especially problematic in basement setups where video processing delays already stack up through longer HDMI runs.
Modern DSP architecture has evolved beyond simple parametric EQ. 2026’s advanced systems employ adaptive algorithms that continuously monitor room conditions, adjusting for temperature and humidity fluctuations that affect sound speed. In basements, where seasonal humidity swings can exceed 40%, this real-time adaptation prevents your carefully tuned system from sounding boomy in summer and thin in winter. The DSP should also support at least 16 channels of simultaneous processing, future-proofing your system for immersive audio formats that might add height channels to your basement ceiling.
FIR vs IIR Filters: What Basement Theaters Need
Filter topology determines how your calibration system shapes sound. Infinite Impulse Response (IIR) filters—common in budget systems—are computationally efficient but introduce phase shift when correcting severe room problems. In basement theaters with massive low-frequency modal issues, IIR filters can make bass sound “smeared” as different frequencies arrive at your ears with timing discrepancies.
Finite Impulse Response (FIR) filters, conversely, maintain linear phase at the cost of more processing power. They can apply the extreme correction needed for concrete room modes while preserving the timing relationships between frequencies. For basement theaters, prioritize systems that use hybrid approaches: IIR filters for broad tonal shaping and FIR filters for surgical correction of the worst room nodes. This combination delivers both efficiency and precision where it matters most.
Microphone Arrays and Measurement Precision
The adage “garbage in, garbage out” applies brutally to room correction. A single-measurement-point system might work in a symmetrical living room, but basement theaters are rarely symmetrical. Advanced kits now include microphone arrays or support multiple measurement positions with weighted averaging algorithms. The gold standard for 2026 is a system that can process at least 32 measurement points, creating a three-dimensional acoustic map of your space.
Microphone quality matters immensely. Calibration mics with calibration files specific to their serial number compensate for manufacturing variations, ensuring your measurements are accurate within ±0.5dB. This is crucial when trying to differentiate between a real room mode and a measurement artifact in a concrete basement where reflections are 20dB louder than in typical rooms. Some premium systems now include binaural measurement heads that capture how your ears actually hear in the room, not just what a perfect microphone diaphragm detects.
Key Features to Prioritize in 2026 Room Correction Kits
Multi-Seat Calibration Capabilities
Your basement theater likely seats more than one person, and nothing kills the shared experience like sweet spot listening. Modern calibration systems employ spatial averaging algorithms that optimize for multiple seating positions, creating a “bubble” of good sound rather than a single chair of perfect sound. Look for systems that let you define priority zones—perhaps weighting the main row at 70% and the bar stools at 30%—rather than treating all positions equally.
The most sophisticated solutions use time-alignment tricks, creating multiple virtual speaker images that converge at different locations. This psychoacoustic wizardry means your spouse on the left side hears the center channel as anchored to the screen, not pulled to the nearest speaker. In basement theaters where seating often hugs walls due to space constraints, this feature transforms compromised layouts into immersive experiences.
Low-Frequency Management for Concrete Bunkers
Your basement’s concrete walls create standing waves with quality factors (Q) two to three times higher than drywall rooms. Standard room correction applies gentle filters to these peaks, but basement theaters need “super-resolution” bass management with filter bandwidths as narrow as 1/30th octave. This requires DSP horsepower that can create 512-tap FIR filters specifically for the subwoofer channel.
Seek systems offering independent subwoofer calibration that treats each sub as a separate entity before blending them. This lets you position subs to cancel specific room modes—one sub in a front corner to energize the space, another mid-wall to provide opposing phase cancellation. The calibration software should then time-align and level-match them as a cohesive system. Some 2026 platforms even include room mode prediction, simulating subwoofer placement before you physically move hundreds of pounds of equipment.
AI-Driven Adaptive Room Modeling
Artificial intelligence has revolutionized calibration from a one-time setup into an evolving process. AI-powered systems learn your listening habits, recognizing that you watch action movies at reference level on weekends but enjoy quiet acoustic sessions on weeknights. They automatically switch between calibration profiles, applying more aggressive dynamic range compression for late-night viewing while preserving full dynamic swing for demo sessions.
These systems also detect when you’ve added absorptive elements—perhaps you hung acoustic panels after initial calibration—and automatically adjust target curves to prevent over-damping. In basements where you might store seasonal furniture that changes room acoustics, this adaptive modeling maintains optimal performance without manual re-tuning. The AI should run on local hardware, not cloud servers, ensuring your calibration works even when internet connectivity is spotty underground.
The Critical Role of Microphone Quality and Placement
Why Your Calibration Mic Matters More Than You Think
That plastic microphone included with your AV receiver? It’s likely the weakest link in your calibration chain. Professional-grade kits supply measurement mics with published frequency response charts and individual calibration files. These files compensate for the mic’s own deviations, ensuring the correction applied to your system addresses your room’s problems, not the microphone’s.
In basement environments, microphone self-noise becomes a critical spec. A mic with 22dBA self-noise might be fine in a quiet living room, but in a basement with 35dB ambient noise from HVAC, you’re burying low-level detail in the measurement noise floor. Premium calibration mics achieve self-noise below 15dBA, capturing clean data down to 20Hz even when your furnace is running. Some systems now include accelerometer-equipped mics that detect mechanical vibrations from equipment racks, filtering out non-acoustic noise from your measurements.
Strategic Positioning in Asymmetrical Basement Layouts
Basement theaters rarely offer the luxury of symmetrical speaker placement. Your right wall might be concrete foundation while the left opens to a storage area, creating wildly different reflection patterns. Effective calibration requires measurement positions that capture this asymmetry. The “mic at ear height in the main seat” approach fails spectacularly here.
Instead, employ a measurement grid that samples the entire listening volume. Start with the main seating row at ear height, then add measurements 12 inches above and below to capture vertical standing waves between floor and ceiling. Include positions at the edges of your seating area, not just the center. Advanced software will display a heat map showing SPL variation across your space, letting you identify problem zones. In L-shaped basements, treat each leg as a separate acoustic zone, performing independent sub-calibrations that can be manually blended or switched based on seating configuration.
Software vs. Hardware Solutions: Making the Right Choice
Integrated AV Receiver Solutions
Modern flagship AV receivers include increasingly sophisticated room correction, blurring the line between consumer and professional gear. These integrated solutions offer unbeatable convenience—one box handles decoding, amplification, and correction with seamless remote control integration. For basement theaters with limited rack space, this consolidation is appealing.
However, integrated systems face compromises. The DSP hardware must share resources with video processing and network functions, potentially limiting filter resolution. They also lock you into a specific correction ecosystem; if you upgrade your receiver, you lose your calibration investment. That said, 2026’s top-tier receivers now include modular DSP cards that can be upgraded independently, addressing this concern. Look for models where the correction system runs on dedicated processing chips, not the main system-on-chip, ensuring consistent performance even when streaming 8K video.
Standalone DSP Processors
Dedicated room correction processors represent the audiophile approach, placing pure acoustic optimization ahead of convenience. These units operate between your preamp/processor and power amplifiers, handling only calibration duties with unfettered DSP resources. The result is typically higher filter resolution, more measurement points, and advanced features like manual target curve editing.
In basement theaters, standalone processors shine when integrating multiple subwoofer arrays or unconventional speaker layouts. They offer channel counts up to 32, perfect for complex immersive audio setups with multiple height layers in low-ceiling basements. The trade-off is system complexity—another component to power, connect, and troubleshoot. Cable runs become longer, potentially picking up noise in electrically noisy basement environments. Ensure any standalone unit includes proper isolation and grounding schemes designed for pro-audio installations.
PC-Based Calibration Platforms
The most flexible approach runs calibration software on a dedicated PC, using professional audio interfaces for measurement and correction. This path offers unlimited processing power, regular software updates, and access to research-grade algorithms not available in commercial hardware. For basement theater enthusiasts who enjoy tinkering, PC-based solutions provide a depth of control that hardware can’t match.
The downside is reliability. A Windows update at the wrong moment can disable your theater until you troubleshoot driver conflicts. Fan noise from the PC raises your basement’s noise floor, requiring creative isolation solutions like sealed racks or remote machine rooms. That said, 2026 has seen the rise of silent, fanless NUC-style PCs with enough horsepower for real-time convolution of 65,536-tap FIR filters—processing power that makes hardware solutions look quaint. If you choose this route, budget for a dedicated machine that runs nothing but your calibration software.
Decoding Technical Specifications for Basement Environments
Frequency Response Correction Range
Specification sheets love to tout correction ranges like “20Hz to 20kHz,” but the devil lives in the details. For basement theaters, examine how much boost and cut the system can apply at each frequency. Some systems limit boost to +6dB to protect speakers, but your concrete room might need +10dB at 40Hz to overcome cancellation. Conversely, excessive cut capability—say, -20dB—might seem beneficial for taming concrete reflections, but over-correction sounds unnatural.
The ideal system offers adjustable limits, letting you set maximum boost per channel based on your speakers’ capabilities. Pay attention to the frequency resolution: does the system apply correction in 1/3 octave bands (coarse) or variable-Q bands that narrow automatically for high-Q resonances (precise)? Basement rooms demand the latter, with the ability to apply 1/12 octave or narrower filters in the modal region below 300Hz.
Filter Resolution and Precision
Filter resolution determines how accurately your system can carve out problem frequencies. Expressed in “taps” for FIR filters or “order” for IIR filters, higher numbers mean more precise correction. For basement theaters, seek FIR filter resolution of at least 1024 taps per channel in the low-frequency range. This allows creating filters narrow enough to address a 35Hz room mode without affecting 32Hz or 38Hz content.
Precision relates to the system’s mathematical calculations. 64-bit floating-point processing maintains accuracy when cascading multiple filters, preventing rounding errors that accumulate and create a “digital” sound. Some 2026 systems now employ 32-bit fixed-point processing for efficiency but switch to 64-bit floating-point automatically when detecting extreme correction needs—a smart hybrid approach for basement acoustics.
Latency Considerations for Gaming and Movies
Every millisecond of processing delay affects lip-sync and gaming responsiveness. Room correction adds latency, typically 1-5ms depending on filter complexity. In basement theaters where video signals already travel through 25-foot HDMI cables and multiple switches, this can push total latency past the 40ms threshold where dialogue looks noticeably out of sync.
For 2026, prioritize systems with “low-latency modes” that bypass certain filters for gaming inputs or apply prediction algorithms to pre-compensate for processing delay. Some advanced implementations use separate processing paths: minimal correction (sub-1ms latency) for gaming, full correction for movies. If your basement doubles as a gaming haven, verify the system’s latency specification at its highest filter resolution, not just its marketing number.
The Importance of Target Curve Customization
Harman Curve vs. Custom House Curves for Basements
The Harman curve, developed through extensive listener preference research, provides an excellent starting point. Its gently downward-sloping response from bass to treble compensates for human hearing sensitivity and typical room gain. However, basement theaters deviate from “typical” rooms significantly. The Harman curve assumes some natural absorption that concrete rooms lack, potentially resulting in overly bright sound.
Creating a custom “house curve” for your basement involves measuring your room’s inherent response, then sculpting a target that sounds subjectively flat. This often means shelving down highs above 5kHz by 2-3dB more aggressively than the Harman curve suggests, to compensate for concrete’s reflective nature. The best calibration systems let you draw your target curve freehand, import curves from acoustic measurement software like Room EQ Wizard, or select from genre-specific presets (e.g., “Basement Cinema,” “Concrete Music Room”).
Managing Bass Buildup in Enclosed Spaces
Basements accumulate bass energy like a battery, storing it in corners and releasing it slowly. Your target curve must address this without making the system sound anemic. The solution is a “basement bass shelf”—boosting frequencies from 60-120Hz slightly above the Harman curve to restore perceived warmth, while applying steep cuts to the true modal peaks below 50Hz.
Advanced 2026 systems include bass management wizards that analyze your room dimensions and automatically suggest target curves. They simulate how different curves will sound, letting you audition options before committing. Some even measure your HVAC noise floor and adjust the bass target upward in narrow bands to mask rumble, a clever psychoacoustic trick that makes your basement seem quieter than it actually is.
Multi-Subwoofer Integration Strategies
The Benefits of Distributed Bass Arrays
One subwoofer in a basement theater is a recipe for lumpy bass. Two subs, properly positioned, can cancel major room modes. Four subs, arranged in a distributed bass array (DBA), can achieve near-perfect bass uniformity across multiple seats. The concept uses destructive interference to tame room modes—placing subs at specific fractions of room dimensions so their reflections cancel rather than reinforce.
Calibration kits designed for basement theaters include DBA optimization modes. They measure each sub individually, calculate the optimal delay and polarity for each, then blend them into a cohesive whole. The result is bass that doesn’t vary more than ±3dB across your entire seating area, even in concrete rooms where a single sub might vary ±20dB. This approach is far more effective than trying to EQ a single sub to compensate for massive room problems.
Phase Alignment Across Multiple Subs
Getting multiple subs to sum correctly requires precise phase alignment, especially critical in small basement rooms where arrival time differences are minimal. Your calibration system should measure phase response, not just amplitude, for each sub at each seat. It then calculates delay settings that align the subs’ acoustic centers, ensuring they pressurize the room as a single source.
The most sophisticated systems perform vector summation, treating each sub as a vector with magnitude (level) and direction (phase). They optimize for maximum vector sum at your primary seats while minimizing destructive interference. In basements with irregular shapes, this might mean setting one sub 180 degrees out of phase with another—a counterintuitive configuration that only works when calculated precisely. Manual phase knobs are insufficient; you need software that can apply fractional millisecond delays to achieve true alignment.
Wireless vs. Wired Calibration Systems
Reliability Concerns in Concrete-Heavy Environments
Wireless calibration microphones offer convenience, eliminating cable runs across your basement floor during measurement. However, concrete and rebar create Faraday cages that attenuate wireless signals significantly. Bluetooth-based systems may drop packets, resulting in incomplete measurements that corrupt your correction filters. Wi-Fi-based systems fare better but introduce latency variability that can skew timing-sensitive measurements.
If you opt for wireless, verify the system uses adaptive frequency hopping to avoid interference from your Wi-Fi network and smart home devices. Better yet, choose systems that record measurements locally to the mic, transmitting data in bursts after each measurement completes. This prevents dropouts from affecting the critical measurement window. For ultimate reliability, wired connections remain king in basement environments—consider it a one-time inconvenience for a lifetime of performance.
Future-Proofing with Hybrid Connectivity
The smartest 2026 systems employ hybrid approaches: wireless for initial quick measurements, wired for final precision tuning. They might use a wireless mic to find optimal speaker and sub positions, then switch to wired mode for the final 32-point measurement grid. This gives you the best of both worlds—exploration freedom and measurement rigor.
Look for systems with USB-C microphone connections that provide phantom power and data over a single cable, simplifying setup. Some advanced units include network-based calibration, where the measurement mic connects via Ethernet to bypass wireless entirely while still offering cable-free convenience. As your basement theater evolves, modular connectivity ensures your calibration investment isn’t rendered obsolete by changing wireless standards.
Budget Considerations and Value Proposition
Entry-Level Solutions for DIY Enthusiasts
Effective basement theater calibration doesn’t require a second mortgage. Entry-level solutions around the $300-500 mark now include measurement microphones with reasonable calibration files and software that runs on existing hardware. These systems typically offer 8-12 measurement positions and correction filters with 256-tap FIR resolution—adequate for moderately problematic basements.
The compromise comes in automation. Budget systems require more manual interpretation of measurements and careful selection of target curves. They might lack the AI-driven suggestions of premium platforms, forcing you to learn acoustic fundamentals. For hands-on enthusiasts, this is a feature, not a bug. The key is choosing a system that doesn’t artificially limit filter resolution or measurement points; avoid anything that caps measurements at 3-5 positions, as this is insufficient for basement asymmetry.
Professional-Grade Investment Justification
Premium calibration kits commanding $1,500+ deliver capabilities that justify their cost in challenging basement environments. We’re talking 32+ measurement positions, 2048-tap FIR filters, multi-sub DBA optimization, and AI-assisted target curve design. For concrete-walled rooms with severe modal issues, this horsepower translates directly into audible improvements.
The value proposition extends beyond initial setup. Professional systems include ongoing software updates that incorporate new research, ensuring your investment improves over time. They also offer direct support from acoustic engineers who can remotely analyze your measurements and suggest optimizations. If your basement theater represents a $20,000+ investment in speakers and electronics, spending 5-10% on calibration that makes those components perform optimally is sound economics.
Installation and Setup Best Practices
Pre-Calibration Room Preparation
Before running any calibration, optimize what you can physically. Walk around your basement clapping your hands—if you hear a sharp “slap echo,” identify the reflection point and place temporary absorption there (even thick blankets help). Measure your HVAC noise floor using a phone app; if it exceeds 35dB, consider adding a secondary return path or flexible ducting to reduce turbulence noise.
Remove transient noise sources during calibration. Turn off the water heater, dehumidifier, and any fluorescent lights that buzz. If your basement shares mechanical systems with the rest of the house, schedule calibration when the furnace isn’t cycling. Temperature matters too—concrete temperature lags air temperature by hours, affecting sound speed. Let the space stabilize for 24 hours at your typical listening temperature before measuring.
The Step-by-Step Measurement Process
Begin with speaker and sub positions roughly optimized using the “subwoofer crawl” method. Place your measurement mic at the main listening position at exact ear height, pointed at the ceiling. Run a full-range sweep to identify major problems, then move the mic incrementally—first across the width of your seating, then depth, then height. This creates a 3D acoustic map.
For each measurement, remain silent and still; even breathing near the mic can contaminate data. Advanced systems include ambient noise detection that automatically repeats measurements if a furnace kicks on. After completing the grid, review the measurement quality indicators—coherence, signal-to-noise ratio, and impulse response clarity. Discard any measurements with coherence below 95% in the modal region; they’re corrupted by noise or movement and will poison your final correction.
Post-Calibration Verification Techniques
After applying correction, verify results using independent measurement software. Play sine wave sweeps and measure with a different calibrated mic (even a inexpensive measurement mic) to confirm the correction matches predictions. Listen to familiar reference tracks—does dialogue sound chesty? Are cymbals harsh? These subjective impressions reveal problems measurements miss.
Use transient test signals like hand claps or drum hits. In a well-calibrated basement theater, you should hear the direct sound clearly, followed by a smooth decay of room sound, not a sharp echo. If you detect ringing, your system may be over-correcting, creating inverse resonances. Most 2026 platforms include a “correction strength” slider—start at 100%, then reduce to 70-80% if the room sounds artificially dead.
Common Basement Theater Calibration Mistakes
Over-Correction and the “Dead Room” Problem
The biggest mistake is trusting the system’s default “perfect” correction. In reflective basement rooms, aggressive correction can eliminate so much reflected energy that the space sounds unnaturally dry, like an anechoic chamber. This happens because the system treats reflections as errors rather than part of the room’s character. The solution is to limit correction above 500Hz to broad tonal shaping, preserving early reflections that contribute to spaciousness.
Another pitfall is correcting dips caused by nulls. If a frequency is cancelled due to destructive interference, boosting it 15dB just wastes amplifier power and driver excursion without filling the null. Good calibration systems identify uncorrectable nulls and leave them alone, focusing instead on taming peaks. If your system tries to boost a null, manually disable that filter or reduce its gain to under 3dB.
Ignoring HVAC and Electrical Noise Floors
Your calibration system can’t fix noise; it can only shape signal. If your basement’s HVAC runs at 40dB, boosting quiet dialogue to overcome it destroys dynamic range. Some enthusiasts set target curves with elevated bass and treble to “mask” noise, but this creates fatiguing sound. The correct approach is measuring your noise floor first, then if it’s above 35dB, addressing it physically before applying digital correction.
Electrical noise from furnaces, water heaters, and fluorescent fixtures couples into audio equipment through shared grounds. Calibration might reveal mysterious 60Hz hum or 120Hz buzz. Don’t try to EQ these out—they’re distortion, not frequency response errors. Install dedicated 20-amp circuits for your theater, use isolated ground receptacles, and consider a balanced power conditioner. Once electrical noise is below the acoustic noise floor, your calibration can work on actual room problems.
Future Trends Shaping 2026 Audio Calibration
Machine Learning and Predictive Room Modeling
2026’s cutting-edge systems don’t just react to measurements—they predict them. By inputting your basement’s dimensions, construction materials, and speaker positions, AI models simulate your room’s acoustic signature before you measure. This predictive model guides microphone placement, ensuring you measure where it matters most rather than wasting time on redundant positions.
These systems learn from thousands of basement installations, recognizing patterns like “7-foot ceiling with concrete walls typically produces a 70Hz axial mode.” They’ll suggest subwoofer positions optimized for your specific geometry, potentially saving hours of trial and error. As you measure, the AI refines its model, eventually achieving measurement efficiency where 8 well-placed mics provide more useful data than 32 random positions.
Integration with Smart Home Ecosystems
Your basement theater doesn’t exist in isolation—it shares air handlers, lighting, and occupancy sensors with your smart home. Next-generation calibration systems integrate with platforms like Home Assistant and Hubitat, using occupancy data to switch calibration profiles. When sensors detect a full couch, it engages multi-seat optimization; when you’re alone in the main chair, it switches to single-seat precision mode.
Integration extends to environmental sensing. Humidity and temperature sensors feed real-time data to the calibration DSP, which automatically compensates for changing sound speed. Your system might apply 0.3dB more high-frequency correction on humid summer days when concrete absorbs slightly more energy. This level of environmental awareness ensures consistent performance despite basement climates that can vary dramatically from the rest of your house.
Maintaining Your Calibration: When to Re-Tune
Seasonal Acoustic Changes in Basements
Concrete is hygroscopic—it absorbs moisture from summer air and releases it in winter. This changes its acoustic impedance, subtly altering reflection coefficients across seasons. A calibration performed in January’s dry heat will sound slightly brighter in July’s humidity. While advanced systems adapt automatically, you should perform a full re-calibration twice yearly: once when you switch from heating to cooling, and again when switching back.
Pay attention to how your basement “feels.” If bass suddenly seems boomy or dialogue gets harsh, humidity has likely risen above 60%, affecting both your ears’ response and the room’s acoustics. Some enthusiasts keep a dehumidifier set to 50% RH year-round, stabilizing both comfort and acoustics. If that’s not practical, schedule calibration during your most frequent listening season—perhaps winter for movie marathons—and accept minor deviations during summer.
Furniture and Equipment Updates
Every change affects acoustics, but some matter more than others. Adding a fabric couch absorbs midrange energy, potentially making dialogue sound recessed. A new equipment rack might create rear-wall reflections that collapse soundstage depth. Even stacking Blu-ray collections along a side wall adds diffraction that scatters high frequencies.
Re-calibrate after any significant furniture change or equipment repositioning. “Significant” means anything larger than 2 cubic feet placed within 6 feet of your speakers. Minor tweaks—new throw pillows, a plant in the corner—usually don’t warrant re-tuning if your system includes adaptive room modeling. Keep a logbook of changes and measurements; over time, you’ll learn which modifications have the biggest impact, helping you make informed decisions about future room treatments.
Expert Tips for Maximizing Your Investment
Combining Acoustic Treatment with Digital Correction
Digital correction works best on modest problems; it can’t fix a 30dB peak caused by a bare concrete corner. The winning strategy is hybrid: apply physical treatment to the worst offenders, then let digital correction handle the remaining issues. In basement theaters, this means treating first reflection points with 2-4 inch absorption panels, installing bass traps in corners (even DIY superchunks of insulation), and using diffusion on the rear wall to maintain liveliness.
Once physical treatment reduces extreme problems, your calibration system’s filters work more efficiently, applying gentler corrections that sound more natural. Think of it as a partnership: acoustic treatment shapes the room’s macro response, digital correction fine-tunes the micro details. A budget split of 60% speakers/electronics, 30% acoustic treatment, and 10% calibration typically yields better results than 90% electronics and 10% correction alone.
The 80/20 Rule for Basement Theaters
You can achieve 80% of perfect calibration with 20% of the effort. Focus on subwoofer integration and first-reflection control first—these deliver the biggest audible improvements. Spend your time perfecting the 40-200Hz range where room modes live; corrections above 1kHz are subtle and often inaudible to all but golden ears.
Don’t chase perfection. A calibration that measures perfectly flat but sounds lifeless is a failure. Trust your ears over the graph. If a 3dB dip at 2kHz subjectively sounds right, leave it. The goal isn’t a sterile lab environment; it’s a space that makes you grin when the Millennium Falcon jumps to hyperspeed. Sometimes the best calibration is the one you don’t notice because you’re too immersed in the movie to think about acoustics.
Frequently Asked Questions
How does basement ceiling height specifically affect calibration needs?
Low ceilings create strong vertical axial modes between floor and ceiling, typically in the 40-80Hz range where subwoofers operate. Your calibration system needs high-resolution FIR filters capable of narrow-band correction in this region. Additionally, the reduced vertical space compresses sound arrival times, requiring precise time-domain correction to prevent smearing. Look for systems that measure and correct vertical reflections separately from horizontal ones.
Can I use a living room calibration system in my basement theater?
Basic living room systems often fail in basements because they assume moderate reflections and typical drywall construction. They lack the filter resolution to tame concrete-induced peaks and may not support enough measurement positions to capture basement asymmetry. While entry-level systems can provide some improvement, you’ll achieve significantly better results with solutions specifically designed for challenging acoustic environments.
How often should I re-calibrate my basement theater?
Perform a full re-calibration twice yearly to account for seasonal humidity changes affecting concrete’s acoustic properties. Additionally, re-tune after any significant furniture changes or equipment repositioning. If your system includes adaptive room modeling, minor seasonal drift is compensated automatically, but major changes still require fresh measurements.
What’s the minimum number of measurement positions for an accurate basement calibration?
For a typical basement theater, aim for at least 16 measurement positions: 8 across your seating area at ear height, 4 positions 12 inches above and below ear height, and 4 positions at the extremes of your listening area. Asymmetrical rooms benefit from 24-32 positions. Anything fewer than 12 positions risks missing critical room interactions in non-ideal basement layouts.
Will room correction eliminate the need for acoustic panels in my basement?
No. Digital correction cannot fix extreme problems like 30dB modal peaks or flutter echoes. It works best when combined with physical treatment that addresses the worst issues. Think of acoustic panels as handling the “heavy lifting” while digital correction performs fine adjustments. A hybrid approach yields superior results to either method alone.
How do I handle HVAC noise during calibration?
Measure your HVAC noise floor first. If it exceeds 35dB, address it physically before calibrating—add duct silencers, relocate returns, or build soffits around equipment. During measurement, temporarily disable HVAC if possible. Advanced calibration systems include noise detection and will repeat measurements automatically if noise intrudes. Some also create “noise-aware” target curves that slightly elevate frequencies to mask persistent low-level noise.
Can room correction fix bass nulls in my basement?
No, correction cannot fill a true null caused by destructive interference. Boosting a null wastes power and driver excursion without audible benefit. Effective calibration identifies uncorrectable nulls and leaves them alone, focusing resources on taming peaks. Address nulls through strategic subwoofer placement and physical bass trapping instead.
What’s the difference between room correction and room treatment?
Room treatment physically alters how sound interacts with surfaces using absorption, diffusion, and bass trapping. Room correction uses digital signal processing to compensate for acoustic problems electronically. Treatment addresses the root cause; correction manages symptoms. For best results in basement theaters, use both: treatment for major issues, correction for fine-tuning.
Will my calibration settings be ruined if I upgrade my AV receiver?
If using an integrated receiver-based system, yes—you’ll need to re-calibrate with the new unit. Standalone DSP processors or PC-based solutions preserve your calibration independent of the receiver. Some 2026 receivers include exportable calibration profiles that can transfer to newer models within the same brand ecosystem, but this isn’t universal. For future-proofing, consider a separate calibration processor.
How do I know if my calibration is working correctly?
Trust your ears first. Play familiar content—does dialogue sound clear and natural? Do explosions have impact without overwhelming speech? Verify with measurements: run a sweep with your calibration enabled and disabled, looking for smooth response at your listening position. The corrected response should show reduced peaks and smoother overall response, especially below 200Hz. Finally, listen from multiple seats; good calibration provides consistent quality across your theater, not just in the main chair.