Walking into a small studio and expecting pristine sound is like trying to mix inside a sonic funhouse mirror. The room itself becomes an uninvited collaborator, coloring every decision with standing waves, flutter echoes, and bass buildup that have nothing to do with your actual mix. In 2026, audio calibration and room correction tools have evolved from simple EQ curves into sophisticated systems that can transform even the most compromised bedroom producer setup into a legitimate critical listening environment. But here’s the catch: not all correction is created equal, and the wrong tool—or the right tool used incorrectly—can leave you worse off than when you started.
The landscape has shifted dramatically. Where we once wrestled with complicated manual measurements and clunky software interfaces, today’s solutions leverage AI-driven analysis, predictive modeling, and real-time adaptation. For small studio operators working in untreated or minimally treated rooms, these advances aren’t just convenient—they’re revolutionary. Understanding what separates a genuinely effective calibration system from marketing fluff could be the difference between mixes that translate flawlessly and tracks that fall apart the moment they leave your compromised listening bubble.
Top 10 Audio Calibration Tools for Small Studios
Detailed Product Reviews
1. SpinTunes Turntable Phono Cartridge Stylus Alignment Protractor Tool- High Visible Tool for Vinyl Record Precision Calibration- Ensure Accurate Tracking and Sound Quality

Overview: The SpinTunes alignment protractor is an essential calibration tool for vinyl enthusiasts seeking optimal audio fidelity. This transparent acrylic guide helps precisely position your turntable’s cartridge stylus to prevent tracking errors, premature wear, and distorted sound. Designed for universal compatibility with standard turntables, it simplifies a critical setup process that directly impacts playback quality and record longevity.
What Makes It Stand Out: This tool distinguishes itself through high-contrast UV-printed markings that dramatically improve visibility compared to generic protractors. The integrated instructions printed directly on the acrylic eliminate guesswork, making it exceptionally beginner-friendly. Constructed from durable transparent acrylic, it maintains rigidity while allowing clear sightlines to your turntable spindle. The manufacturer backs the product with a no-questions-asked money-back guarantee, demonstrating confidence in its performance.
Value for Money: At $8.99, this protractor sits at the market’s entry-level price point while delivering professional-grade functionality. Comparable tools from audiophile brands often cost $15-25 without offering superior accuracy. The inclusion of printed instructions and satisfaction guarantee adds significant value, sparing users from purchasing separate setup guides or risking compatibility issues.
Strengths and Weaknesses: Strengths: Exceptional visibility with high-contrast printing, durable acrylic construction, integrated instructions, universal 1/2" cartridge compatibility, and strong manufacturer guarantee.
Weaknesses: Lacks a magnifying lens (available in competing bundles), requires careful handling to avoid scratches, and doesn’t include advanced alignment geometries for exotic tonearms.
Bottom Line: The SpinTunes protractor is an indispensable tool for both novice vinyl collectors and experienced enthusiasts. Its combination of clarity, durability, and user-friendly design makes it the ideal choice for anyone seeking accurate cartridge alignment without unnecessary complexity or expense. Highly recommended for routine turntable maintenance.
2. Dayton Audio EMM-6 Precision Omnidirectional Electret Condenser Microphone for Room Acoustic Analyzers and Audio Measurement Systems, Calibration Data File with Response Graph Included

Overview: The Dayton Audio EMM-6 is a professional-grade measurement microphone engineered for acoustic analysis, room correction, and audio system calibration. This omnidirectional electret condenser mic delivers reliable, accurate frequency response data when paired with room analyzers like REW or commercial calibration systems. Each unit ships with an individual calibration file, ensuring measurement precision that hobbyists and professionals can trust.
What Makes It Stand Out: Every EMM-6 includes a unique serial-numbered calibration response graph and data file, a feature typically reserved for microphones costing several hundred dollars. The low-noise FET input minimizes low-frequency distortion, crucial for accurate bass measurements. The package is remarkably complete: stand mount, foam windscreen, and protective transport case are all included, providing immediate deployment capability.
Value for Money: Priced at $59.98, the EMM-6 represents exceptional value in the measurement microphone category. Competitors like the MiniDSP UMIK-1 cost 30-50% more, while Earthworks models command prices in the thousands. For home studio owners, acoustic treatment designers, and AV installers, this microphone delivers 90% of professional performance at a fraction of the cost.
Strengths and Weaknesses: Strengths: Individual calibration file included, low-noise FET design, rugged metal construction, complete accessory package, true omnidirectional pattern, and excellent compatibility with industry-standard software.
Weaknesses: Electret design (while stable) isn’t a true externally-polarized condenser; requires 48V phantom power from a separate interface; and the 1/4" mount may need adapter for some stands.
Bottom Line: The Dayton Audio EMM-6 is the go-to measurement microphone for budget-conscious professionals and serious enthusiasts. Its included calibration data and robust construction make it an unbeatable value for room acoustic analysis and audio system optimization. An essential tool for any serious listening room or studio.
3. sdroceRyaM Cartridge Alignment Protractor Tool -Pickup Calibration Distance Gauge Protractor with Magnifier-Record LP Vinyl Turntable Phonograph Phono

Overview: This cartridge alignment protractor from sdroceRyaM provides vinyl enthusiasts with a straightforward solution for precise stylus positioning. The transparent acrylic tool helps eliminate tracking errors and overhang distortion while protecting valuable record collections from premature groove wear. Designed for universal application, it works with S-shaped tonearms and standard 1/2" mounted cartridges.
What Makes It Stand Out: The included magnifier sets this tool apart from basic protractors, allowing users to scrutinize alignment details with enhanced clarity. High-contrast markings improve visibility under various lighting conditions, while the printed setup guide directly on the tool eliminates the need for external reference materials. The package addresses both alignment and inspection needs in one affordable bundle.
Value for Money: At $8.99, this protractor matches competitors’ pricing while adding a magnifying lens—a feature often costing an extra $5-10 separately. This two-in-one approach delivers tangible savings and convenience. For vinyl collectors on a budget, it provides essential functionality without the premium pricing of audiophile-branded alternatives that perform identically.
Strengths and Weaknesses: Strengths: Included magnifier enhances precision, high-contrast markings aid visibility, universal S-shaped arm compatibility, printed instructions for easy reference, and protective packaging.
Weaknesses: The unconventional brand name may raise quality concerns, acrylic thickness isn’t specified, and the magnifier’s plastic lens is susceptible to scratching. Lacks advanced alignment options for straight or J-shaped tonearms.
Bottom Line: This sdroceRyaM protractor offers excellent value by bundling a magnifier with a reliable alignment tool. It’s perfect for vinyl newcomers and casual listeners who want accurate setup without investing in separate inspection tools. Despite the quirky branding, the functionality and included magnifier make it a smart purchase.
4. Mayrecords Cartridge Alignment Protractor Tool -Pickup Calibration Distance Gauge Protractor with Magnifier-Record LP Vinyl Turntable Phonograph Phono

Overview: Mayrecords delivers a precision cartridge alignment tool designed to optimize turntable performance and preserve vinyl collections. This acrylic protractor enables accurate stylus overhang and alignment adjustments for improved tracking, reduced distortion, and extended record life. The included magnifying card assists with detailed visual inspection during setup.
What Makes It Stand Out: The manufacturer emphasizes quality materials and precise craftsmanship, with specific dimensions provided (190mm x 40mm) for compatibility verification. The magnifying glass card (85mm x 54mm) is credit-card sized for convenient storage. Explicit focus on record protection—reducing friction and balancing sliding forces—demonstrates thoughtful design beyond basic alignment.
Value for Money: At $8.99, this tool matches market pricing while offering clear quality assurances. Competing products at this price point often omit magnifiers or use lower-grade acrylic. The detailed product specifications suggest manufacturing consistency, reducing the risk of receiving a subpar unit. It’s an economical alternative to $20+ protractors from boutique audio brands.
Strengths and Weaknesses: Strengths: Quality acrylic construction with precise printing, included magnifying card, clear dimensional specifications, emphasis on record protection, universal 1/2" cartridge compatibility, and straightforward usability.
Weaknesses: No mention of UV printing durability, limited to basic alignment geometry, brand recognition is minimal, and the magnifier’s magnification power isn’t specified.
Bottom Line: The Mayrecords protractor is a solid, no-nonsense alignment tool that delivers reliable performance with the added benefit of a magnifier. Its clear specifications and quality-focused description inspire confidence. Ideal for vinyl enthusiasts who want a dependable, well-documented tool without paying premium prices. A worthwhile investment for any turntable owner.
5. Dayton Audio iMM-6C Calibrated Measurement USB-C Microphone for iPhone, iPad Tablet and Android,Black

Overview: The Dayton Audio iMM-6C is a precision measurement microphone engineered for modern mobile acoustic analysis. This USB-C condenser mic connects directly to smartphones and tablets, enabling room calibration, speaker measurement, and audio system tuning on the go. Its calibrated flat frequency response and true omnidirectional pattern deliver professional-grade data for apps like REW Mobile and Studio Six Digital tools.
What Makes It Stand Out: The integrated kickstand cleverly elevates and angles your device during measurements, ensuring consistent microphone positioning without additional stands. The headphone/line-out pass-through jack allows simultaneous test signal playback and measurement—a critical feature for impulse response testing. True omnidirectional pattern and calibrated response provide accuracy that consumer mics cannot match.
Value for Money: Priced at $44.97, the iMM-6C offers exceptional mobile measurement capability at half the cost of traditional XLR measurement mics requiring separate interfaces. While the UMIK-1 with USB-C adapter costs more, this all-in-one solution eliminates adapter clutter. For AV professionals, home theater calibrators, and mobile recording engineers, it delivers professional features at a consumer-friendly price.
Strengths and Weaknesses: Strengths: USB-C native connectivity, integrated kickstand, headphone pass-through jack, calibrated flat response, true omnidirectional pattern, compact portability, and Dayton Audio reliability.
Weaknesses: Limited to USB-C devices (no Lightning version), mobile app quality varies, smaller capsule may have slightly higher noise floor than full-size mics, and plastic construction is less rugged than professional XLR counterparts.
Bottom Line: The Dayton Audio iMM-6C is the ideal measurement microphone for the mobile era. Its thoughtful design features and calibrated accuracy make it indispensable for anyone performing acoustic measurements with tablets or smartphones. For modern audio professionals and serious enthusiasts, this is the most convenient and cost-effective mobile measurement solution available.
6. OLLOAUDIO X1 Producing and Mixing Studio Headphones | Individually Calibrated | Flat Frequency Response

Overview: The OLLOAUDIO X1 Producing and Mixing Studio Headphones represent a serious investment for audio professionals seeking surgical precision. These open-back reference headphones feature individually calibrated 50mm dynamic drivers with a patented Pu+PET membrane, delivering a flat frequency response essential for critical mixing decisions. The included Realphones-powered calibration plugin provides multiple target curves and virtual monitoring environments.
What Makes It Stand Out: True individuality sets the X1 apart—each pair ships with its own calibration file that remains open data, free from proprietary lock-in. This means you can implement the correction in hardware DSP solutions like RME TotalMix or Neumann Mission, ensuring consistent translation across different playback systems. The 32-ohm impedance makes them surprisingly versatile, performing admirably even with mobile devices while maintaining studio-grade specifications.
Value for Money: At $599, the X1 competes directly with calibrated systems from Sonarworks and IK Multimedia, but offers superior flexibility through its open-file approach. For professional producers and mix engineers who bill hourly, the accuracy and time savings justify the premium over standard studio headphones.
Strengths and Weaknesses: Strengths include exceptional frequency response linearity (±1dB variation), low distortion (<0.05% THD), and cross-platform calibration compatibility. The open-back design provides natural soundstage but limits isolation and leaks sound—unsuitable for tracking. The dependency on calibration software may intimidate analog purists.
Bottom Line: The OLLOAUDIO X1 delivers on its promise of calibrated accuracy. If you’re a serious mix engineer tired of translation issues, these headphones merit strong consideration despite the steep price.
7. Sound Level Meter Calibrator, Precise Decibel Meter Calibrator with 3 Calibration Level 114dB & 94dB & 104dB, Professional Sound Pressure Level (SPL) Calibrator for Sound Level Meters

Overview: The DANOPLUS Sound Level Meter Calibrator offers an accessible entry point into proper SPL meter calibration. This compact device generates three reference tones at 94dB, 104dB, and 114dB at 1kHz, allowing quick field verification of your sound measurement equipment. Designed for portability, it runs on two AA batteries and fits easily into any toolkit.
What Makes It Stand Out: Three calibration levels provide unusual flexibility at this price point, letting you verify linearity across different SPL ranges rather than just a single reference point. The universal cavity design accepts most standard microphone diameters, while the low-power LED indicator prevents unexpected failures during critical measurements.
Value for Money: At $75.99, this calibrator costs a fraction of laboratory-grade alternatives while delivering essential functionality. For environmental consultants, live sound engineers, or safety officers needing regular verification without certification paperwork, it represents exceptional practicality.
Strengths and Weaknesses: Strengths include portability, multiple output levels, and clear battery status indication. However, the device lacks formal IEC standards compliance, which may disqualify it for legal metrology applications. The plastic construction raises durability questions for daily professional use, and auto-power-off is conspicuously absent.
Bottom Line: For semi-professional applications where traceable certification isn’t mandatory, this DANOPLUS unit delivers reliable performance. It’s ideal for field technicians and educators who prioritize functionality over formal accreditation.
8. Sound Level Calibrator,Decibel Meter Calibration for Noise Measurement Reader,Output Sound Level 94dB & 114dB output levels for 1 inch and 1/2 inch Microphones

Overview: This Sound Level Calibrator positions itself as a professional-grade tool for serious acousticians and industrial hygienists. Generating precise 94dB and 114dB tones at 1kHz, it conforms to stringent IEC942 Class 1 standards, ensuring measurements meet legal and scientific requirements. The dual microphone compatibility accommodates both ½-inch and 1-inch capsules with included adapters.
What Makes It Stand Out: IEC942 Class 1 compliance distinguishes this unit from budget alternatives, providing documented accuracy for regulatory reporting. The remarkable 100-hour battery life eliminates frequent maintenance concerns, while factory calibration at sea-level conditions guarantees out-of-the-box precision. Universal microphone support future-proofs your investment across different meter manufacturers.
Value for Money: At $108.90, you’re paying modestly more than basic calibrators but gaining certified accuracy and professional credibility. For consultants producing court-defensible noise reports or factories maintaining OSHA compliance, this price represents negligible overhead compared to the cost of measurement uncertainty.
Strengths and Weaknesses: Strengths include standards compliance, exceptional battery longevity, and professional build quality. The two-level output (versus three on some competitors) covers most calibration needs but occasionally requires additional calculation. It’s slightly bulkier than ultra-portable units, and the higher price may deter casual users.
Bottom Line: This calibrator hits the sweet spot for professionals needing certified accuracy without laboratory-grade expense. The IEC compliance alone justifies the investment for any serious noise measurement work.
9. Decibel Meter Wall Hanging Sound Level Meter 11 inch Large LED Display Noise Temperature Humidity Meter with Alarm Icons Indicator Wide Applications for Classroom, Studio, Home, Factory
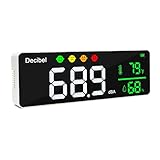
Overview: The DANOPLUS Wall Hanging Decibel Meter transforms noise monitoring into a visual centerpiece. Featuring an impressive 11-inch LED display, this continuous monitor tracks sound levels from 30-130dB while simultaneously displaying temperature and humidity. Designed for permanent installation, it provides at-a-glance environmental awareness for spaces where noise management matters.
What Makes It Stand Out: Face-icon alarms deliver instant visual feedback without audible distractions—green smiles below 60dB transition to red frowns above 85dB, making it perfect for classrooms and libraries. The calibration function allows recalibration after long-term drift, a rare feature in consumer-grade monitors. A generous 9.8-foot USB cable and 2000mAh battery ensure flexible placement.
Value for Money: At $44.99, this monitor costs less than many handheld meters while offering continuous visibility. For teachers managing classroom noise, studio owners monitoring ambient levels, or factory supervisors tracking compliance zones, it provides 24/7 monitoring that’s impossible to ignore.
Strengths and Weaknesses: Strengths include the large, bright display, intuitive visual alerts, and multi-parameter monitoring. However, wall-mount limitation reduces portability, and ±1.5dB accuracy trails professional handheld units. There’s no data logging or connectivity for trend analysis, restricting its use to real-time monitoring only.
Bottom Line: This DANOPLUS unit excels as a passive, always-on noise awareness tool. For applications requiring constant visual feedback rather than precise documentation, it’s an unbeatable value that effectively modifies behavior through immediate visual cues.
10. Professional Sound Level Calibrator Decibel Meter Calibration with Three Calibration Level at 94dB & 104dB & 114dB, SPL Meter Calibrator for dB Noise meter

Overview: This Professional Sound Level Calibrator balances portability with benchtop stability, offering three reference levels at 94dB, 104dB, and 114dB. Operating at 1kHz with a 13.2mm cavity, it accommodates standard measurement microphones while providing clear LED status indicators. The auto-power-off function conserves battery during field work.
What Makes It Stand Out: The hybrid design philosophy merges handheld portability with benchtop stability—a rare combination that prevents the unit from tipping during calibration. Color-coded LEDs clearly indicate active calibration level and warm-up status, eliminating guesswork. The three-level output allows quick linearity checks across a 20dB span, identifying microphone compression issues.
Value for Money: Priced at $79.79, this calibrator sits comfortably between budget options and certified units. For audio system installers, venue technicians, or safety officers requiring regular calibration without regulatory documentation, it offers professional features without unnecessary certification costs.
Strengths and Weaknesses: Strengths include stable benchtop design, clear LED feedback, three output levels, and intelligent power management. The 400g weight provides heft without burdening field kits. Weaknesses include unspecified IEC compliance, which may limit use in legal contexts, and the lack of a low-battery warning before complete failure.
Bottom Line: This calibrator serves technicians who prioritize practical functionality and build quality. It’s ideal for regular field calibration where certified accuracy isn’t mandatory but reliability and ease-of-use are paramount.
Why Room Acoustics Are the Hidden Bottleneck in Small Studios
Small studios face a unique acoustic paradox: the very dimensions that make them practical create the worst acoustic problems. When your room is under 200 square feet, you’re battling axial modes that stack up in predictable but devastating ways, creating massive dips and peaks in your low-end response. A 10x12 foot room, for instance, will almost certainly have a null around 47Hz and a peak around 94Hz—right where your kick drum lives. These aren’t subtle problems; they’re 15-20dB swings that make balanced mixing physically impossible.
The real danger lies in how your brain adapts. Spend enough time in a hyped room and you’ll start cutting frequencies that aren’t actually there, or boosting elements that sound weak due to nulls. This psychoacoustic compensation is remarkably persistent—you’ll carry those biased decisions into every subsequent project. Modern calibration tools don’t just fix frequency response; they reset your auditory baseline, forcing your brain out of its compromised adaptation patterns. The result isn’t just better sound—it’s better decision-making.
The Evolution of Audio Calibration: From Manual Tuning to AI-Driven Correction
The calibration journey began with graphic analyzers and pink noise, where engineers would manually adjust parametric EQs while squinting at RTA displays. This was part science, part voodoo, and largely ineffective for phase-related issues. The first generation of automated systems brought computer-controlled measurements, but they were slow, required extensive technical knowledge, and often produced results that sounded “correct” but felt lifeless.
Today’s AI-driven solutions represent a fundamental shift. They don’t just measure what your room is doing; they model what it should be doing and calculate the most elegant path between those two states. Machine learning algorithms trained on thousands of studio measurements can now distinguish between problematic resonances and desirable room character, preserving the spatial cues that make a room feel musical while surgically removing the destructive elements. For small studios, this means correction that doesn’t sound “processed”—it simply sounds like a better version of your room.
Understanding the Core Technologies Behind Modern Room Correction
At the heart of any calibration system lies the measurement and correction engine. The measurement phase uses swept sine waves or MLS (Maximum Length Sequence) signals to capture not just frequency response but also impulse response—the complete time-domain behavior of your room. This is crucial because frequency problems are only half the story; the time it takes for those frequencies to decay determines whether you hear clarity or mud.
The correction engine typically employs one of two approaches: FIR (Finite Impulse Response) or IIR (Infinite Impulse Response) filtering. FIR filters offer linear phase response, meaning they don’t introduce timing smear across frequencies—a critical feature for maintaining transient accuracy. IIR filters are more computationally efficient and can handle steep slopes with less processing power, but they manipulate phase relationships. Leading systems in 2026 often hybridize these approaches, applying FIR correction to the low frequencies where phase coherence matters most, and IIR for high-frequency tweaks where the ear is less sensitive to timing shifts.
Hardware vs. Software Solutions: Which Path Should You Choose?
Hardware-based correction systems integrate directly into your monitor chain, typically between your interface and speakers. Their primary advantage is universality—they correct everything passing through them, regardless of source. This means your DAW, streaming audio, and reference tracks all benefit from the same calibrated environment. Hardware solutions also operate with dedicated DSP chips, eliminating latency concerns and CPU load from your computer.
Software solutions, conversely, run as plugins within your DAW or as system-level applications. They offer greater flexibility, allowing you to bypass correction when needed or create multiple calibration profiles for different listening positions. The downside is they only process audio from your computer, leaving external sources uncorrected. For small studios where the computer is the sole audio source, software can be more cost-effective and upgradeable. The emergence of ultra-low-latency system-level drivers in 2026 has blurred these lines, with some software solutions achieving near-zero latency performance that rivals hardware.
Key Features to Evaluate in 2026’s Calibration Tools
When evaluating modern systems, look beyond the marketed frequency response corrections. Multi-point averaging capability has become essential for small studios where the mix position might be cramped. The ability to measure at 8-12 positions around your listening area and intelligently average the results prevents over-correction for a single “sweet spot” that disappears when you lean forward.
Target curve customization represents another critical feature. The “flat” response isn’t actually flat—it’s a carefully sloped curve that accounts for human hearing sensitivity and typical room behavior. Advanced systems let you adjust this target, creating slightly brighter or warmer balances that match your personal workflow or genre conventions. Some even offer genre-specific presets that account for the different balance requirements of electronic music versus acoustic recordings.
Real-time adaptation is the frontier feature for 2026. Using built-in microphones or connected measurement mics, some systems can now track room changes—temperature, humidity, even furniture position—and subtly adjust correction curves throughout your session. While this might sound like overkill, in small studios where opening a door fundamentally changes bass response, it’s transformative.
The Measurement Microphone: Your Most Critical Accessory
Your calibration is only as accurate as your measurement microphone. The bundled mics included with many systems are often adequate but not exceptional. A measurement microphone’s job is to be acoustically invisible—it must have a ruler-flat frequency response and perfect omnidirectional polar pattern. Cheaper mics can exhibit slight deviations that compound into significant errors after correction.
For serious small studio work, consider investing in a Class 1 measurement microphone with an individual calibration file. These files contain the exact frequency response fingerprint of your specific mic, allowing the software to compensate for any microscopic deviations. In 2026, we’re seeing the rise of MEMS-based measurement microphones that maintain accuracy across wider temperature ranges—a genuine advantage in studios that aren’t climate-controlled. Remember, a $1,000 correction system is only as good as the $50 microphone measuring your room.
Multi-Point vs. Single-Point Calibration: The Sweet Spot Debate
Single-point calibration measures at your primary listening position and creates a correction filter optimized for that exact spot. This produces the most dramatic correction at that location but can make the room sound worse everywhere else. In a small studio where you might lean to adjust a synth or pull up a chair for a collaborator, this creates a frustratingly narrow window of accuracy.
Multi-point calibration measures across a volume of space—typically a 1-2 foot sphere around your head—and calculates a compromise correction that minimizes errors across all measured points. The mathematics behind this are complex; it’s not simple averaging but weighted optimization that prioritizes the central position while controlling degradation at the edges. For rooms under 150 square feet, multi-point is almost mandatory. The key is measuring enough points (minimum 8) but not so many that you start incorporating irrelevant data from behind your head or too far laterally.
FIR vs. IIR Filters: The Technical Foundation of Your Sound
The filter type determines the sonic signature of your correction. FIR filters process audio through a time-delayed tap structure that allows for arbitrary frequency response shaping without altering phase relationships. This preserves the timing integrity of transients—crucial for hearing the attack of a snare drum or the pluck of a bass string accurately. The trade-off is latency and CPU load; FIR filters require more processing power and introduce delay, which can be problematic for tracking.
IIR filters use feedback loops to achieve steep filtering with minimal latency and CPU usage. However, they inherently manipulate phase, which can smear transient information and create subtle timing shifts between frequencies. Most modern small studio solutions use hybrid approaches: FIR for bass management where room modes cause the most severe phase issues, and IIR for mid-high frequencies where the ear is less sensitive to phase. Some advanced systems even let you manually adjust this balance, trading off pure phase coherence for lower latency depending on your workflow.
Integration Challenges: DAWs, Interfaces, and Monitoring Chains
Plugging a correction tool into your setup isn’t always plug-and-play. Software solutions must contend with your DAW’s buffer settings, and running correction at high sample rates can multiply CPU load. Some systems require specific routing that conflicts with monitor control features in your interface, forcing you to choose between hardware volume control and software correction.
Hardware solutions bring their own integration hurdles. Many small studio interfaces lack digital outputs, requiring analog conversion that slightly degrades signal quality. The correction device’s input and output stages become part of your signal path, and their quality varies dramatically. Look for hardware with bypass relays that completely remove the unit from the chain when disabled, preserving your original signal path integrity. Also consider clocking—if your interface and correction device both have internal clocks, you may need to configure master/slave relationships to avoid jitter.
The Small Studio Constraint: Working With Imperfect Spaces
Small studios aren’t just small—they’re compromised. Parallel walls create strong standing waves. Low ceilings cause vertical mode issues. Windows and doors introduce asymmetry. The best calibration tool for a small studio acknowledges these realities rather than pretending they don’t exist. This means systems with aggressive low-frequency correction capabilities, since small rooms have modal issues starting as high as 70-80Hz.
Look for tools that can correct down to 20Hz with high resolution. Some systems claim correction to 20Hz but use coarse filters that miss narrow peaks. The best solutions use high-tap-count FIR filters in the sub-bass region, providing 1-2Hz resolution to surgically address room modes. Additionally, consider systems that offer boundary compensation settings. If your monitors are within 2 feet of a wall (common in small rooms), they’ll exhibit predictable bass buildup that standard correction might not fully address without specific boundary EQ presets.
Budget Tiers: What to Expect at Every Price Point
Entry-level solutions under $300 typically offer software-only correction with basic measurement capabilities. They’ll flatten your frequency response effectively but may lack sophisticated time-domain correction or multi-point averaging. These are genuine improvements over raw room sound but require more manual tweaking and acoustic treatment to achieve professional results.
The $300-$800 range brings hardware/software hybrid solutions with better measurement mics, multi-point capabilities, and hybrid FIR/IIR engines. This is the sweet spot for most small studios—you get professional-grade correction without boutique pricing. Expect comprehensive target curve editing, DAW integration plugins, and the ability to store multiple profiles.
Above $800, you’re paying for marginal gains: higher-quality conversion in hardware units, AI-driven measurement analysis, real-time adaptation, and ultra-high-resolution filters. For small studios, these premium features offer diminishing returns unless you’re working in an extremely compromised space that requires every possible advantage. The law of acoustic treatment still applies—no amount of electronic correction can fully substitute for proper bass trapping, but premium tools can stretch your treatment budget further.
The Setup Process: From Unboxing to Final Listening Test
Proper setup begins before you open the box. Position your monitors in an equilateral triangle with your listening position, tweeters at ear height, and at least 8-12 inches from walls if possible. Treat first reflection points with absorption—even basic foam panels here dramatically improve correction effectiveness. Calibration can’t fix what it can’t measure, and strong early reflections confuse measurement algorithms.
The measurement sequence matters. Start with your room at its typical temperature and humidity. Close doors and windows. Measure during quiet hours—traffic noise can contaminate low-frequency readings. Follow the software’s guidance for mic positioning, but be methodical: use a mic stand, not your hand, and maintain consistent height. After calibration, perform subjective tests with reference tracks you know intimately. Listen for improved bass definition, clearer stereo imaging, and reduced ear fatigue. If vocals suddenly sound nasal or cymbals harsh, you may have over-correction that requires adjusting your target curve.
Common Calibration Mistakes That Sabotage Your Results
The number one mistake is treating calibration as a substitute for acoustic treatment. Correction systems can’t fix flutter echo or extreme reverb times—they can only address frequency and time-domain issues within certain limits. A room with 500ms decay times will still sound boxy even after perfect EQ correction.
Second is improper monitor placement. No amount of electronic wizardry can correct massive boundary interference from monitors shoved directly against a wall. The laws of physics still apply. Another critical error is measuring with gear in the signal path that will be removed later. If you use a console or monitor controller, it must be in the chain during measurement. Changing gain structure post-calibration invalidates the entire process.
Finally, many users set and forget their calibration. Rooms change—seasonally, daily, even hourly. Re-measure monthly, and always re-calibrate after moving any significant piece of furniture or equipment. The most sophisticated 2026 systems include reminder features that prompt you to re-measure based on detected environmental changes.
Beyond EQ: Time Domain Correction and Phase Coherence
Frequency response is just the visible tip of the acoustic iceberg. The time domain—how long specific frequencies linger in your room—determines clarity and definition. A 20dB peak at 60Hz is problematic, but a 300ms decay at that frequency is catastrophic. Modern correction tools address both simultaneously through impulse response manipulation.
This is where phase coherence becomes critical. When different frequencies arrive at your ears with different timing relationships, the soundstage collapses and transients smear. Linear-phase FIR filters maintain these relationships, but they introduce pre-ringing—an audible artifact that sounds like reversed echo before sharp transients. The best 2026 systems use minimum-phase FIR designs that eliminate pre-ringing while preserving phase relationships, or they employ sophisticated psychoacoustic models to make IIR filters behave more linearly in the critical midrange.
The Future of Room Correction: 2026 Trends and Beyond
We’re witnessing the convergence of room correction with immersive audio and spatial monitoring. Modern systems don’t just correct for stereo—they’re building 3D correction maps that account for ceiling reflections and vertical imaging, preparing small studios for Dolby Atmos and spatial audio workflows. This is particularly relevant as more producers work in headphones but need to verify spatial mixes on speakers.
AI is moving beyond simple measurement analysis into predictive modeling. Some systems can now generate correction curves based on room dimensions and photos, using computer vision to identify problematic surfaces before you even plug in a microphone. While these predictive corrections aren’t as accurate as full measurements, they provide excellent starting points for further refinement.
The most significant trend is the shift toward continuous adaptation. Instead of static correction filters, emerging systems create dynamic models that adjust to real-time measurements from ambient microphones. These systems can compensate for a door opening, a window cracking, or even the acoustic absorption of people moving through the space. For small studios where environmental control is limited, this represents the final frontier of consistent monitoring.
Verifying Your Results: Objective Metrics vs. Subjective Listening
After calibration, you need verification. Use Room EQ Wizard or similar software to perform a post-correction measurement. Look for a smooth frequency response within ±3dB from 100Hz to 10kHz. More importantly, examine the waterfall plot—this shows frequency decay over time. You want to see even, rapid decay across all frequencies without ridges that indicate lingering resonances.
But measurements don’t tell the whole story. The ultimate test is mix translation. Create a simple session with a kick, snare, bass line, and vocal. Mix it quickly in your calibrated room, then listen in your car, on earbuds, and through a Bluetooth speaker. If the balance holds—if the kick isn’t overwhelming, if the vocal sits right—you’ve achieved translation. Keep a logbook of these tests, noting how often you need to revise mixes after hearing them elsewhere. Over time, you should see revision rates drop from 80% to under 20%. That’s the true metric of successful calibration.
Frequently Asked Questions
1. Can room correction completely replace acoustic treatment in my small studio?
No, correction complements treatment but can’t substitute for it. Physical absorption is necessary for controlling reverb times and eliminating flutter echo. Think of correction as fine-tuning a treated room, not fixing an untreated one. At minimum, treat first reflection points and corners before relying on electronic correction.
2. How often should I re-calibrate my studio?
Re-measure monthly and recalibrate whenever you make physical changes. Temperature and humidity fluctuations affect room modes, especially in small spaces. The most advanced 2026 systems include environmental sensors that prompt recalibration when conditions shift significantly.
3. Will room correction introduce latency that affects my recording?
Software solutions can add 5-20ms of latency, which is problematic for tracking. Use zero-latency monitoring through your interface during recording, or invest in hardware correction with dedicated DSP that adds less than 1ms of delay. Some modern software systems now offer “tracking modes” that use minimal-phase processing with sub-3ms latency.
4. Can I use the same calibration for mixing and mastering?
Ideally, no. Mastering requires even stricter accuracy. Create separate target curves: a slightly more forgiving curve for mixing that reduces ear fatigue, and a ruthlessly flat curve for mastering. The best systems let you switch profiles with a single click.
5. What’s the minimum room size where correction becomes effective?
Correction works in any size room, but it’s most transformative in spaces under 200 square feet where modal issues are dense and unpredictable. In closets or tiny bedrooms under 100 square feet, even the best correction has limits—some frequencies may be physically impossible to reproduce accurately due to room dimensions.
6. Do I need a subwoofer for effective low-frequency correction?
A subwoofer actually makes correction more challenging by introducing another variable, but it can help smooth severe nulls. If your monitors only extend to 50Hz, you’re missing critical sub-bass information. Many 2026 systems include sophisticated subwoofer integration tools that time-align and phase-match subs to mains while correcting the combined response.
7. Why does my room sound worse immediately after calibration?
Your brain has adapted to the colored sound. The corrected response will initially sound dull or lifeless because you’re hearing accuracy for the first time. Give it 2-3 weeks of regular mixing before judging. If issues persist after adaptation, you may have over-correction or an inaccurate measurement.
8. Can room correction fix stereo imaging problems?
Yes, but only those caused by frequency response imbalances between left and right speakers. It can’t fix poor speaker placement or strong side-wall reflections that create phantom images. For imaging issues, first ensure proper equilateral triangle setup and treat side walls, then let correction fine-tune channel balance.
9. Are measurement microphones really that important?
Absolutely. A 2dB inaccuracy in your measurement mic becomes a 2dB error in your correction. This is especially critical in the 1-4kHz range where small errors dramatically affect vocal clarity. Use the included mic initially, but budget for a calibrated measurement mic with individual calibration file for professional results.
10. What’s the biggest mistake people make when choosing a calibration system?
Buying based on feature lists rather than workflow compatibility. A system with 1000 filter taps and AI analysis is useless if it doesn’t integrate with your monitor controller or adds unacceptable latency. Prioritize how the tool fits your specific setup—DAW-based producers need different solutions than those using hardware mixers. Always download the manual before purchasing and verify signal flow compatibility with your exact gear.