Tired of battling uneven temperatures throughout your house? You’re not alone. That classic scenario—freezing in the living room while your upstairs bedroom feels like a sauna—is the number one complaint about traditional HVAC systems. Professional zoning solutions can cost thousands, but here’s the good news: smart damper controllers have revolutionized DIY climate control, putting professional-grade comfort within reach for budget-conscious homeowners. These clever devices let you create customized temperature zones without gutting your ductwork or draining your savings account.
Whether you’re a seasoned home improvement enthusiast or a curious beginner ready to tackle your first major HVAC project, understanding what separates a worthwhile smart damper controller from a disappointing gadget is crucial. This comprehensive guide cuts through the marketing jargon to focus on the features, compatibility factors, and installation considerations that actually matter when building a zoned HVAC system on a budget. We’ll explore how to evaluate options, avoid common pitfalls, and maximize your investment—no specific product names, just pure, actionable expertise to help you make the smartest choice for your home.
Top 10 Top 10 Smart Damper Controllers
 | Honeywell CPRD10 TrueZONE Bypass Damper, 10" | Check Price |
 | SMOBOT WiFi Kamado Grill and Smoker Temperature Controller - for Daisy Wheel | Check Price |
 | Snap-On Control Damper, 10" Duct Dia. | Check Price |
Detailed Product Reviews
1. Honeywell CPRD10 TrueZONE Bypass Damper, 10"
Overview: The Honeywell CPRD10 TrueZONE Bypass Damper is a critical component for residential and light commercial HVAC zoning systems. Designed to automatically regulate excess air pressure when zone dampers close, this 10-inch damper prevents system strain and noise while maintaining optimal airflow. Unlike traditional weighted bypass dampers, Honeywell’s engineered solution eliminates manual calibration and provides consistent performance across varying system conditions.
What Makes It Stand Out: The standout feature is its revolutionary no-weight design that automatically maintains constant system pressure regardless of zone configuration changes or blower speed adjustments. This self-regulating capability means technicians can install it in any orientation—horizontal, vertical, or angled—without compromising functionality. The quick installation process significantly reduces labor time, a major advantage for contractors working on tight schedules.
Value for Money: While specific pricing isn’t available, the CPRD10 delivers exceptional value by eliminating callbacks associated with manual damper adjustments. Traditional bypass dampers require precise weight tuning that can drift over time, but this unit’s engineered reliability translates to fewer service issues and longer system life. For HVAC professionals, the time saved during installation and reduced warranty claims justify a premium over conventional options.
Strengths and Weaknesses: Strengths include foolproof installation, orientation flexibility, automatic pressure regulation, and compatibility with TrueZONE systems. Weaknesses involve potential incompatibility with non-Honeywell zoning panels and the need for professional installation. The lack of price transparency also makes budgeting challenging for DIYers.
Bottom Line: This damper is ideal for HVAC contractors seeking reliable, labor-saving components for zoning installations. Homeowners with existing TrueZONE systems will appreciate its maintenance-free operation, though professional installation is strongly recommended.
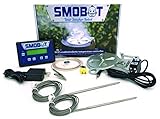
2. SMOBOT WiFi Kamado Grill and Smoker Temperature Controller - for Daisy Wheel
Overview: The SMOBOT controller revolutionizes kamado grill management by replacing manual damper adjustments with intelligent, robotic precision. Specifically designed for grills with daisy wheel vents, this $309 device maintains consistent smoking and cooking temperatures for hours without intervention. The integrated WiFi system connects to your home network, enabling real-time monitoring and control through the mySMOBOT platform from anywhere with internet access.
What Makes It Stand Out: Unlike fan-based controllers that force air into the grill, SMOBOT’s robotic damper provides “natural” temperature control by precisely positioning your existing daisy wheel, maintaining the grill’s inherent airflow dynamics. The dual food probes allow simultaneous monitoring of multiple meats or grill zones, while the rugged thermocouple thermometer with alligator clip ensures accurate grate-level temperature readings. Cloud-based connectivity means you can check your brisket from the grocery store or adjust temperatures from your couch.
Value for Money: At $309, SMOBOT competes directly with premium controllers like the Flame Boss 500 and BBQ Guru CyberQ. Its unique mechanical damper approach preserves the kamado’s natural convection patterns, potentially yielding superior smoke flavor compared to fan-forced alternatives. The robust build quality and comprehensive feature set justify the investment for serious enthusiasts who regularly undertake long cooks.
Strengths and Weaknesses: Strengths include authentic temperature control method, excellent WiFi connectivity, intuitive app interface, and dual-probe capability. Weaknesses are the daisy wheel requirement (won’t work on all kamado models), premium pricing that may deter casual users, and dependence on home WiFi reliability. Initial setup requires careful calibration.
Bottom Line: Perfect for dedicated kamado grillers seeking set-and-forget convenience without compromising traditional cooking dynamics. The SMOBOT justifies its price through innovative design and reliable performance, making it a worthwhile upgrade for frequent low-and-slow cooks.
3. Snap-On Control Damper, 10" Duct Dia.
Overview: The Snap-On Control Damper offers a straightforward, economical solution for manual airflow regulation in 10-inch ductwork. Priced at just $24.02, this basic damper installs directly onto existing ducts, allowing homeowners and HVAC technicians to balance air distribution between rooms or zones without complex equipment. It’s designed for simple, hands-on adjustment of heating and cooling airflow.
What Makes It Stand Out: Its primary distinction is affordability and simplicity. The snap-on design suggests tool-free installation in many applications, making it accessible for DIY enthusiasts tackling basic duct modifications. Unlike motorized or pressure-regulating dampers, this manual unit requires no electrical connections, controllers, or specialized knowledge—just physical adjustment of the damper blade to restrict or allow airflow as needed.
Value for Money: Exceptional value for budget-conscious projects. At under $25, it costs a fraction of automated dampers while addressing fundamental airflow balancing needs. For rental properties, workshops, or single-room additions where permanent zoning isn’t justified, this damper provides an effective, low-cost alternative. However, its manual nature means you’ll sacrifice convenience and precision compared to pricier options.
Strengths and Weaknesses: Strengths include rock-bottom pricing, simple installation, no power requirements, and reliability due to minimal moving parts. Weaknesses are manual operation requiring physical access, lack of automation, absence of sealing features (likely standard), and no feedback mechanism for precise positioning. The sparse product details also raise questions about material quality and longevity.
Bottom Line: Ideal for basic HVAC balancing tasks where manual control suffices and budget is paramount. Choose this for simple airflow adjustments in non-critical applications, but invest in automated dampers for true zoning or convenience. It’s a functional, no-frills tool for the cost-conscious.
Understanding Smart Damper Controllers
What is a Smart Damper Controller?
A smart damper controller is the brain behind your zoned HVAC system, commanding motorized dampers inside your ductwork to open or close based on temperature demands from different zones. Think of it as a traffic cop for your conditioned air, directing airflow precisely where it’s needed instead of blasting it equally throughout your entire home. Unlike manual dampers that require physical adjustment, these devices respond automatically to signals from thermostats or sensors, making real-time decisions to optimize comfort and efficiency.
How Do Smart Dampers Work in Zoned Systems?
The magic happens through a simple feedback loop. When a zone’s thermostat calls for heating or cooling, the controller receives that signal and activates the appropriate damper to open. Simultaneously, it may partially close dampers in zones that have reached their target temperature. This dynamic adjustment prevents your HVAC system from wasting energy on already-comfortable rooms. Most controllers manage this process through low-voltage wiring connections, though newer wireless models use RF signals or Wi-Fi mesh networks to communicate with dampers and thermostats.
Why Zone Your HVAC System?
Energy Savings Potential
Zoning can slash your energy bills by 20-30% annually by eliminating climate control in unoccupied spaces. Instead of heating your entire home for that one cold office, you can maintain comfort only where you need it. Smart controllers take this further by learning your patterns and optimizing damper positions to reduce runtime on your furnace or AC unit. The initial investment often pays for itself within 2-3 years through reduced utility costs.
Comfort Control Benefits
Beyond savings, zoning solves fundamental design flaws in single-thermostat homes. Multi-story houses, homes with large windows, or those with finished basements naturally develop temperature imbalances. Smart dampers let you create up to 8 independent zones, each with its own temperature setpoint. This means finally achieving that perfect 72°F in your bedroom while keeping the nursery slightly warmer and the home gym cooler.
When Zoning Makes Sense
Zoning delivers the biggest ROI in homes over 2,000 square feet, multi-level layouts, or houses with rarely-used guest rooms. If you have areas that are consistently 3-5 degrees different from your main thermostat, you’re an ideal candidate. However, homes with already-balanced temperatures or those with ductwork too small to handle redirected airflow may see limited benefits. Always assess your ductwork capacity before investing.
Key Features to Evaluate
Wireless vs. Wired Connectivity
Wired systems offer bulletproof reliability and eliminate battery concerns, making them ideal for new construction or major renovations where you can run low-voltage wires. Wireless controllers provide installation flexibility for existing homes, though they require strategic placement to avoid signal interference from metal ducts. Budget-friendly wireless options typically use proprietary RF protocols rather than Wi-Fi, which can be more stable but limits smart home integration. Consider your home’s construction—wireless signals struggle in houses with plaster walls or extensive metal ductwork.
Motor Type and Power Requirements
The damper motor determines longevity and noise level. Belimo-style synchronous motors offer whisper-quiet operation and 10+ year lifespans but cost more. Simpler induction motors work reliably but generate noticeable hum when operating. Power requirements vary dramatically: some controllers supply 24VAC directly to dampers, while others require external transformers. Check your system’s available power—overloading a 40VA transformer with multiple dampers can cause voltage drops and erratic behavior.
Damper Size Compatibility
Controllers must match your ductwork dimensions, typically ranging from 6-inch round to 16x8-inch rectangular. Budget controllers often support only standard round sizes, forcing expensive duct modifications. Look for systems with adapters or universal mounting brackets that accommodate multiple sizes. Pay attention to damper blade design: opposed-blade dampers provide better sealing for high-pressure systems, while parallel blades work fine for standard residential setups.
Smart Home Integration Capabilities
Even on a budget, consider future-proofing. Basic controllers offer app control through proprietary apps, while mid-range options integrate with major platforms like SmartThings or Hubitat. The real value lies in automation—connecting your dampers to occupancy sensors or window contacts prevents wasteful conditioning when rooms are empty or windows are open. Avoid controllers requiring monthly subscriptions for basic functionality; the best budget options provide full control without recurring fees.
Temperature Sensing Options
Quality zoning depends on accurate temperature feedback. Some systems use dedicated wireless sensors, others leverage smart thermostats in each zone. The most budget-friendly approach combines a central controller with affordable Bluetooth temperature sensors, though this may sacrifice precision. For best results, ensure your controller supports multiple sensor types and allows sensor calibration to account for placement variations—sensors near windows or vents read differently than those on interior walls.
Compatibility Considerations
Existing Ductwork Assessment
Before purchasing anything, inspect your ductwork. Measure internal dimensions, check for asbestos wrapping in older homes, and assess accessibility. Flexible ductwork requires special round dampers with compression clamps, while rigid metal ducts need slip-in dampers with gasket seals. Calculate your total system static pressure—adding dampers increases resistance, and already undersized ducts may restrict airflow enough to freeze AC coils or overheat furnaces. A simple manometer test can prevent costly mistakes.
Furnace and AC Unit Compatibility
Not all HVAC systems handle zoning gracefully. Single-stage equipment cycles frequently with zoning, reducing efficiency gains. Two-stage or variable-speed units pair beautifully with smart dampers, running longer at lower capacity for better dehumidification and temperature balance. Check your system’s minimum airflow requirements—most need at least 60% of total capacity flowing to prevent damage. Budget controllers with bypass damper support protect your equipment when only one small zone calls for conditioning.
Thermostat Integration
Your controller must communicate seamlessly with thermostats. Some systems require proprietary thermostats, locking you into an ecosystem. Others work with any standard 24VAC thermostat, giving you freedom to choose budget-friendly options. Multi-stage thermostat support matters if you have advanced HVAC equipment. For DIYers, controllers with auto-detect features simplify setup by automatically recognizing connected thermostat types.
Budget-Friendly Buying Strategies
Understanding Price Tiers
Entry-level controllers ($150-300) typically manage 2-3 zones with basic scheduling. Mid-range options ($300-500) offer 4-6 zones, wireless connectivity, and smart home integration. Premium systems ($500+) provide advanced analytics and support for 8+ zones. For most DIY projects, mid-range controllers deliver the best value, offering professional features without the pro price tag. Focus on expandability—buying a controller that supports more zones than you currently need prevents costly upgrades later.
Where to Find Deals
HVAC supply houses often offer contractor pricing to DIYers who ask politely, typically 20-30% below retail. Online marketplaces feature open-box returns at significant discounts, though warranty coverage may be limited. Purchase during off-season months (spring and fall) when demand drops and retailers discount inventory. Some manufacturers offer refurbished units with full warranties at 40-50% savings—these are often customer returns tested to factory specs.
Refurbished vs. New
Refurbished controllers from reputable sellers provide exceptional value, but verify the warranty terms. Look for at least a one-year warranty and a 30-day return window. Inspect for firmware update capabilities—older refurbished models may lack modern security protocols. New units offer peace of mind and latest features, but the premium rarely justifies the cost for budget-conscious DIYers. A certified refurbished controller from a major brand often outperforms a new no-name unit.
DIY Installation Essentials
Tools You’ll Need
Beyond basic hand tools, you’ll need a 3.5-inch hole saw for damper installation, a 24VAC multimeter for testing circuits, and a smartphone with a decibel meter app to check for air leaks. A borescope camera helps inspect ductwork interiors before cutting. For wireless systems, a Wi-Fi analyzer app ensures adequate signal strength at installation points. Budget tip: rent the borescope from a tool library rather than buying.
Safety Precautions
Always disconnect power to your HVAC system at the breaker, not just the thermostat. Ductwork can contain sharp edges and fiberglass insulation—wear cut-resistant gloves, long sleeves, and a respirator. Test for asbestos in pre-1980 homes before disturbing duct insulation. Never bypass safety switches or pressure sensors; budget controllers should enhance safety, not compromise it. Have a fire extinguisher rated for electrical fires accessible during installation.
Common Installation Pitfalls
The biggest mistake is installing dampers too close to the air handler, creating turbulence. Place dampers at least 3 feet downstream from bends or branches. Another frequent error is undersizing bypass ducts—calculate bypass capacity at 25-30% of total system CFM. Failing to seal damper connections with mastic or foil tape leads to air leaks that negate efficiency gains. Always install dampers with the blade axis horizontal to prevent sagging and binding.
Wiring and Power Setup
Low-Voltage Wiring Basics
Most controllers use 18-gauge thermostat wire, but runs over 50 feet may need 16-gauge to prevent voltage drop. Follow color coding conventions: red for 24VAC hot, white for heat, yellow for cool, green for fan. Keep low-voltage wires at least 6 inches from line-voltage circuits to prevent interference. Use fish tape to route wires through finished walls, and always leave service loops at connections for future troubleshooting. For multi-wire bundles, label each conductor at both ends—what seems obvious during installation becomes confusing months later.
Power Supply Options
Controllers typically draw 15-30VA, with each damper adding 5-10VA. Standard HVAC transformers (40VA) can handle 2-3 dampers; larger systems need 75VA transformers or dedicated power supplies. Some budget controllers include built-in transformers, while others require separate purchase. Calculate total load: add controller draw, all damper motors, and any connected thermostats or sensors. Operating at over 80% of transformer capacity causes premature failure. Consider a separate 24VAC power supply for the controller to isolate it from HVAC equipment fluctuations.
Configuration and Calibration
Setting Up Zones
Effective zoning groups rooms with similar thermal characteristics and usage patterns. Avoid mixing east and west-facing rooms in the same zone, as solar gain creates conflicting demands. Bedrooms should form separate zones from living areas to accommodate different schedules. Basements typically need their own zone due to unique temperature profiles. Most controllers support zone naming—use descriptive labels like “Master Suite” rather than “Zone 1” to simplify management. Start with 3-4 zones maximum; you can always expand as you learn your system’s behavior.
Balancing Airflow
After installation, measure airflow at each supply register using a cheap anemometer or the garbage bag inflation method. Adjust damper end switches to limit blade travel if certain zones receive too much air. The goal is achieving design CFM within 10% across all zones. Set minimum damper positions (typically 10-15% open) to ensure continuous airflow and prevent pressure spikes. Document all settings with photos—this baseline proves invaluable when troubleshooting later.
Troubleshooting Common Issues
Noisy Dampers
Rattling usually indicates loose damper blades or insufficient duct support. Tighten all set screws and add duct hangers within 1 foot of the damper. Whistling suggests excessive air velocity—partially open additional dampers to reduce pressure. Grinding noises point to motor failure or binding; check that blades move freely with power disconnected. Some budget motors are inherently loud; adding 1-inch duct insulation around the damper assembly can muffle operational noise significantly.
Connectivity Problems
Wireless systems dropping connections often suffer from weak signals. Install a signal repeater or relocate the controller closer to dampers. Interference from metal ducts can be mitigated by mounting antennas externally using remote sensor cables. For wired systems, intermittent operation usually indicates loose wire nuts or corrosion at connections. Use gel-filled connectors in humid environments like attics. Firmware bugs cause connectivity issues—always update to the latest version before troubleshooting further.
Uneven Heating/Cooling
If one zone never reaches temperature, calculate its BTU load versus supply capacity. You may need to adjust damper timing to give problematic zones longer conditioning periods. Short-cycling indicates zones are too small; combine adjacent zones or increase minimum damper positions. Temperature overshoots suggest sensors are poorly placed or need calibration offset. Remember that zoning can’t fix fundamentally undersized equipment—it only optimizes distribution.
Maintenance and Longevity
Seasonal Checks
Every spring and fall, cycle each damper through full open/close positions while listening for unusual noises. Check wire connections for corrosion, especially in unconditioned spaces. Verify that bypass dampers operate freely and that controller firmware is current. Clean any accessible temperature sensors with compressed air. This 15-minute routine prevents 90% of common failures and extends system life by years.
When to Replace
Motors typically last 7-10 years, but controllers may need replacement sooner due to obsolete communication protocols. If your controller can’t receive security updates or lacks support for newer thermostat standards, consider upgrading before it fails catastrophically. Replacement is warranted when repair costs exceed 50% of a new unit’s price, or when expanding beyond your current controller’s zone capacity. Keep spare damper motors on hand—they’re the most failure-prone component and cheap insurance against discomfort.
Advanced Features Worth Considering
Learning Algorithms
Some mid-range controllers now include basic machine learning that adapts to your schedule, preemptively adjusting zones based on historical data. While not essential, this feature can improve efficiency by 5-8% by reducing temperature recovery time. Evaluate whether the premium is worth it—simple schedule programming often achieves similar results. Learning features require at least 30 days of operation to become effective, so don’t expect immediate miracles.
Energy Usage Monitoring
Controllers with current sensors can estimate energy consumption per zone, revealing which areas cost the most to condition. This data helps optimize setpoints and identifies poorly insulated spaces. Budget options may offer whole-system monitoring rather than per-zone tracking, which still provides valuable insights. Use this information to prioritize weatherization projects, often delivering better ROI than additional zoning equipment.
Regulatory and Safety Standards
Building Code Compliance
Most jurisdictions require permits for duct modifications, even DIY projects. Check local codes regarding damper installation in fire-rated assemblies—you may need fire/smoke dampers in certain locations. Return air pathways must remain unrestricted; zoning supply ducts cannot create pressure imbalances that affect combustion appliances. Keep installation documentation and take photos for permit inspections. Some areas prohibit zoning in homes with natural draft water heaters due to backdrafting risks.
UL Certification Importance
Underwriters Laboratories certification ensures electrical safety and fire resistance. Budget controllers lacking UL listing may use substandard components or inadequate circuit protection. Look for UL 60730 certification specifically for automatic electrical controls. This matters for insurance claims—non-certified equipment can void coverage if a fire occurs. Reputable manufacturers display certification marks prominently; absence of UL listing is a red flag regardless of price.
Frequently Asked Questions
1. Can I zone my HVAC system myself, or do I need a professional?
Most homeowners with basic electrical and ductwork skills can successfully install smart damper controllers. The key is choosing a system designed for DIY installation with clear documentation and customer support. However, you should hire a professional if your ductwork is inaccessible, you have asbestos insulation, or your HVAC system uses complex communicating technology. Always pull required permits and get your work inspected.
2. How many zones can I realistically create on a budget?
For under $500, you can typically create 3-4 zones covering main living areas, bedrooms, and a basement. Each additional zone adds $75-150 for dampers and sensors. Most residential systems max out at 6-8 zones before ductwork modifications become necessary. Start with zones that address your biggest comfort complaints, then expand gradually as budget allows.
3. Will zoning damage my HVAC equipment?
Properly installed zoning with a bypass damper or variable-speed equipment actually reduces wear by minimizing short cycling. The danger comes from restricting airflow below manufacturer minimums, which can freeze coils or overheat heat exchangers. Quality controllers monitor system pressure and prevent damaging conditions. Always check your equipment’s minimum CFM requirements before installation.
4. Do smart dampers work with heat pumps and mini-splits?
Standard ducted heat pumps work excellently with smart dampers. Mini-splits are inherently zoned and don’t need dampers. However, some high-efficiency variable-speed heat pumps use communicating thermostats that may conflict with third-party zoning controllers. Check compatibility with your specific model—some manufacturers void warranties if non-approved zoning is added.
5. What’s the difference between smart dampers and manual dampers with smart thermostats?
Manual dampers are set-and-forget; they can’t respond to changing conditions throughout the day. Smart dampers dynamically adjust airflow in real-time based on actual zone demands. While smart thermostats optimize equipment runtime, they can’t redirect air where it’s needed. True zoning requires both smart control and motorized adjustment of airflow paths.
6. How long does a typical DIY installation take?
Plan for 6-10 hours spread over a weekend. Cutting into ductwork and installing dampers takes 3-4 hours. Wiring the controller and thermostats adds another 2-3 hours. Configuration, calibration, and troubleshooting typically consume 1-3 hours. Working in hot attics or crawlspaces extends time significantly. Don’t rush—proper sealing and wire routing prevent future headaches.
7. Can I integrate zoning with my existing smart home system?
Many mid-range controllers offer integration via Zigbee, Z-Wave, or Wi-Fi. This lets you create automations like “close bedroom dampers when windows open” or “boost AC to home office during video calls.” Basic models may only work through their proprietary app. Check for IFTTT support or open API documentation if you use less-common smart home platforms.
8. What maintenance do smart damper systems require?
Beyond seasonal cycling checks, clean damper blades every 2-3 years to prevent dust buildup that can cause binding. Replace batteries in wireless sensors annually, even if they still have charge. Update firmware when prompted to maintain security and compatibility. The maintenance burden is minimal—less than an hour per year once installed.
9. Will zoning solve hot and cold spots caused by poor insulation?
Zoning manages symptoms but doesn’t cure underlying building envelope problems. A room with inadequate insulation will still lose heat faster, requiring more conditioning time. Use zoning to manage comfort while prioritizing air sealing and insulation upgrades. Combined, these improvements deliver maximum efficiency. Think of zoning as fine-tuning, not a replacement for proper weatherization.
10. What’s the biggest mistake people make when buying budget damper controllers?
Choosing based solely on price without verifying compatibility. A $200 controller that doesn’t work with your equipment or ductwork costs more than a $400 unit that installs seamlessly. Always download installation manuals before purchasing and verify damper sizes, power requirements, and thermostat compatibility. The second biggest mistake is underestimating the importance of a bypass damper—skipping this critical component risks equipment damage.