Have you ever stood back to admire your new television, only to have the illusion of a sleek, modern setup shattered by a tangled mess of cords snaking down the wall? That frustrating visual clutter doesn’t just detract from your carefully curated living space; it signals a missed opportunity to truly integrate technology seamlessly into your home. In 2026, the demand for invisible, clean installations isn’t just a luxury—it’s become the expected standard for discerning homeowners and tech enthusiasts alike. The right mounting solution transforms your device from an appliance into an elegant part of your room’s architecture, making the technology itself feel secondary to the experience it enables.
Achieving that elusive “floating screen” or perfectly concealed setup requires far more than just a basic bracket and some zip ties. It demands a sophisticated understanding of integrated systems designed for both form and function. Smart mounting kits have evolved dramatically, moving beyond simple hardware to become intelligent ecosystems that manage power, signals, and aesthetics invisibly. This guide cuts through the marketing noise to focus on the fundamental principles and critical features you must understand to select the ideal system for a genuinely clean, hidden, and future-proof installation. Forget chasing specific brand names; let’s equip you with the knowledge to make the right choice for your unique space and needs.
Top 10 Smart Mounting Kits
Detailed Product Reviews
1. Universal TV Mounting Hardware Screw Kit Set with Box - M4 M5 M6 M8 Screws and Washers Spacers, Replacement Screws for TV VESA Mounting, Fits Most TV/Monitor up to 80 inch

Overview: This comprehensive screw kit provides essential hardware for mounting TVs and monitors up to 80 inches using VESA standards. It eliminates the frustration of missing or mismatched screws during installation. What Makes It Stand Out: Its standout feature is the durable, organized storage box with pre-divided and clearly labeled compartments for M4, M5, M6, and M8 screws, plus washers and spacers. This ensures quick identification and prevents loss, a significant upgrade over typical loose hardware bags. Value for Money: Priced affordably, it offers exceptional value by replacing multiple individual purchases. The included variety covers nearly all common mounting scenarios, making it far more cost-effective than hunting for specific replacements or risking incompatible hardware. Strengths and Weaknesses: Strengths: Excellent organization, high-quality durable materials, universal compatibility for large screens, dust-free storage, and reliable customer support. Weaknesses: The box, while useful, adds slight bulk; some very niche mounting configurations might still require additional specific parts. Bottom Line: An indispensable, well-organized solution for DIYers and professionals. It guarantees you have the right hardware on hand, saving time, frustration, and money, making it a highly recommended purchase for any TV mounting project.
2. Smart Choice Granite Countertop Dishwasher Installation Kit
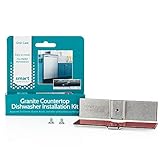
Overview: This kit simplifies securing dishwashers under solid-surface countertops like granite or quartz without permanent alterations, addressing a common installation headache. What Makes It Stand Out: Its unique no-drill, no-glue, no-mess design is revolutionary for countertop installations. The brackets clamp securely onto the countertop edge using included hardware, eliminating the need for messy adhesives or risky drilling that could crack stone. Value for Money: While seemingly simple, the specialized design justifies its price. It prevents costly damage repairs from drilling errors and saves significant time versus traditional methods, offering strong value for the peace of mind and ease it provides during dishwasher setup. Strengths and Weaknesses: Strengths: Truly damage-free installation on sensitive surfaces, incredibly easy and quick setup, compatible with multiple countertop materials (granite, quartz, acrylic), no tools required. Weaknesses: Only includes brackets/hardware for countertop mounting (no waterline parts), limited to specific dishwasher models with standard mounting flanges. Bottom Line: A must-have for anyone installing a dishwasher under a high-end countertop. Its innovative, non-destructive mounting method is worth every penny to avoid potential disasters, making it an essential and highly recommended kit.
3. Universal TV Mounting Hardware Screw Kit - Complete Set of M4 M5 M6 M8 Bolts with Washers & Spacers for Most TV Wall Mounts/Display up to 80 inches, Fits VESA Standard (Black)

Overview: This kit delivers a complete, universal solution for mounting TVs and monitors up to 80 inches using VESA standards, ensuring compatibility across most brands and mount types. What Makes It Stand Out: Beyond basic hardware, it excels in universal compatibility with fixed, tilting, and full-motion brackets. The clearly organized and labeled components (M4-M8 bolts, washers, spacers) streamline installation, while the high-strength steel construction guarantees long-term security. Value for Money: It offers superb value by replacing multiple single-size purchases. The comprehensive selection covers virtually all common mounting needs, preventing installation delays and the expense of sourcing missing parts separately, especially valuable for installers handling diverse jobs. Strengths and Weaknesses: Strengths: Exceptional versatility across mount types and TV sizes, robust steel build quality, intuitive organization for fast setup, broad VESA compatibility. Weaknesses: Lacks a dedicated storage solution like a box (often loose in packaging), black finish may not suit all aesthetics (though functionally irrelevant). Bottom Line: A reliable, professional-grade hardware kit that ensures a secure, correct mount every time. Its flexibility and quality make it a cost-effective essential for both consumers and installers, earning a strong recommendation.
4. Mounting Bracket myQ Chamberlain Garage Smart Hub,Smart Garage Control - Wireless Garage Hub,(Only for MYQ-G0401-ES, Not Included Garage Hub), White

Overview: This bracket is a dedicated mounting solution specifically designed for the Chamberlain/myQ Smart Garage Hub model G0401-ES, enabling secure, damage-free installation near garage door openers. What Makes It Stand Out: Its key innovation is the completely tool-free, no-drill installation using locking buckles and adhesive. The integrated wire manager neatly tucks away excess cable, maintaining a clean look without modifying walls or opener components. Value for Money: Priced reasonably, it delivers excellent value if you own the specific G0401-ES hub. It eliminates the risk and mess of DIY mounting solutions, protects the hub, and ensures optimal signal placement, justifying its cost for compatible users. Strengths and Weaknesses: Strengths: Effortless, damage-free setup, secure attachment to opener hanging holes, effective wire management, clean aesthetic. Weaknesses: Extremely limited compatibility (only MYQ-G0401-ES), useless for other hub models or brands, requires specific hole size (1/4" - 9/16"). Bottom Line: An ideal, hassle-free mounting solution exclusively for owners of the Chamberlain/myQ G0401-ES Smart Garage Hub. If you have this exact model, it’s a highly recommended purchase; otherwise, it has no utility.
5. Smart Choice 6-Foot Stainless Steel Dishwasher Installation Kit

Overview: This kit provides all necessary components to safely connect any brand of dishwasher to a home’s water supply line, featuring a robust stainless steel water inlet hose. What Makes It Stand Out: The inclusion of a high-quality 6-foot braided stainless steel waterline is the centerpiece, offering superior durability and leak resistance compared to standard plastic hoses. The comprehensive hardware kit ensures a complete, professional-grade connection. Value for Money: It represents excellent value as a true all-in-one solution. Purchasing the hose, fittings (elbows, T-connector), sealant tape, bushing, and wire nuts separately would cost more and require multiple trips, making this kit highly economical and convenient. Strengths and Weaknesses: Strengths: Durable stainless steel hose, complete with every essential fitting and accessory, simplifies installation significantly, reduces leak risk, suitable for any dishwasher brand. Weaknesses: The 6-foot length might be excessive for some installations (though excess can be coiled), doesn’t include mounting hardware for the dishwasher itself. Bottom Line: A practical, reliable, and cost-effective solution for a critical dishwasher connection. The quality hose and complete components make installation straightforward and secure, earning it a solid recommendation for any dishwasher setup or replacement.
6. ECHOGEAR Universal TV Mount Hardware Pack - Replacement Hardware Mounting Kit for TVs up to 80" - Includes M4, M5, M6 & M8 Screws

Overview:
This universal hardware pack solves the common headache of missing or incompatible screws during TV mounting. Designed for screens up to 80", it includes M4, M5, M6, and M8 screws with spacers to fit virtually any flat or curved TV from major brands like Samsung, LG, and Sony. It’s a compact solution for both DIYers and professionals facing last-minute mounting snags.
What Makes It Stand Out:
Its comprehensive range of pre-sorted, labeled screws eliminates guesswork, while the strip-resistant, durable construction ensures long-term stability. The inclusion of spacers accommodates uneven TV backs—a rarity in budget packs—and M8 screws specifically address Samsung’s frequent compatibility issues. The organized packaging streamlines installation, and surplus screws double as versatile household backups.
Value for Money:
Priced affordably, it’s a cost-effective alternative to buying individual screw sets or risking damage with subpar hardware. While basic kits exist, this pack’s breadth of sizes, Samsung-specific M8 support, and premium build justify its value, especially compared to single-size replacements that leave users stranded mid-installation.
Strengths and Weaknesses:
Strengths: Universal compatibility; durable, anti-strip screws; intuitive labeling; spacers for curved TVs; Samsung-ready. Weaknesses: No instructions for size selection (novices may need online guidance); spacers might not suit ultra-thin bezels; minimal storage case for leftovers.
Bottom Line:
An indispensable, future-proof kit for anyone mounting a TV. Its reliability and versatility make it a smart investment over generic alternatives, earning a strong recommendation for hassle-free installations.
7. CERCGVEL 1/2 Packs Trim Plate ONLY Compatible with ecobee Smart Thermostat Essential, Wall Plate Bracket Cover, Programmable Thermostat Accessory, Practical Kit, Bracket Mount Cover (1 Pack)

Overview:
This trim plate is a dedicated accessory for the ecobee Smart Thermostat Essential, designed solely to cover wall imperfections and wiring gaps during installation. Crafted from premium ABS plastic, it ensures a seamless aesthetic without altering the thermostat’s functionality—ideal for users seeking a clean, professional finish post-installation.
What Makes It Stand Out:
Its precision engineering guarantees a perfect flush fit for the ecobee Essential, with rounded edges that complement modern decor. Unlike generic plates, it’s mandatory for junction box installations (common in North American homes), eliminating the need for messy wall repairs. The tool-free snap-on design saves significant time versus repainting or patching.
Value for Money:
While seemingly simple, it delivers exceptional value by transforming a sloppy installation into a polished one for minimal cost. Cheaper alternatives often misalign or lack junction box compatibility, making this purpose-built plate a worthwhile upgrade for $10–$15 over DIY fixes that risk damaging walls.
Strengths and Weaknesses:
Strengths: Essential for junction boxes; flawless ecobee Essential fit; scratch-resistant ABS; ultra-fast installation; hides wiring gaps cleanly. Weaknesses: Only compatible with ecobee Essential (not other models); purely cosmetic (no functional benefits); sold separately from the thermostat.
Bottom Line:
A niche but vital accessory for ecobee Essential owners—especially in junction box setups. It’s non-negotiable for a pro finish, earning a top recommendation despite its single-purpose design.
8. 12V Power Adapter Kit for myQ Smart Garage Video Keypad, 25ft Stable Charging Cable & Swivel Angle Bracket, Weatherproof Mounting Bracket for myQ

Overview:
This all-in-one kit replaces batteries in the myQ Smart Garage Video Keypad with reliable wired power, featuring a 25ft cable, weatherproof bracket, and 12V adapter. Engineered exclusively for myQ systems, it ensures uninterrupted operation while optimizing camera angles and shielding against the elements.
What Makes It Stand Out:
The 12V-specific adapter prevents overheating common with 5V knockoffs, while the “rain roof” bracket and double-sealed connector offer dual weather protection—a rarity. The 25ft cable allows flexible routing from garage outlets, and the horizontal swivel bracket eliminates blind spots by directing the camera toward driveways or walkways.
Value for Money:
Though pricier than generic adapters, it justifies cost through safety (correct voltage), weather resilience, and installation ease. Competing kits often lack the integrated rain shield or precise swivel, risking device failure. For myQ users tired of battery swaps, this is a durable, long-term solution.
Strengths and Weaknesses:
Strengths: Safe 12V output; exceptional weatherproofing; 25ft cable for clean routing; adjustable swivel; no battery dependency. Weaknesses: Only for myQ Video Keypad (not standard openers); bracket installation requires drilling; cable may need conduit in exposed areas.
Bottom Line:
A must-have upgrade for myQ Video Keypad owners seeking reliability and optimal coverage. Its targeted design and robust build make it the clear choice over makeshift alternatives.
9. Voyaux Tool-Free Mounting Bracket for myQ Chamberlain Garage Smart Hub (MYQ-G0401-ES), No Drilling Required, Easy and Damage-Free Installation, Compatible with Garage Door Opener Hanging Kits

Overview:
This bracket securely mounts the MYQ-G0401-ES Smart Garage Hub without tools or drilling, using your opener’s existing hanging holes. Crafted for quick setup, it eliminates wall damage while keeping the hub accessible near garage door motors—a game-changer for renters or tidy installations.
What Makes It Stand Out:
The true standout is tool-free installation: hand-tightened buckles attach in seconds to 1/4"–9/16" hanging holes. Integrated wire management tames excess cables, and the ABS+PC build withstands garage temperature swings. Voyaux’s decade-long accessory expertise ensures reliability, with included Velcro for sensor organization.
Value for Money:
At a modest price, it outperforms drilling-dependent brackets by preventing permanent wall damage—saving repair costs. Generic mounts often require modifications, but this plug-and-play design delivers immediate value for hub owners prioritizing simplicity and reusability.
Strengths and Weaknesses:
Strengths: Zero-drill, tool-free setup; cable management; durable ABS+PC; renter-friendly; fits common hanging holes. Weaknesses: Only for MYQ-G0401-ES (not newer models); hanging hole compatibility limits may apply; buckles could loosen in high-vibration environments.
Bottom Line:
An exceptional solution for effortless, damage-free MYQ-G0401-ES mounting. Its user-centric design and durability earn a strong recommendation for hassle-free smart garage setups.
10. Wallplate Brackets Compatible with Lutron Caseta Pico Remote, No Wires Required, Wall Mounting Kit Compatible with Lutron Smart Switch, 4-Pack ABS
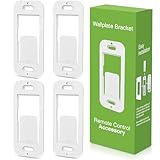
Overview:
This 4-pack of brackets mounts Lutron Caseta Pico remotes to walls without wiring or drilling, integrating them flush with standard wallplates. Made for Claro plates, it transforms handheld remotes into permanent wall controls—ideal for multi-room smart lighting setups or replacing traditional switches.
What Makes It Stand Out:
The embedded ABS design ensures a seamless, minimalist look while resisting heat and impact. Installation takes minutes: snap the bracket into a wallplate, then the Pico remote clicks securely into place. It enables wireless 3-way control (e.g., at hallway entrances) without rewiring, leveraging existing Lutron ecosystems.
Value for Money:
Priced for bulk use, the 4-pack pays for itself by eliminating the need for full switch replacements in secondary locations. Cheaper brackets often crack or misalign, but Lutron-specific precision and a 2-year warranty validate the investment for cohesive smart-home aesthetics.
Strengths and Weaknesses:
Strengths: True Lutron Caseta compatibility; tool-free 3-minute install; heat/impact-resistant ABS; clean integrated look; 2-year warranty. Weaknesses: Brackets only (remotes/wallplates sold separately); limited to Claro plates; not suitable for moisture-prone areas.
Bottom Line:
A refined, essential accessory for Lutron users wanting flexible, wired-switch alternatives. Its reliability and seamless integration make it highly recommended for polished smart-home control.
Understanding Your Mounting Needs and Space
Before diving into technical specs, a successful hidden installation starts with a thorough assessment of your specific environment and requirements. Rushing this step often leads to costly mistakes or compromises in the final result.
Defining Your Desired Aesthetic Outcome
What does “clean” mean to you? Is it a completely flush-mounted screen with zero visible gaps, a setup where all cables disappear into the wall, or perhaps a configuration where only the screen surface is visible, with the electronics housed neatly behind? Your precise vision dictates the complexity and type of mounting system required. Consider the viewing angles, room layout, and how the installation integrates with existing furniture and decor. This clarity prevents selecting an over-engineered (and expensive) solution for a simple need or, worse, an underpowered system that can’t deliver your desired look.
Evaluating Wall Structure and Composition
Your wall is the foundation of your installation, and its composition is non-negotiable. Is it standard drywall over wooden studs, concrete, brick, tile, or perhaps a plaster/lath system? Each material demands specific mounting hardware and techniques for safe, secure anchoring. Hidden installations often require creating channels within the wall for cables, which is vastly easier in drywall than in concrete. Understanding load-bearing walls versus partitions is also crucial, as it impacts where heavy equipment can be safely mounted. Never assume; use a stud finder and potentially consult a professional if unsure about your wall’s integrity.
Measuring Device Compatibility and Clearance
Precise measurements are paramount. Note your device’s exact dimensions (especially depth and mounting pattern – VESA compatibility), but also crucial is the total depth required behind the screen for the mounting bracket itself, any necessary adapters, and the space needed for cable routing and potential behind-the-wall components like power modules or media players. Measure the distance from the wall surface to any nearby obstacles like cabinets, moldings, or electrical outlets. This ensures your chosen system fits within the physical constraints without forcing awkward compromises.
Critical Features of Modern Smart Mounting Systems
Today’s advanced mounting solutions incorporate intelligence far beyond basic brackets. These features are essential for achieving a truly hidden, functional, and adaptable installation.
Advanced Cable Management Systems
This is the cornerstone of a clean look. Look for kits featuring integrated raceways, in-wall conduit channels, or specialized cable channels within the bracket structure itself. The best systems guide cables through the mount and directly into the wall cavity, eliminating any external dangling wires. Consider ease of access for future cable changes – some systems have removable covers or modular channels. Avoid solutions that merely bundle cables with ties; true management hides them completely from the outset.
Integrated Power and Signal Solutions
The holy grail is eliminating the need for a visible power brick. Seek systems with dedicated in-wall power modules that safely bring electricity behind the screen. These often involve a low-voltage transformer mounted safely within the wall cavity, connected to the device via a thin, flat cable that’s much easier to conceal than a standard power cord. Similarly, consider solutions that integrate HDMI or other signal extenders (like HDBaseT) designed to run cleanly through the wall, potentially reducing the number of thick cables needed.
Dynamic Weight Capacity and Movement
Don’t just check the maximum weight; understand the dynamic load capacity, especially if your device might be moved (like a motorized lift). Consider the bracket’s ability to handle the specific weight distribution of your device, particularly if it’s ultra-thin with the weight concentrated at the bottom. For articulating arms (used for monitors or smaller TVs), ensure smooth movement and secure locking positions without sagging over time, even with the added weight of hidden cabling.
Universal VESA Compatibility and Adapter Flexibility
While VESA is a standard, patterns vary widely. Ensure the kit offers extensive compatibility across common (and less common) patterns, often through included or optional adapter plates. Crucially, verify that the adapter system doesn’t add excessive depth that compromises your ability to mount the screen close to the wall or creates difficult cable routing paths behind the device. Flexibility here prevents headaches during installation.
Wall Integration and Finish Options
The mount shouldn’t fight your decor. Look for systems offering paintable covers for wall plates or conduit entrances to blend seamlessly with your wall color. Some premium kits include thin, flexible metal or fabric covers that sit flush over cable entry points, creating a truly minimalist finish. Consider how the system handles the transition from the wall surface to the device – gaps should be minimal and visually unobtrusive.
Installation Process and Practical Considerations
A brilliant kit is useless if the installation process is overly complex or risky. Understanding the practicalities is key to a successful project.
Assessing DIY Feasibility vs. Professional Installation
Be brutally honest about your skill level. Running low-voltage wiring within walls, dealing with power modules (even low-voltage ones), and ensuring perfect leveling for large, heavy screens requires specific tools and knowledge. While basic fixed mounts might be DIY-friendly, complex hidden installations involving in-wall power, conduit, and significant wall modification often demand a professional electrician or certified installer. Factor this potential cost into your budget from the start; a botched DIY job can be far more expensive to fix.
Required Tools and Wall Modification Complexity
Look beyond the kit itself. What tools will you need? A high-quality stud finder, fish tape, drywall saw, voltage tester, drill with specific bits, level (laser preferred), and potentially a low-voltage wire puller are often essential. Consider the mess: cutting channels in drywall creates dust, and patching afterward requires skill. Kits requiring significant wall opening might necessitate professional drywall repair for a flawless finish. Understand the scope before you start cutting.
Safety Protocols for In-Wall Components
Safety is non-negotiable. Any system involving electrical components within the wall cavity must comply with local electrical codes. This usually means using listed, low-voltage power modules specifically designed and certified for in-wall use. Never run standard mains voltage cables (like a regular power cord) inside walls without proper conduit and licensing – this is a major fire hazard. Always turn off the correct circuit at the breaker and verify it’s dead before working near outlets or wiring.
Future-Proofing for Technology Changes
Technology evolves rapidly. Design your installation to accommodate future upgrades. Will the cable channels be large enough for next-gen, potentially thicker HDMI cables? Is the power solution flexible enough for a device with slightly higher wattage? Can you easily access and replace the in-wall power module if needed? Choosing a system with modular components and ample conduit space saves you from tearing open the wall again in a few years.
Optimizing Aesthetics and Long-Term Satisfaction
The final look and ease of maintenance are what you’ll live with daily. Prioritize these elements for lasting enjoyment.
Minimizing the Visual Footprint
Every millimeter counts. Focus on the “bezel gap” – the space between the screen edge and the wall. The best hidden mounts achieve near-zero gaps. Evaluate how the mount handles the device’s own stand footprint; some systems allow removal of the original stand legs for a flusher fit. Consider the profile of any necessary wall plates – opt for ultra-thin designs that sit completely flush.
Concealing All External Components
The screen is just the start. Where will your streaming device, soundbar receiver, or game console live? Truly hidden installations often incorporate behind-the-wall media compartments or utilize furniture with integrated cable routing. If devices must stay nearby, ensure the mounting system includes solutions for neatly tucking away these boxes, perhaps with adhesive mounts or dedicated shelf brackets that route their cables back into the main wall channel.
Ensuring Easy Access for Maintenance
Don’t make yourself a prisoner of your own installation. How easily can you access the back of the screen to plug in a new device, change a cable, or clean dust? Look for mounts with quick-release mechanisms or sufficient tilt/swivel range that allows you to gently pull the bottom of the screen away from the wall for access without dismounting the entire unit. Avoid permanent seals or complex covers that require tools for simple tasks.
Material Quality and Longevity Assessment
This isn’t a place to skimp. Inspect the materials: heavy-duty, cold-rolled steel for brackets; robust, non-conductive plastics for cable channels; corrosion-resistant finishes. Cheap plastics can yellow, warp, or crack over time, especially hidden in wall cavities where temperature fluctuates. High-quality metals ensure stability and prevent sagging. Check for smooth finishes on moving parts to guarantee decades of reliable operation.
Environmental Factors and Room Placement
Consider your room’s environment. High humidity (like in a bathroom or sunroom) demands mounts and components rated for moisture resistance. Direct sunlight can degrade certain plastics over time. In rooms with significant vibration (near heavy machinery or subwoofers), ensure the mount has robust damping features to prevent annoying screen wobble. The location matters as much as the kit itself.
Integration with Smart Home Ecosystems
While the mount itself might not be “smart,” consider how it fits into your broader system. Does the clean cable routing accommodate sensors or devices needed for your smart home setup? Can the hidden installation easily incorporate a discreet camera or microphone array if required by your smart display? Think holistically about how the physical setup supports your connected lifestyle.
Frequently Asked Questions
Frequently Asked Questions
Can I safely install in-wall power for my TV myself? While running low-voltage wiring is often DIY-able, installing any component that connects to your home’s main electrical system (even if it’s a transformer) typically requires a licensed electrician to comply with safety codes and avoid fire hazards. Always consult local regulations.
How do I hide cables without cutting into my wall? Surface-mount raceways painted to match your wall are the primary alternative, though they are less invisible than in-wall solutions. Cord covers or routing cables through baseboards/flooring are other options, but true “hidden” usually requires some wall access for the cleanest look.
What’s the maximum weight a typical hidden mount can hold? Weight capacity varies drastically. Fixed low-profile mounts for smaller TVs might handle 50-80 lbs, while robust full-motion mounts designed for large screens can support 150+ lbs. Always check the specific kit’s rating and ensure it exceeds your device’s weight, including any added components.
Will a hidden installation damage my wall? Professional installation minimizes damage, with holes patched seamlessly. DIY carries higher risk of larger cuts or poor patching. Using proper techniques and tools is essential, and some wall texture matching might be needed post-installation regardless.
Are smart mounting kits compatible with all TV brands? Compatibility depends on VESA pattern and weight, not the TV brand. Ensure the kit supports your TV’s specific mounting hole spacing (measured in mm) and weight. Most modern kits cover common patterns, but verify with your model’s specifications.
How much does a professional hidden installation typically cost? Costs vary widely based on complexity, TV size, wall type, and location. Basic fixed hidden mounts might start around $300-$500 installed, while complex setups with in-wall power, multiple devices, and significant wall modification can range from $800 to $2000+.
Can I install a hidden mount on brick or concrete walls? Yes, but it’s significantly more complex and expensive. Requires specialized masonry drill bits, anchors, and potentially channeling the brick/concrete, which is labor-intensive. Professional help is highly recommended for these surfaces.
Is it possible to upgrade the cables behind the wall later? Yes, if the installation included proper conduit (smooth, hollow tubing) running from the device area to the equipment location. Conduit allows you to easily pull new cables through later. Systems relying solely on cut-out wall channels make future cable changes very difficult.
Do hidden mounts affect my TV’s warranty? Generally, no, as long as the installation doesn’t physically damage the TV (e.g., cracking the screen during mounting). However, modifications that void the warranty (like removing the stand in a way the manufacturer prohibits) are rare but check your specific TV’s terms.
How do I clean dust from behind my wall-mounted TV? Choose a mount with a tilt or slight pull-away mechanism. Gently tilt the bottom of the TV away from the wall (following the mount’s instructions) to access the back for vacuuming with a brush attachment. Avoid excessive force. Regular dusting helps prevent heavy buildup.