Imagine stepping onto a perfectly warm tile floor on a frigid winter morning—that luxurious feeling doesn’t happen by accident. Behind every comfortable in-floor heating system lies a critical component that most homeowners overlook until something goes wrong: the thermostat with built-in Ground Fault Circuit Interrupter (GFCI) protection. This unsung hero doesn’t just control temperature; it’s your primary defense against electrical hazards in wet environments where water and electricity dangerously intersect.
Whether you’re planning a new radiant heat installation or upgrading an aging controller, understanding the nuances of GFCI-protected thermostats can mean the difference between decades of silent, efficient operation and costly callbacks, safety violations, or worse—electrical shock hazards. This comprehensive guide dives deep into everything you need to know, from the technical fundamentals to advanced smart features, installation best practices, and long-term maintenance strategies that industry professionals use to ensure optimal performance and safety.
Top 10 The Ultimate Guide to In-Floor
Detailed Product Reviews
1. Ultimate Guide to House Framing, 3rd Edition: Plan | Design | Build (Creative Homeowner) Step-by-Step for Building Walls, Floors, and Roofs, Repairing Stairs, and Installing Bay Windows

Overview: The Creative Homeowner’s Ultimate Guide to House Framing delivers comprehensive instruction for one of construction’s most critical skills. This third edition covers essential framing techniques for walls, floors, and roofs, plus specialized applications like stair repair and bay window installation. As a used book in good condition, it offers the same technical content as a new copy at a reduced price point, making professional-grade knowledge accessible to DIY builders and apprentices.
What Makes It Stand Out: This guide excels in its methodical, visual approach to complex structural work. The step-by-step format breaks down intimidating projects into manageable phases, while detailed diagrams clarify load paths and connection details that often confuse beginners. Unlike generic construction manuals, it dedicates significant attention to troubleshooting common framing errors and addressing renovation challenges, making it equally valuable for new construction and repair work.
Value for Money: At $30.12 for a used copy, this represents solid value for a specialized technical manual. New framing books often exceed $40-50, and this edition retains all original illustrations and code references. The durable binding typical of Creative Homeowner publications means even a pre-owned copy should withstand jobsite use. For anyone undertaking a structural project, the potential cost savings from avoiding mistakes far outweigh the purchase price.
Strengths and Weaknesses: Strengths include exceptional visual clarity, comprehensive scope from basic walls to advanced details, and practical troubleshooting sections. The primary weakness is its used condition, which may include minor wear or outdated code references (always verify current local codes). Some readers might find the text dense for casual reading.
Bottom Line: This is an essential reference for serious DIY builders and a valuable supplement for construction students. Despite being used, its timeless principles and detailed graphics make it worth every penny for anyone planning structural work.
2. Ultimate Guide: Ceramic & Stone Tiling, Third Edition, Updated and Expanded (Creative Homeowner) Step-by-Step Guide to Tile Installations, including Glass, Mosaic, & Porcelain

Overview: This updated third edition from Creative Homeowner serves as a complete tutorial for tile installation projects of any scale. Covering ceramic, stone, glass, mosaic, and porcelain, the guide walks readers through every phase from substrate preparation to grouting and sealing. Whether you’re renovating a bathroom or installing a kitchen backsplash, this manual provides the technical foundation for professional-quality results without the contractor costs.
What Makes It Stand Out: The book’s expanded content reflects modern trends, including detailed sections on large-format porcelain and delicate glass tile applications that many older manuals gloss over. Its troubleshooting gallery helps identify and fix common problems like lippage and cracked grout before they become expensive failures. The updated edition also incorporates current waterproofing standards and membrane systems crucial for wet areas.
Value for Money: At $15.97, this guide offers exceptional value. A single botched tile job can cost hundreds in materials alone, making this preventative investment negligible. Comparable tiling courses or contractor consultations would cost 10-20 times more. The book pays for itself by teaching proper layout planning, which minimizes material waste and avoids costly pattern mistakes.
Strengths and Weaknesses: Strengths include comprehensive material coverage, modern technique updates, and excellent problem-diagnosis sections. The step-by-step photography is particularly helpful for visual learners. The main limitation is the lack of video content for dynamic processes like mixing thinset. Some advanced topics like radiant heat installation receive only brief coverage.
Bottom Line: An indispensable resource for DIY renovators and a cost-effective alternative to professional training. For under $16, it delivers the knowledge needed to tackle tiling projects with confidence and achieve lasting results.
3. The Ultimate Guide to Building an Accessory Dwelling Unit (ADU) in Your Back or Front Yard: With19 Floor Plans & Step by Step Easy Guides from Planning, Designing, Building to Financing
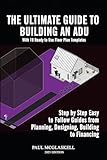
Overview: This timely guide addresses the surging interest in ADUs as solutions for multi-generational living and rental income. The book demystifies the entire process from initial zoning research through final inspection, presenting 19 ready-to-use floor plans that adapt to various lot sizes and budgets. It uniquely combines design inspiration with practical construction methodology and financial planning, addressing the three pillars of successful ADU projects simultaneously.
What Makes It Stand Out: The inclusion of financing guidance sets this apart from pure construction manuals, helping readers navigate loans, permits, and ROI calculations—critical aspects often overlooked by DIY guides. The 19 floor plans provide concrete starting points rather than abstract principles, accelerating the design phase. It also covers both back and front yard placements, addressing aesthetic and privacy considerations for different orientations.
Value for Money: Priced at $16.99, this guide offers remarkable value for a comprehensive ADU resource. Architectural consultations alone typically start at $500, and this book provides code-compliant plans and financial strategies for a fraction of that cost. The potential rental income from a well-executed ADU makes this investment insignificant compared to the long-term returns.
Strengths and Weaknesses: Major strengths include holistic coverage of planning, financing, and building; practical floor plans; and current ADU-specific code discussions. The step-by-step approach is ideal for project management. Weaknesses include limited depth on actual construction techniques (best paired with a framing or general construction guide) and regional code variations that require additional research.
Bottom Line: Perfect for homeowners exploring ADU potential. It provides the roadmap to transform underutilized yard space into valuable living quarters, making complex decisions manageable and financially sound.
4. Ultimate Guide: Barns, Sheds & Outbuildings, Updated 4th Edition: Step-by-Step Building and Design Instructions Plus Plans to Build More Than 100 Outbuildings (Creative Homeowner) Catalog of Plans

Overview: This extensive fourth edition serves as both an instructional manual and design catalog for outbuildings. With over 100 detailed plans and step-by-step building instructions, it covers structures from simple garden sheds to elaborate barns and workshops. The updated edition reflects modern materials and building practices while maintaining traditional design options. It’s essentially a pattern book and construction guide in one volume, enabling readers to select a design and execute it with confidence.
What Makes It Stand Out: The sheer volume of plans—over 100—provides unmatched variety for matching structures to specific needs and property aesthetics. Each plan includes material lists and cutting schedules, eliminating guesswork and reducing waste. The book’s dual focus on design principles and construction details means readers can either build a plan verbatim or customize it intelligently. Updated sections address modern considerations like solar panel installation and enhanced insulation.
Value for Money: At $20.52, this represents outstanding value. Purchasing individual plans online typically costs $20-50 each, making this collection worth thousands. The comprehensive construction guidance adds further value, essentially providing a contractor’s knowledge base for the price of a single tool. For property owners needing multiple structures, this single purchase covers all potential projects.
Strengths and Weaknesses: Strengths include the vast plan library, detailed material takeoffs, and clear construction sequences. The updated edition’s modern technique integration is excellent. The primary weakness is the physical book’s size—coordinating plans across pages can be cumbersome. Some plans may require engineering stamps for permit approval in certain jurisdictions.
Bottom Line: An essential investment for homesteaders, farmers, or homeowners needing outbuildings. The plan variety and construction guidance make it a one-stop resource that pays for itself with the first project.
5. How to Build Your First Barndominium: The Ultimate Step-by-Step Guide with Tips, Ideas, and Advice for First-Time Barn-Home Builders

Overview: This specialized guide targets the growing barndominium trend, addressing first-time builders specifically. The book walks readers through the unique challenges of converting post-frame structures into comfortable homes, covering everything from initial design considerations to finishing touches. It acknowledges that barndominium construction differs significantly from conventional home building, focusing on the hybrid nature of these projects where residential finishes meet agricultural framing systems.
What Makes It Stand Out: The guide’s singular focus on barndominiums provides depth that general construction manuals lack. It addresses barndominium-specific issues like moisture control in metal buildings, insulating around large clear spans, and routing utilities in non-traditional wall systems. The “first-time builder” perspective ensures complex topics are explained without assumed prior knowledge, while the tips and ideas sections inspire creative solutions for open floor plans and rustic-modern aesthetics.
Value for Money: At $13.97, this is the most affordable guide in the series yet delivers highly specialized knowledge. Barndominium mistakes can be catastrophic due to the scale and unique challenges, making this preventative guidance invaluable. Online barndominium resources are fragmented and often unreliable; this consolidated, step-by-step approach saves countless hours of research and potentially thousands in errors.
Strengths and Weaknesses: Strengths include targeted barndominium expertise, beginner-friendly explanations, and practical tips for the aesthetic and functional aspects. The step-by-step format builds confidence. Weaknesses include limited plan variety compared to other titles and minimal coverage of financing options. It should be supplemented with general construction and electrical/plumbing guides for complete coverage.
Bottom Line: A must-have for anyone considering a barndominium project. Its specialized focus and affordable price make it the perfect starting point for navigating this unique building style successfully.
6. Siding Closet Door Floor Guide,3-Roller Adjustable Double Bypass Door Guide Upgrade Kit, Black Sliding Door Guides Floor Mount for Double Bypass Door(2 Pack)

Overview: This two-pack sliding door floor guide kit provides a complete solution for stabilizing double bypass closet doors. Designed for DIY homeowners and contractors, the system prevents door sway and ensures smooth, quiet operation across various door configurations. The black aluminum guides mount directly to the floor without requiring complex slot cutting.
What Makes It Stand Out: The innovative three-roller independent adjustment system sets this apart from standard single-roller guides. Each roller fine-tunes separately to accommodate varying door thicknesses and spacing, eliminating the common frustrations of sticking, rattling, and wobbling. The tool-free adjustment and slotless installation make it exceptionally user-friendly.
Value for Money: At $24.99 for two complete guides, this kit delivers strong value compared to purchasing individual guides at $15-20 each. The durable aluminum construction and rust-resistant coating ensure longevity, making it a cost-effective alternative to replacing entire door systems or hiring professional installers.
Strengths and Weaknesses: Strengths include precise three-roller adjustability, universal compatibility with doors up to 1-9/16" thick, robust all-aluminum build quality, and straightforward installation with included hardware. Weaknesses involve requiring minimum 11/16" door spacing and 3/8" floor clearance, which may not suit all installations. The adjustment mechanism, while precise, demands careful measurement for optimal performance.
Bottom Line: An excellent hardware upgrade for anyone installing or maintaining double bypass doors. The three-roller design and solid construction justify the price, making it a smart investment for smooth, professional-grade door operation.
7. The Ultimate Killing Floor 3 Survival Guide: Hardcore Tactics, Loadouts, and Lore for Serious Survivors

Overview: This specialized guidebook targets dedicated Killing Floor 3 players seeking to master the game’s brutal cooperative horde-mode mechanics. Focused on high-level play, it promises advanced strategies, optimized weapon loadouts, and deep lore exploration for serious survivors ready to tackle the game’s toughest challenges.
What Makes It Stand Out: Unlike basic wikis or beginner guides, this book emphasizes hardcore tactics for Hell on Earth difficulty and Endless mode. It likely includes perk progression trees, zed weak point analysis, team composition strategies, and hidden game mechanics that casual players miss. The lore section adds narrative depth beyond pure mechanics.
Value for Money: At $17.99, the guide sits in the mid-range for gaming supplements. For players investing dozens of hours in Killing Floor 3, the time saved through proven tactics and loadout optimization provides solid ROI. However, free community guides offer alternatives, albeit less curated.
Strengths and Weaknesses: Strengths include expert-level strategies, comprehensive loadout analysis, and consolidated lore not found elsewhere. Weaknesses involve rapid potential obsolescence from game patches, niche appeal limited to KF3 enthusiasts, and possible overlap with free online resources. Physical format lacks the searchability of digital wikis.
Bottom Line: Recommended for committed Killing Floor 3 players wanting a curated, offline reference for advanced tactics. Casual players should stick with free online guides, but serious survivors will appreciate the depth and convenience.
8. Siding Closet Door Floor Guide,3-Roller Adjustable Double Bypass Door Guide Upgrade Kit, Black Sliding Door Guides Floor Mount for Double Bypass Door(1 Pack)

Overview: This single-pack floor guide offers the same three-roller adjustment system as its two-pack counterpart, designed for single sliding doors or as a replacement unit. It provides smooth, stable door operation through independent roller tuning, accommodating various door thicknesses without requiring floor slotting.
What Makes It Stand Out: The individual packaging makes this ideal for single-door installations or repair projects where only one guide is needed. It retains the premium three-roller precision adjustment and robust aluminum construction, ensuring you don’t sacrifice quality when purchasing separately for targeted applications.
Value for Money: Priced at $14.29 for one unit versus $24.99 for two, the single pack costs approximately 15% more per unit. While less economical for double-door setups, it prevents overbuying for single-door applications. The price remains competitive against lower-quality alternatives at big-box stores.
Strengths and Weaknesses: Strengths include identical adjustability and build quality to the two-pack, no-waste purchasing for single doors, and included installation hardware. Weaknesses mirror the two-pack: specific clearance requirements and measurement precision needed. The higher per-unit cost is the main drawback compared to the bundle.
Bottom Line: Perfect for single-door projects or replacements where buying a two-pack would be wasteful. Despite the slightly higher unit price, the three-roller precision and durable construction make it a worthwhile purchase for targeted hardware needs.
9. The Ultimate Guide to the Dragons: Guide to the Dragons Volume 1; Guide to the Dragons Volume 2; Guide to the Dragons Volume 3 (How to Train Your Dragon TV)

Overview: This three-volume collection serves as the definitive companion to the How to Train Your Dragon television series, cataloging every dragon species with detailed illustrations, behavioral analysis, and lore. It targets fans seeking comprehensive knowledge beyond what the show provides.
What Makes It Stand Out: The trilogy format allows exhaustive coverage, likely including rare dragon variants, training techniques, and expanded universe details not in single-volume guides. As an official TV series tie-in, it offers canonical information and high-quality artwork that unofficial fan guides cannot match.
Value for Money: At $89.99 for the set, this represents a premium collectible investment. Individual volumes typically retail for $30-35, making the bundle price equivalent to separate purchases. For die-hard fans, the completeness justifies the cost, but casual viewers may find better value in digital encyclopedias.
Strengths and Weaknesses: Strengths include comprehensive dragon compendium, official canon status, and high-quality presentation suitable for display. Weaknesses involve the steep price point, niche appeal limited to HTTYD TV series fans, and physical bulk. The content may overlap with free online fan wikis, and lacks interactivity of digital alternatives.
Bottom Line: Essential for How to Train Your Dragon enthusiasts and collectors who value physical media. Casual fans should consider cheaper digital options, but completists will treasure this authoritative three-volume dragon encyclopedia.
10. The Masterclass In Elite Architectural Design.: The Ultimate 100% Complete Guide to Floor Plans, Structural Secrets, and High-Society Design Psychology.

Overview: This ambitious guidebook promises comprehensive architectural education, covering floor plan development, structural engineering principles, and the psychology of high-society design. It targets aspiring architects, designers, and homeowners wanting insider knowledge of elite residential design methodologies.
What Makes It Stand Out: The book uniquely combines technical architectural training with psychological insights into luxury client preferences. It claims to reveal “structural secrets” and design psychology typically learned through years of professional practice, potentially offering shortcuts to high-end design thinking.
Value for Money: At just $7.99, this guide is remarkably inexpensive for a “masterclass” and “ultimate complete guide.” The low price suggests either a concise ebook or a budget publication, making it accessible but raising questions about depth and production quality compared to $50+ architectural textbooks.
Strengths and Weaknesses: Strengths include affordability, broad topic coverage, and accessible entry point for beginners. Weaknesses involve the suspiciously low price for comprehensive content, potential lack of depth in complex technical subjects, and absence of credentials for such ambitious claims. The title’s hyperbole may oversell actual content.
Bottom Line: A worthwhile impulse purchase for design-curious readers at $7.99, but serious students should invest in accredited textbooks. Treat it as a supplementary overview rather than a true masterclass, and manage expectations regarding technical depth.
Understanding In-Floor Heating Systems and GFCI Protection
In-floor heating systems transform your flooring into a gentle, radiant heat source through electric heating cables or hydronic tubing embedded beneath the surface. Unlike traditional forced-air systems that blast heat from vents, radiant floors deliver consistent warmth where you actually need it—at ground level. The thermostat serves as the brain of this operation, monitoring floor and air temperature while cycling power to maintain your desired comfort level.
GFCI protection adds a critical safety layer by continuously monitoring the electrical current flowing through the heating circuit. If even a tiny amount of current—typically 4-6 milliamps—leaks to ground through an unintended path (like water seepage or damaged cable insulation), the GFCI instantly cuts power within milliseconds. This rapid response prevents dangerous shock conditions that could otherwise go unnoticed until someone touches a conductive surface.
Why GFCI Protection is Critical for Heated Floors
The marriage of electricity and moisture makes GFCI protection non-negotiable for in-floor heating systems. Bathrooms, kitchens, and mudrooms—prime locations for heated floors—are inherently wet environments where building codes mandate GFCI protection for all outlets. However, many homeowners don’t realize that the heating system itself requires the same level of protection, not just the bathroom vanity outlets.
A ground fault in your heating cable can occur from installation damage, aging insulation, or even microscopic cracks that allow moisture intrusion. Without GFCI protection, this fault creates a dangerous voltage gradient across your floor surface. You might not feel a shock while wearing shoes, but barefoot contact could deliver a painful or lethal jolt. The GFCI thermostat acts as a dedicated safety sentinel, protecting that specific circuit with sensitivity far beyond what a standard circuit breaker provides.
The Science Behind Ground Faults in Heating Systems
Heating cables consist of a resistive heating element surrounded by insulation and a grounded metal sheath. Over time, thermal cycling, concrete expansion, and physical stress can create minuscule breaches in this protective layer. When water containing dissolved minerals seeps in, it creates a conductive path to ground. The GFCI detects the imbalance between hot and neutral conductors—the telltale signature of a ground fault—and responds faster than a human heartbeat.
How GFCI-Protected Thermostats Function
Modern GFCI thermostats integrate ground fault detection directly into the temperature control unit, eliminating the need for a separate GFCI breaker in many installations. These devices use a differential current transformer that continuously compares the current on the hot wire against the neutral return. Under normal conditions, these values are identical. Any discrepancy triggers a relay that opens both conductors, de-energizing the heating system completely.
Advanced models feature self-testing capabilities that automatically verify GFCI function every few hours, ensuring the protection mechanism hasn’t failed. Some units also include manual test buttons that should be pressed monthly—a requirement that building inspectors often check during final approvals. When the GFCI trips, these thermostats typically display error codes that help diagnose whether you’re dealing with a genuine ground fault, a nuisance trip, or a device malfunction.
Internal vs. External GFCI Protection
You’ll encounter two primary configurations: thermostats with built-in GFCI protection and those that require an external GFCI breaker. Internal GFCI thermostats simplify installation by combining functions into a single wall-mounted unit, reducing wall box clutter and potential wiring errors. They’re ideal for retrofits where panel space is limited.
External GFCI protection uses a dedicated GFCI breaker in your electrical panel to protect the entire circuit. While this approach costs less for the thermostat itself, it requires panel space and professional installation. Some building jurisdictions specifically require external GFCI breakers regardless of thermostat features, so always verify local codes before purchasing.
Essential Features to Evaluate When Shopping
When comparing GFCI thermostats, several features separate basic units from professional-grade controllers. Start with the display quality—backlit LCD screens with large, readable fonts make nighttime adjustments effortless. Touchscreen interfaces offer modern aesthetics but consider whether gloved hands in winter might complicate operation.
Dual-sensor capability ranks among the most valuable features, allowing the thermostat to monitor both floor temperature (via a probe embedded in the floor) and ambient air temperature. This prevents overheating in sunny rooms while maintaining consistent comfort. Look for models with adjustable floor temperature limits, crucial for protecting sensitive flooring materials like engineered wood or luxury vinyl from heat damage.
Temperature Sensing Technologies
Thermostats rely on either integrated air sensors, remote floor sensors, or both. Floor sensors consist of a thin probe installed in the conduit alongside heating cables, positioned equidistant between cable runs for accurate readings. The sensor wire runs back to the thermostat, typically allowing up to 50-60 feet of lead length. Premium thermostats support multiple sensor inputs, letting you average readings across large rooms or prioritize the coldest zone.
Thermostat Types: Line Voltage vs. Low Voltage
In-floor heating thermostats fall into two electrical categories, and choosing the wrong type creates an instant safety hazard. Line voltage thermostats directly switch the 120V or 240V power flowing to the heating cables, handling currents from 15 to 30 amps. These are the standard for electric radiant floor heating and always include GFCI protection.
Low voltage thermostats operate at 24V and control heating through a relay or power controller located elsewhere. While rare for direct electric floor heating, they appear in hydronic systems or when using a separate contactor. Never connect a low-voltage thermostat directly to heating cables—it will destroy the unit and create a fire hazard.
Installation Best Practices for Safety and Performance
Proper installation begins with correct wall box selection. GFCI thermostats require deeper boxes than standard switches—minimum 3.5 inches deep—to accommodate the device’s internal components and wiring connections. Install the thermostat on an interior wall, away from direct sunlight, drafts, and heat sources like towel warmers that could skew temperature readings.
Position the thermostat 5 feet above floor level for optimal accessibility and sensor accuracy. The floor sensor probe must never cross a heating cable; instead, run it through a separate conduit or corrugated sleeve, maintaining at least 2 inches of separation. Secure the sensor with tape or clips to prevent it from migrating during concrete pour or thinset application. Never cut or shorten the sensor wire—its specific resistance is calibrated at the factory.
Electrical Box Requirements and Spacing
National Electrical Code requires GFCI thermostats be installed in readily accessible locations—not behind doors or inside closets. Maintain 36 inches of clear space in front of the device for service access. If installing multiple thermostats in the same room, separate them by at least 48 inches to prevent thermal interference. Use fire-resistant boxes rated for the application, especially when mounting on concrete or masonry walls.
Programming Strategies for Optimal Comfort and Efficiency
Modern programmable thermostats offer sophisticated scheduling that can slash energy costs by 30% or more. Create distinct programs for weekdays and weekends, with setback temperatures dropping 5-7°F during sleeping hours and when the house is unoccupied. Unlike forced-air systems that respond quickly, radiant floors have thermal lag—start the warmup cycle 1-2 hours before you need full comfort.
Adaptive learning algorithms in premium units analyze your home’s thermal characteristics and automatically adjust start times to hit target temperatures precisely. Some thermostats integrate with occupancy sensors or geo-fencing via smartphone apps, ensuring the system only runs when needed. For bathrooms, consider a “boost” mode that rapidly raises floor temperature for 30-60 minutes during morning routines, then automatically returns to energy-saving levels.
Adaptive Learning and Geo-Fencing Features
Smart thermostats with geo-fencing use your phone’s location to detect when you’re heading home, triggering preheating cycles that ensure warm floors upon arrival without wasting energy all day. Adaptive learning goes further, tracking weather forecasts and your home’s thermal mass to optimize heating cycles. These features pay for themselves within two heating seasons in most climates.
Energy Efficiency: Maximizing Your ROI
In-floor heating already operates more efficiently than forced-air systems by eliminating duct losses and delivering heat where occupants actually feel it. The thermostat maximizes these inherent efficiencies through precise control algorithms. Look for units with PWM (Pulse Width Modulation) output that modulates power rather than simply cycling on/off, reducing temperature swings and improving comfort.
Energy monitoring features provide real-time consumption data, helping you identify inefficient usage patterns. Some thermostats generate monthly reports comparing your usage to similar homes, gamifying energy savings. Setpoint limiting prevents family members from cranking temperatures to excessive levels—each degree above 70°F increases energy consumption by approximately 3%. Optimal floor surface temperature typically ranges from 80-84°F for comfort without waste.
Troubleshooting Common GFCI Tripping Issues
The most frequent complaint with GFCI thermostats is nuisance tripping—when the GFCI activates without a true ground fault. Start by checking for actual moisture intrusion, especially near bathroom fixtures or entryways. If the floor is dry, the heating cable itself may have sustained damage during installation or from subsequent flooring work. A megohmmeter test can verify cable insulation integrity.
Loose connections at the thermostat or floor sensor can also cause tripping. Ensure all wire nuts are tight and no copper strands are frayed. Some older GFCI thermostats are overly sensitive to electrical noise from nearby motors or fluorescent lighting; upgrading to a newer model with better noise filtering often resolves chronic issues. If tripping occurs only during startup, the heating cable’s inrush current may be triggering the GFCI—consider a soft-start thermostat designed for large heating loads.
Maintenance Guidelines for Long-Term Reliability
Unlike mechanical thermostats, electronic GFCI units require minimal maintenance but benefit from periodic attention. Test the GFCI function monthly by pressing the test button—the heating system should immediately shut off, and the display should indicate a trip condition. Press reset to restore operation. If the test button doesn’t trip the unit, replace the thermostat immediately as the safety protection has failed.
Annually, remove the thermostat from its wall box and inspect wire connections for signs of overheating or corrosion. Tighten any loose terminal screws and verify that wire insulation isn’t damaged. Clean the display with a dry microfiber cloth—never use liquid cleaners that could seep into the housing. For systems in seasonal homes, power down the thermostat during summer months to extend component life, but run a full test cycle before heating season begins.
Smart Home Integration and Remote Access
Wi-Fi enabled GFCI thermostats revolutionize how you interact with your heating system. These devices connect to your home network, allowing control via smartphone apps from anywhere with internet access. Voice control through Amazon Alexa, Google Home, or Apple HomeKit lets you adjust temperatures hands-free while cooking or getting ready for bed.
Integration with broader smart home platforms enables sophisticated automation scenarios. Link your thermostat to window sensors that automatically disable heating when windows open, or connect to weather services that preemptively warm floors before cold fronts arrive. API access allows tech-savvy users to create custom integrations, though this requires careful attention to security to prevent unauthorized access to your heating system.
Floor Type Compatibility Considerations
Different flooring materials conduct heat differently and have varying temperature tolerances, making thermostat compatibility crucial. Tile and stone, excellent heat conductors, respond quickly and can handle surface temperatures up to 84°F without issue. Engineered wood floors require stricter temperature limiting—typically 80°F maximum—to prevent delamination or warping.
Luxury vinyl plank (LVP) and laminate flooring demand the most conservative settings, with maximum surface temperatures around 77-79°F. The thermostat must offer programmable floor temperature limits for each zone. For carpeted areas, the combined thermal resistance of carpet and pad reduces system efficiency and requires higher heating cable wattage, but the thermostat itself operates identically. Always verify that your thermostat’s floor sensor is compatible with the specific flooring manufacturer’s warranty requirements.
Tile, Stone, and Concrete Applications
These high-mass flooring types excel with in-floor heating but require thermostats with aggressive anticipation algorithms. The thermostat should offer a “slab” or “high-mass” setting that extends heating cycles and reduces temperature overshoot. For polished concrete floors, consider a thermostat with a slower PID control loop to prevent surface temperature fluctuations that could affect the concrete’s appearance.
Wood and Laminate Flooring
Wood floor applications demand thermostats with dual-sensor capability and strict temperature limiting. The floor sensor prevents overheating, while the air sensor maintains room comfort. Look for models with wood-specific programming that gradually ramps temperatures up and down, reducing stress on the flooring material. Some premium thermostats include humidity sensor inputs that adjust heating to maintain optimal wood moisture content.
Carpet and Rug Limitations
While possible, carpeted heated floors present challenges. The thermostat must compensate for higher thermal resistance, often requiring longer heating cycles. Choose a model with adjustable cycle rates—some thermostats allow cycle times from 15 minutes to 2 hours. Avoid thermostats with aggressive PWM control on carpeted floors, as the rapid cycling can create hot spots where the heating cable runs closest to the surface.
Electrical Code Requirements and Compliance
The National Electrical Code (NEC) mandates GFCI protection for all electric heating equipment located in bathrooms, kitchens, and other damp locations. Article 424 specifically covers fixed electric space-heating equipment, requiring either a GFCI breaker or a listed GFCI thermostat. Local amendments may be stricter—some jurisdictions require both forms of protection for redundancy.
The heating circuit must be dedicated, with no other loads sharing the breaker. Wire gauge must match the thermostat’s rating and circuit length; voltage drop should not exceed 3% to prevent nuisance tripping and ensure even heating. The equipment ground conductor must be continuous and properly bonded, as the GFCI’s effectiveness depends on a low-impedance path to ground. Keep installation manuals and specification sheets on file—inspectors will want to verify the thermostat is listed for the application.
Understanding Safety Certifications
Only purchase thermostats bearing UL (Underwriters Laboratories) or ETL (Intertek) listing marks specifically for “Fixed Electric Space-Heating Equipment.” Generic thermostats lacking this specific listing violate code and compromise insurance coverage. The listing mark should be on both the product and packaging—counterfeit devices often omit this critical detail.
For Canadian installations, CSA certification is mandatory. European installations require CE marking, but this doesn’t automatically meet North American safety standards. Look for additional certifications like FCC compliance for Wi-Fi models, ensuring electromagnetic emissions won’t interfere with other household electronics. Some manufacturers submit products for marine-grade testing, indicating exceptional moisture resistance for the most demanding wet environments.
Budgeting for Your Thermostat Investment
GFCI thermostats range from $75 for basic non-programmable units to $300+ for smart models with advanced features. While tempting to save money upfront, consider the total cost of ownership. A $150 programmable thermostat can save $200+ annually in energy costs compared to a manual model, paying for itself in the first year.
Factor installation costs—electricians charge $75-150 per hour, and a complex smart thermostat installation might take 2-3 hours including programming and Wi-Fi setup. If your electrical panel lacks space for a GFCI breaker, panel upgrades can add $500-800 to the project. Budget for a spare floor sensor ($20-40) during initial installation; replacing a failed sensor after the floor is finished requires destructive access.
Warranty Coverage and Manufacturer Support
Quality GFCI thermostats typically carry 3-year warranties, with premium models offering 5-year coverage. Read warranty terms carefully—many exclude damage from power surges, lightning strikes, or improper installation. Some manufacturers extend warranty periods if you register the product online within 30 days of installation.
Evaluate manufacturer support before purchasing. Can you reach technical support by phone during business hours? Do they offer online chat or email support? The best manufacturers provide detailed installation videos, troubleshooting guides, and firmware update portals for smart models. Check online forums and contractor reviews for real-world feedback on warranty claim responsiveness—some companies replace failed units with minimal questions, while others demand extensive documentation and professional verification.
Future-Proofing Your System
Technology evolves rapidly, and a thermostat installed today should remain relevant for 10-15 years. Choose models with over-the-air firmware update capability, ensuring compatibility with future smart home standards. Wi-Fi 6 support future-proofs wireless connectivity as mesh networks become standard. Look for thermostats with expandable I/O—some units accept add-on modules for humidity sensing, outdoor temperature compensation, or integration with home automation hubs.
Consider the ecosystem: thermostats from companies with broad product lines often integrate better with other home systems. Open API access provides flexibility for custom integrations as your smart home grows. Some forward-thinking manufacturers design thermostats with modular construction, allowing field replacement of the control board while retaining the GFCI protection module—a cost-effective approach when technology advances but the safety components remain valid.
Frequently Asked Questions
1. Why does my GFCI thermostat keep tripping even when the floor is dry?
Nuisance tripping often stems from electrical noise, loose connections, or an overly sensitive older model. First, tighten all wire connections and ensure the heating cable’s insulation resistance tests above 1 megohm. If problems persist, upgrade to a newer thermostat with improved noise filtering and adjustable GFCI sensitivity settings.
2. Can I install a GFCI thermostat myself, or do I need an electrician?
While handy homeowners can install line-voltage thermostats, most jurisdictions require a licensed electrician for final connections due to the high voltage and safety-critical nature of GFCI protection. You can save money by running the sensor wire and mounting the wall box, but have a professional make the line-voltage connections and test the GFCI function.
3. How often should I test the GFCI function on my thermostat?
Test the GFCI manually every month by pressing the test button and verifying the heating system shuts off. The thermostat should display a trip indication. Press reset to restore operation. Many modern thermostats perform automatic self-tests every few hours, but manual testing remains a code requirement and ensures your safety protection is active.
4. What’s the difference between a Class A and Class B GFCI thermostat?
Class A GFCIs trip at 4-6 milliamps of ground fault current and are required for personal protection in wet areas. Class B devices trip at 20 milliamps and are only suitable for equipment protection, not for floor heating systems where people walk barefoot. Always verify your thermostat is Class A rated for bathroom and kitchen installations.
5. Can I use any floor sensor with my GFCI thermostat?
No—floor sensors are calibrated to specific resistance values and temperature curves. Using an incompatible sensor results in inaccurate temperature readings, causing overheating or inadequate heating. Always use the sensor specified by the thermostat manufacturer, and keep the part number handy for future replacements.
6. Will a smart GFCI thermostat work if my Wi-Fi goes down?
Yes, smart thermostats operate as standalone temperature controllers without Wi-Fi, maintaining your programmed schedule. You’ll lose remote access and smart home integration until connectivity restores. Premium models store schedules locally and include manual override buttons on the unit itself, ensuring heating continues uninterrupted during network outages.
7. How do I know if my heating cable is compatible with a new thermostat?
Check the cable’s voltage (120V or 240V) and wattage rating against the thermostat’s specifications. The thermostat’s amperage rating must exceed the total load of all heating cables connected to it. For existing installations, measure the cable’s resistance with a multimeter and calculate wattage using the formula: (Voltage²) ÷ Resistance. When in doubt, consult the heating cable manufacturer for compatibility verification.
8. What causes a GFCI thermostat to fail the self-test?
Self-test failures typically indicate the GFCI detection circuitry has degraded or failed. This can result from power surges, moisture intrusion into the thermostat housing, or component aging. Most thermostats will display an error code and disable heating when self-test fails. Replace the thermostat immediately—continued operation without functional GFCI protection violates electrical codes and endangers occupants.
9. Can I control multiple heating zones with one GFCI thermostat?
Only if the total load doesn’t exceed the thermostat’s amperage rating and all zones share the same schedule. For independent zone control, each zone needs its own thermostat. Some smart thermostats support “zone grouping” in software, allowing you to control multiple thermostats from one interface while maintaining separate GFCI protection for each zone—a safer and more flexible approach.
10. How long should a GFCI thermostat last before needing replacement?
Quality GFCI thermostats typically last 10-15 years in residential applications. However, the GFCI protection circuitry may degrade after 5-7 years due to the sensitive electronic components. If you experience frequent unexplained trips or the unit fails self-tests, replace it regardless of age. Newer models offer significantly better energy savings and smart features that justify earlier upgrades, making replacement a worthwhile investment in both safety and efficiency.