There’s something almost sacred about a well-seasoned cast iron skillet—that smooth, black patina that promises perfect sear marks and a lifetime of reliable cooking. Yet for every cast iron enthusiast who swears by their heirloom pan, there’s a nervous home cook terrified of ruining it with a single drop of dish soap. The truth? Cast iron care isn’t about following arcane rules; it’s about understanding the science of seasoning and making smart, informed decisions about when and how to clean. Modern dishwashing wisdom for cast iron has evolved far beyond “just wipe it out,” and mastering these techniques will transform your relationship with this incredible cookware.
Top 10 Smart Dishwashers for Cast Iron Care
Detailed Product Reviews
1. CARON & DOUCET - Cast Iron Cleaning Soap | 100% Plant-Based Soap | Best for Cleaning, Restoring, Removing Rust and Care Before Seasoning | For Skillets, Pans & Cast Iron Cookware… (8 oz)

Overview: This specialized cast iron cleaning soap from Caron & Doucet offers a natural solution for maintaining your cast iron cookware. The 8-ounce bottle contains a 100% plant-based formula designed to clean without stripping the precious seasoning that makes cast iron non-stick. Unlike harsh detergents, this soap uses traditional soap-making methods and is free from sulfates, phosphates, parabens, and petrochemicals.
What Makes It Stand Out: The soap’s unique formulation includes coconut oil and is enhanced with lemongrass and rosemary essential oils that naturally eliminate odors without transferring scents to your food. It’s gentle enough to use on your hands yet effective at removing rust and built-up residue. The product is backed by a family guarantee, reflecting confidence in its quality. The essential oil blend addresses the common concern of lingering food odors in cast iron’s porous surface.
Value for Money: At $13.59 for 8 ounces ($1.70 per fluid ounce), this sits in the premium range for cleaning products. However, compared to re-seasoning damaged cookware or using ineffective DIY methods, it’s a worthwhile investment. A little goes a long way, and the concentrated formula means one bottle lasts months with regular use. It costs less than replacing a ruined cast iron pan.
Strengths and Weaknesses: Strengths include its all-natural composition, odor-eliminating properties, gentle cleaning action that preserves seasoning, and satisfaction guarantee. The essential oil scent is refreshing and won’t affect food flavors. Weaknesses are its higher price point compared to regular dish soap, limited availability in some markets, and the fact that some cast iron purists still avoid any soap entirely. The 8-ounce size may feel small for heavy users.
Bottom Line: This is an excellent choice for cast iron enthusiasts who want to maintain their cookware naturally without compromising the seasoning. While pricier than conventional cleaners, its plant-based formula and proven effectiveness justify the cost. Perfect for those transitioning from “no soap” to “smart soap” cast iron care.
2. XANGNIER Cast Iron Scrubber Cleaning Kit,5 Pcs Cast Iron Skillet Cleaner Care Kit Tools Accessories for Griddle,Pan,Dutch Oven,Wok,Stainless Steel Pot,Kitchen Cleaning Gadget

Overview: The XANGNIER 5-piece cleaning kit provides a comprehensive solution for cast iron maintenance without the scratching risks of chain mail or steel wool. This versatile set includes specialized tools designed to clean every nook and cranny of your cookware while protecting the seasoned surface you’ve worked hard to build.
What Makes It Stand Out: Unlike abrasive scrubbers that can damage cast iron, this kit uses gentle materials that won’t scratch. The clever design includes a silver cloth for surface cleaning, a crevice brush for hard-to-reach corners, and a double-sided cloth that cleans, dries, and applies oil. Everything rinses clean easily without trapping food particles—a common frustration with chain mail scrubbers. The tools work on various cookware types beyond just cast iron.
Value for Money: At $8.99 for five pieces ($1.80 per item), this kit delivers exceptional value. Comparable chain mail scrubbers alone cost $15-20, and they don’t include specialized brushes or maintenance cloths. The reusable design eliminates the need for disposable products, saving money long-term. For budget-conscious cooks, this provides professional-level tools at an entry-level price.
Strengths and Weaknesses: Strengths include the scratch-free design, easy-to-clean materials, comprehensive tool variety, and versatility across cookware types. The kit addresses every cleaning stage from scrubbing to oiling. Weaknesses include unknown brand longevity, potential durability questions with heavy use, and lack of cleaning solution included. Some users might prefer the heft of traditional chain mail for stubborn buildup.
Bottom Line: This affordable kit is perfect for cast iron owners seeking a gentler alternative to abrasive scrubbers. The five specialized tools cover all cleaning scenarios while protecting your cookware investment. Despite the unfamiliar brand name, the thoughtful design and low price make it a smart purchase for both beginners and experienced cast iron users.
3. BLACK+DECKER 24" Built-In Dishwasher, 12-Place Setting Capacity with Stainless Steel Tub, Dish Washer with 5 Wash Programs and Smart Wash Cycle, ENERGY STAR Certified, BDW100MS, Stainless Steel

Overview: BLACK+DECKER’s 24-inch built-in dishwasher offers modern convenience with a spacious 12-place setting capacity and stainless steel tub. The unit features five wash programs including Heavy, Normal, Delicate, Quick, and Rinse, plus an intelligent Smart Wash cycle that automatically adjusts settings based on soil levels. ENERGY STAR certification ensures efficient operation.
What Makes It Stand Out: The adjustable top rack moves up to 2 inches to accommodate tall items, while fold-down tines in the lower rack handle oversized cookware like roasting pans. The Smart Wash system uses soil sensors to optimize water and energy usage, delivering superior cleaning performance. Three-layer filtration and efficient spray arms work together to tackle stubborn messes without wasting resources.
Value for Money: Priced at $681.99, this dishwasher sits in the mid-range category, offering premium features without the luxury price tag. Comparable models from Bosch or KitchenAid with similar capacity and stainless interiors start at $800+. The ENERGY STAR rating promises utility bill savings over time, while the durable stainless tub outlasts plastic alternatives, making this a wise long-term investment.
Strengths and Weaknesses: Strengths include generous capacity, flexible loading options, smart sensing technology, energy efficiency, and the reputable BLACK+DECKER brand. The stainless steel tub resists stains and odors better than plastic. Weaknesses include installation costs not included, limited color options, and fewer wash cycles than some competitors. The 24-inch size may not fit smaller kitchens.
Bottom Line: This dishwasher strikes an excellent balance between performance, capacity, and price. Ideal for families needing to handle large loads efficiently, the Smart Wash feature and adjustable interior make it adaptable to various needs. While installation requires planning, the ENERGY STAR certification and durable construction make it a solid value for the price.
4. Culina Cast Iron Cleaning & Restoring Scrub & Brush & stainless scrubber,Removes Rust Without Scratching & Care Before Cleaning, Washing & Seasoning,for Cast Iron Skillets, Pans & Cookware
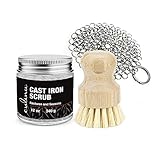
Overview: Culina’s Cast Iron Cleaning & Restoring Scrub offers a premium, all-natural solution for maintaining and restoring cast iron cookware. This specialized scrub uses a coconut oil base to clean while simultaneously conditioning the pan’s surface. Designed to remove rust and stuck-on food without scratching, it serves as both a cleaner and a seasoning aid.
What Makes It Stand Out: The solvent-less, refined coconut oil formula is 100% natural and food-safe, with long-chain fatty acids removed to prevent rancidity. Unlike harsh chemical cleaners, this scrub actually enhances your pan’s seasoning during use. The product is Kosher-certified and manufactured entirely in the USA, ensuring quality control. Essential oils help eliminate odors while the coconut oil base provides gentle yet effective cleaning power.
Value for Money: At $19.99, this is a premium-priced single product compared to multi-piece kits. However, its dual-action cleaning and seasoning properties justify the cost for serious cast iron enthusiasts. The concentrated formula lasts through many applications, and the quality American manufacturing ensures consistency. When compared to purchasing separate cleaners and conditioners, the combined functionality offers reasonable value.
Strengths and Weaknesses: Strengths include the food-safe natural formulation, non-scratch guarantee, dual cleaning and seasoning action, USA manufacturing, and satisfaction guarantee. The coconut oil base is superior to petroleum-based alternatives. Weaknesses are the higher price point, single-product versus kit limitation, and that it requires more elbow grease than power tools for heavy restoration jobs. The 100% satisfaction guarantee mitigates purchase risk.
Bottom Line: Culina’s scrub is ideal for cast iron purists who prioritize natural, food-safe ingredients and American manufacturing. While more expensive than basic options, its ability to clean and season simultaneously makes it a valuable tool for maintaining heirloom-quality cookware. Perfect for regular maintenance and light restoration work.
5. Sleetide Tamagoyaki Pan Japanese Omelette Pan Japanese Egg Pan with Spatula & Brush, Dishwasher Safe, Induction-Ready, Cast Iron, Naturally Nonstick with Seasoning (S - Standard)

Overview: The Sleetide Tamagoyaki Pan brings authentic Japanese omelette-making to home kitchens. This rectangular cast iron pan features a 45° angled edge specifically designed for easy flipping and rolling of layered eggs. The die-cast iron construction comes pre-seasoned with natural nonstick properties and includes a matching spatula and brush for complete cooking convenience.
What Makes It Stand Out: The specialized geometry with its angled side wall is engineered for the precise technique required in tamagoyaki preparation. Unlike round skillets, this rectangular shape creates perfect rolled omelette layers. The pan’s induction-ready base works on all cooktops, while its cast iron construction delivers superior heat retention for even cooking. Being dishwasher safe is rare for cast iron and adds modern convenience.
Value for Money: At $43.99, this specialty pan offers excellent value compared to imported Japanese versions costing $60-100. The inclusion of a spatula and brush adds $10-15 in value. While more expensive than a basic skillet, its specialized design and authentic results justify the premium for enthusiasts of Japanese cuisine. The pre-seasoned surface saves time and effort.
Strengths and Weaknesses: Strengths include the purpose-built design for tamagoyaki, versatility for other small foods, induction compatibility, included accessories, and dishwasher-safe convenience. The pre-seasoned surface is ready to use. Weaknesses include the niche application limiting everyday use, cast iron maintenance requirements, and the smaller cooking surface (standard size) may be insufficient for larger families. Some purists may question dishwasher safety claims.
Bottom Line: This pan is a must-have for fans of Japanese cooking who want authentic tamagoyaki results at home. The thoughtful design, quality construction, and useful accessories make it worth the modest investment. While specialized, its versatility for other small items and modern convenience features make it practical for adventurous home cooks beyond just omelette enthusiasts.
6. Sleetide Tamagoyaki Pan Japanese Omelette Pan Japanese Egg Pan with Spatula & Brush, Dishwasher Safe, Induction-Ready, Cast Iron, Naturally Nonstick with Seasoning (S - With lid)

Overview: The Sleetide Tamagoyaki Pan in size Small with lid delivers an authentic Japanese omelette experience in a compact, complete package. This pre-seasoned cast iron pan features the traditional rectangular shape with a 45° angled edge that makes rolling tamagoyaki intuitive even for beginners. At $57.99, it includes a matching lid, spatula, and brush—everything needed to start creating those signature layered egg rolls at home while occupying minimal storage space, making it ideal for singles or couples.
What Makes It Stand Out: This pan’s compact dimensions and included lid differentiate it meaningfully from standard models. The lid transforms it from a single-purpose egg pan into a versatile mini-cooker capable of steaming vegetables or keeping your rolled omelette warm while preparing additional dishes. The pre-seasoned cast iron provides natural nonstick properties that improve with proper use, while maintaining the excellent heat retention essential for achieving delicate, even layers. The 45° angled edge genuinely simplifies the rolling technique that newcomers often find challenging with conventional pans.
Value for Money: At $57.99, this small-sized version costs slightly more than its larger counterpart but justifies the premium with the added lid and specialized size. For singles, couples, or those prioritizing storage efficiency, the complete kit eliminates separate accessory purchases. Compared to traditional unseasoned cast iron requiring extensive maintenance, this ready-to-use option saves considerable time and effort. The induction-ready design ensures compatibility with modern kitchens, protecting your investment across different cooking setups for years.
Strengths and Weaknesses: Strengths include excellent heat distribution, versatile lid inclusion, pre-seasoned convenience, multi-cooktop compatibility, and the precise angled design. The compact size suits smaller portions perfectly. Weaknesses: the limited cooking surface restricts batch cooking for families, cast iron requires specific care (hand washing recommended despite dishwasher-safe claims), and the $5 premium over the larger size may not suit everyone. The weight might also challenge those with limited wrist strength.
Bottom Line: Ideal for individuals or couples seeking an authentic, space-efficient tamagoyaki solution. The included lid adds meaningful versatility that justifies the small price premium. If you’re cooking for one or two and value compact storage, this is your best choice.
7. Sleetide Tamagoyaki Pan Japanese Omelette Pan Japanese Egg Pan with Spatula & Brush, Dishwasher Safe, Induction-Ready, Cast Iron, Naturally Nonstick with Seasoning (L - Standard)
Overview: The Sleetide Tamagoyaki Pan in Large Standard size delivers the same authentic Japanese omelette experience as its smaller sibling but with expanded cooking capacity for families and serious enthusiasts. This $52.99 rectangular cast iron pan comes pre-seasoned with natural nonstick properties and features the signature 45° angled edge for effortless rolling. Designed for versatility across all cooktops, it’s the practical choice for larger portions without sacrificing traditional technique or requiring multiple cooking cycles.
What Makes It Stand Out: The larger cooking surface provides approximately 30% more area than the small version, making it significantly more efficient for batch cooking or creating thicker, restaurant-style tamagoyaki rolls. The same excellent cast iron construction and pre-seasoning ensure professional results, while the angled edge maintains the user-friendly flipping action that defines this product line. Despite the larger size, it remains induction-ready and compatible with all stovetops, offering identical technical versatility in a more substantial, family-friendly package.
Value for Money: At $52.99, this standard size represents better pure value than the smaller model, offering more cooking real estate for less money. The $5 savings compared to the small version with lid makes sense if you don’t need steaming capabilities. For families or meal-preppers, the increased capacity means fewer cooking cycles and significant time saved. The included spatula and brush provide necessary accessories without additional cost, and the durable cast iron construction promises decades of service with proper maintenance and seasoning.
Strengths and Weaknesses: Strengths include larger cooking surface, superior batch cooking efficiency, robust cast iron heat retention, multi-cooktop compatibility, and the beginner-friendly angled design. The lower price point than the small version adds immediate value. Weaknesses: it lacks the versatile lid, requires more storage space, cast iron maintenance demands may deter casual users, and the rectangular shape still limits general-purpose cooking compared to a traditional skillet. It’s also heavier than the small size, which may affect handling.
Bottom Line: The optimal choice for families, meal preppers, or serious tamagoyaki enthusiasts wanting maximum efficiency. Skip this only if you specifically need the lid’s versatility or have severe storage constraints.
Why Cast Iron Demands a Smarter Approach to Cleaning
Cast iron isn’t just another pan—it’s a living piece of kitchen equipment that changes with every use. Unlike stainless steel or non-stick cookware, cast iron develops its own protective coating through a process called polymerization, where oil transforms into a durable, plastic-like layer bonded to the metal surface. This seasoning is what makes cast iron non-stick, rust-resistant, and flavor-enhancing. But it’s also vulnerable to damage from improper cleaning methods. Smart dishwashing means protecting this investment while maintaining impeccable food safety standards. The goal isn’t to avoid cleaning; it’s to clean strategically.
The Anatomy of Cast Iron Seasoning
What Seasoning Really Is (And Isn’t)
Seasoning isn’t just “oil on a pan”—it’s a molecular transformation. When you heat oil past its smoke point on cast iron, the fatty acids undergo polymerization, cross-linking to form a hard, hydrophobic surface. This layer is chemically bonded to the iron through a process called carbonization. True seasoning is multiple micro-thin layers built up over time, not a thick, goopy coating. Understanding this helps you realize why aggressive scrubbing or harsh detergents can break down these delicate polymer bonds, while gentle cleaning preserves them.
How Cleaning Impacts Polymerization
Every cleaning session either contributes to or degrades your seasoning. Hot water alone won’t strip polymerized oil—it’s chemically resistant to simple H2O. However, mechanical action (scrubbing), chemical action (strong alkalis in dishwasher detergent), or thermal shock (extreme temperature changes) can fracture the seasoning matrix. Smart dishwashing minimizes these stresses while removing food particles that could harbor bacteria or become rancid.
Myth-Busting: What You’ve Been Told Wrong
The “Never Use Soap” Fallacy
This advice dates to when soap contained harsh lye that would absolutely strip seasoning. Modern dish soaps are mild, pH-neutral surfactants designed to cut grease, not dissolve polymerized oil. The myth persists because people confuse “dish soap” with “oven cleaner” or “lye-based soaps” used historically. While you don’t need soap for every cleaning, using it occasionally won’t destroy a well-seasoned pan. The real risk isn’t the soap—it’s the soaking and scrubbing that often accompanies it.
The “Water is the Enemy” Misconception
Water doesn’t cause rust—prolonged exposure to water does. Iron oxidizes when it remains in contact with moisture and oxygen over time. A quick wash, rinse, and immediate thorough drying poses zero risk to your cast iron. In fact, hot water is your most effective tool for safe cleaning. The key is time: a 3-minute cleaning session won’t rust your pan; a 3-hour soak absolutely will.
The “Salt-Only” Cleaning Limitation
Kosher salt as an abrasive works beautifully for minor messes, but it’s not a sterilizing agent or a degreaser. It won’t remove rancid oil buildup or sanitize after cooking raw meat. Salt scrubs are one tool in your arsenal, not the entire toolbox. Relying solely on salt is like washing your hands with just sand—mechanically effective but incomplete from a food safety perspective.
The Smart Pre-Clean Assessment
The Visual Inspection Check
Before you even reach for water, look at your pan. Is there visible food debris? A greasy film? Discoloration? A perfectly cooked omelet might leave nothing but a sheen of oil, requiring just a wipe. Seared steak leaves fond that needs deglazing. Starchy foods like potatoes leave residue that demands water. Train your eye to assess the level of soil: dry wipe, damp wipe, hot water rinse, or full scrub.
The Tactile Test: What Your Fingers Tell You
Run your (clean) finger across the cooled pan’s surface. Does it feel smooth and slick? A paper towel wipe is sufficient. Slightly tacky? You need hot water. Sticky or rough? That’s either sugar residue or degraded seasoning that needs attention. Your sense of touch reveals what your eyes might miss—the difference between polymerized oil and gummy, rancid buildup.
Building Your Cast Iron Cleaning Kit
Must-Have Tools for Safe Cleaning
Your cast iron care kit should include: a pan scraper (polycarbonate, not metal), a stiff-bristled brush (natural or nylon), chain mail scrubber for tough jobs, lint-free cotton towels, high-smoke-point oil for seasoning, and a dedicated drying rack. Each tool serves a specific purpose without compromising your pan’s surface. The scraper lifts food without scratching, the brush cleans without abrasion, and chain mail provides controlled mechanical cleaning for stubborn spots.
Materials to Banish from Your Kitchen
Never use steel wool (unless restoring rust), metal spatulas with sharp edges for cleaning, abrasive powders like Bar Keepers Friend, or dishwasher detergent pods. These create micro-scratches that provide footholds for rust and degrade seasoning. Also avoid soaking in vinegar—while it removes rust, prolonged exposure etches the iron surface, making future seasoning harder to adhere.
The Standard Hot Water Method
Step-by-Step: The 5-Minute Clean
- While the pan is still warm (not screaming hot), run hot tap water into it. The heat helps release food particles.
- Use a stiff brush to scrub in circular motions, focusing on stuck spots. No soap needed for most jobs.
- If residue remains, add a tablespoon of water and heat the pan on the stove until it simmers, then scrub again.
- Rinse with hot water. Inspect—if it looks clean and feels smooth, you’re done.
- Immediately dry with a towel, then heat on the stove for 2-3 minutes to evaporate every last water molecule.
Temperature Dynamics: Why Temperature Matters
Thermal shock occurs when you plunge a 400°F pan into cold water, causing rapid contraction that can crack seasoning or even the iron itself. Always match temperatures: hot pan gets hot water, warm pan gets warm water. This prevents seasoning from shearing off and protects the pan’s structural integrity. The gradual cooling also allows any loosened food particles to release naturally without aggressive scrubbing.
Dealing with Stubborn, Baked-On Residue
The Boiling Water Degradation Technique
For truly stuck-on food, fill the pan with water to cover the residue and bring it to a rolling boil for 3-5 minutes. The sustained heat hydrolizes starches and denatures proteins, essentially “unsticking” them at a molecular level. After boiling, dump the water (carefully!) and scrub while hot. This method uses heat and water alone—no chemicals, no abrasion—to do the heavy lifting.
Chain Mail Scrubbers: A Controlled Abrasive
Chain mail isn’t just medieval armor—it’s the perfect cast iron cleaner. The interlocking rings provide mechanical scrubbing power without the uncontrolled scratching of steel wool. Use it with hot water, applying firm but not aggressive pressure in circular motions. It removes stuck food while actually smoothing and polishing the seasoning surface. Think of it as exfoliation for your pan: removing the bad while improving the good.
Salt Scrub Method for Tough Spots
When you need abrasion but not water, coarse kosher salt is your answer. Pour 2-3 tablespoons into the warm, dry pan and use a folded paper towel or cloth to scrub in circular motions. The salt crystals act as a gentle abrasive, absorbing oil and lifting residue. Once the salt turns gray and grimy, dump it out and wipe clean. This is ideal for lightly soiled pans or removing surface stickiness without a full water cleaning.
Understanding Soap’s Role in Modern Cast Iron Care
When and How to Use Soap Safely
Use soap when you’ve cooked something that leaves an odor (fish), grease that feels rancid, or when sanitizing is critical (after cooking poultry). Choose a mild, fragrance-free dish soap. Apply a drop directly to your brush or sponge, create lather, and wash quickly—no soaking. The contact time is so brief that the soap can’t penetrate the polymerized seasoning. Rinse thoroughly with hot water and dry immediately. Your seasoning remains intact because it’s chemically bonded, not just layered on.
Detergent Types: What to Avoid
Never use dishwasher detergent (highly alkaline), oven cleaners (lye-based), or antibacterial soaps with triclosan. These aggressive chemicals can break down seasoning over time. Avoid anything labeled “degreaser” or “heavy duty.” Stick to simple, pH-neutral dish soaps designed for hand-washing. The simpler the formula, the safer for your cast iron.
The Critical Drying Phase
Stovetop Drying: The Gold Standard
After towel-drying, place your pan on a burner over medium heat for 3-5 minutes. This drives off residual moisture you can’t see or feel. You’ll often see a faint wisp of steam—that’s water evaporating from the pan’s porous surface. Let it heat until the entire surface looks dry and slightly matte. Never skip this step; it’s your primary rust prevention strategy.
Oven Drying: The Foolproof Method
If you’re distracted or batch-cleaning multiple pans, oven drying is safer. After rinsing, place pans in a cold oven, set it to 200°F, and leave for 20-30 minutes. The gentle, ambient heat ensures complete evaporation without requiring your attention. This is especially smart in humid climates where air-drying invites oxidation. Just remember to use oven mitts when removing them!
Post-Cleaning Seasoning Maintenance
The Light Oil Wipe: Daily Protection
After each cleaning and drying, while the pan is still warm, apply a micro-thin layer of oil. Pour a teaspoon of high-smoke-point oil (grapeseed, canola, or refined avocado) into the pan and use a paper towel to wipe it over every surface—interior, exterior, handle. Then—and this is crucial—take a clean paper towel and wipe it all off. The goal is a molecular-thin layer, not a visible coating. This “micro-seasoning” repairs microscopic gaps in your seasoning.
Recognizing Seasoning Failure Signals
If your pan looks patchy, feels sticky after oiling, or shows rust spots, your seasoning needs attention. Sticky means you applied too much oil last time. Patchy means uneven heating during seasoning. Rust means incomplete drying. Smart care means correcting these issues immediately with targeted spot-seasoning rather than waiting for a complete failure.
Rust Management: Prevention and Cure
Early Detection and Spot Treatment
Catch rust when it’s just a faint orange blush, not a scaly disaster. For minor surface rust, scrub the spot with a brush and hot water, dry thoroughly, then apply oil and heat the pan until it smokes lightly. The heat converts the iron oxide and integrates it back into the seasoning layer. Early intervention prevents the need for aggressive restoration.
The Full Rust Removal Protocol
For serious rust, you’ll need to strip and restart. Scrub with fine steel wool until you see bare iron, wash with soap and water, dry completely, then apply multiple thin seasoning layers in the oven. While this seems extreme, it’s the only way to ensure the rust is completely gone and won’t continue to eat your pan from beneath the seasoning.
Intelligent Storage Solutions
Climate Considerations for Different Regions
In humid climates, store cast iron in the oven (when not in use) or with a silica gel packet in the cabinet. In dry climates, simply ensure it’s bone-dry before storing. Never put the lid on a Dutch oven for long-term storage—trapped moisture creates a rust incubator. If you must stack pans, place a paper towel between them to absorb ambient moisture and prevent scratching.
Protective Layering and Stacking
For stacked storage, apply that micro-thin oil layer, then place a breathable barrier like a paper towel or dedicated pan protector between each piece. This prevents the seasoning from transferring or sticking and provides an early warning system—if the towel shows rust spots, you know moisture is getting in.
The Dishwasher Question: A Technical Analysis
What Actually Happens Inside
Dishwashers combine four cast iron destroyers: prolonged water exposure (30+ minutes), harsh alkaline detergents (pH 10-12), high heat drying cycles, and abrasive water jets. This perfect storm strips seasoning, promotes flash rusting, and can leave your pan worse than when it went in. The aggressive environment is designed for glass and ceramic, not polymerized oil on iron.
Emergency Dishwasher Protocol (If You Must)
If someone runs your cast iron through the dishwasher, don’t panic. Remove it immediately, scrub off any orange rust that appeared, dry it thoroughly, and apply 2-3 micro-layers of seasoning in the oven. The pan isn’t ruined—seasoning can be rebuilt. But treat this as a learning opportunity, not a new cleaning method.
Long-Term Care Scheduling
Daily and Weekly Routines
Daily: Clean after use, dry on stovetop, micro-season. Weekly: Inspect for stickiness or patchiness, deep-clean if needed, ensure storage area is dry. This consistent attention prevents 90% of cast iron problems. Think of it like dental care—two minutes daily prevents painful interventions later.
Monthly and Quarterly Deep Care
Monthly: Apply a full stovetop seasoning (heat pan, apply thin oil, smoke until dry). Quarterly: Check for buildup on the exterior, scrub with soap if needed, and consider a full oven re-seasoning cycle if cooking performance has declined. This schedule maintains peak performance without becoming obsessive.
Troubleshooting Common Issues
Sticky, Gummy Surface Buildup
This happens from too much oil during seasoning or cleaning. Fix it by scrubbing with hot water and chain mail to remove the gummy layer, then dry and apply a proper micro-thin oil coat. If severe, bake the pan upside-down at 450°F for an hour to fully polymerize the excess oil.
Flaking and Peeling Seasoning
Flaking means seasoning built up too thickly in layers without proper polymerization. Scrub off loose flakes with a brush, smooth the edges with chain mail, then apply thin new layers. Don’t strip the whole pan—just repair the damaged areas. Flaking is cosmetic and doesn’t affect cooking performance if addressed.
Metallic Taste Issues
A metallic taste indicates either bare iron spots where seasoning has worn thin, or acidic food reacting with iron. The solution isn’t less cleaning—it’s better seasoning. Apply 2-3 oven seasoning layers to create a more complete barrier. Meanwhile, avoid long-simmered acidic dishes until the seasoning rebuilds.
Smart Environmental and Health Practices
Eco-Friendly Cleaning Approaches
Cast iron care is inherently green. You’re not using disposable scrub pads or chemical-laden cleaners. Maximize this by using biodegradable soaps when needed, saving your dirty cast iron water for plants (let it cool first), and choosing organic flaxseed or grapeseed oils for seasoning. The longevity of cast iron means less waste than replacing non-stick pans every few years.
Food Safety Considerations
A well-maintained cast iron pan is perfectly food-safe. The high heat used in cooking sterilizes the surface, and proper cleaning removes food particles. Concerns about iron leaching are overblown—most people can benefit from the small amount of dietary iron. If you have hemochromatosis, simply maintain a robust seasoning layer to minimize iron transfer.
Frequently Asked Questions
1. Can I use soap on my cast iron every time I wash it?
You can, but you don’t need to. Modern mild dish soap won’t strip seasoning, but using it daily is unnecessary and may slowly degrade the seasoning over months. Reserve soap for greasy, smelly, or sanitization-required situations. Hot water and a brush handle 90% of cleaning needs while preserving your seasoning investment.
2. How do I know if I’ve ruined my seasoning?
True seasoning failure is rare. If you see bare, shiny metal (not black), experience severe sticking, or notice widespread rust, you’ve got problems. Patchiness, minor stickiness, or discoloration just means your seasoning needs maintenance, not replacement. A few targeted seasoning sessions usually restore performance.
3. What’s the fastest way to dry cast iron without causing rust?
The stovetop method: towel dry immediately, then heat on medium for 3-5 minutes until you see no steam. This is faster and more effective than air drying, which can take hours and leaves your pan vulnerable in humid environments. For maximum safety, follow with a micro-thin oil wipe while warm.
4. Is it normal for my pan to look splotchy after cleaning?
Yes, especially with newer seasoning. Splotchiness usually indicates uneven oil application during the last seasoning or different rates of polymerization. Cook with it a few times and apply thin oil layers after cleaning—it will even out. Avoid the temptation to strip and start over; time and use cure most cosmetic issues.
5. Can I clean cast iron with vinegar?
Only for rust removal, and never for more than 30 minutes. Vinegar is acidic and will etch the iron surface if left too long, creating a rough texture that’s hard to season. For cleaning, stick to hot water. For rust, use a 50/50 vinegar-water soak briefly, then scrub, rinse, and season immediately.
6. Why does my pan feel sticky after I oil it?
You used too much oil. The “sticky” is partially polymerized oil that hasn’t fully carbonized. Wipe it down with a clean, dry cloth, then heat the pan to smoking to finish the polymerization. Next time, apply oil, then wipe it off as if you’re trying to remove every trace. The invisible remaining layer is all you need.
7. How often should I do a full oven re-seasoning?
Most pans never need a full re-seasoning if you practice micro-seasoning after each use. Consider a full oven cycle only if you’ve stripped the pan for restoration, if cooking performance has seriously degraded, or after removing rust. For maintenance pans, once every 1-2 years is plenty.
8. Can I cook acidic foods like tomatoes in cast iron?
Yes, once your seasoning is well-established (after 2-3 months of regular use). A robust seasoning layer protects the iron from acid. Limit cooking time to under 30 minutes for very acidic dishes, and avoid storing food in the pan. If the seasoning is new or weak, acidic foods will strip it and cause metallic flavors.
9. What’s the best oil for maintaining seasoning after cleaning?
Use oils with high smoke points: grapeseed, refined avocado, or canola. Avoid flaxseed oil for daily maintenance—while it creates a hard initial seasoning, it can become brittle and flake. Save olive oil and butter for cooking, not seasoning maintenance, as their lower smoke points create sticky, incomplete polymer layers.
10. My cast iron smokes when I heat it after oiling. Is that normal?
Yes, and it’s desirable. The smoke indicates the oil is reaching its smoke point and polymerizing into seasoning. If you see heavy smoke, you applied slightly too much oil—open a window and let it smoke for 2-3 minutes, then wipe again. Light smoking is the sound of your seasoning repairing and strengthening itself.